
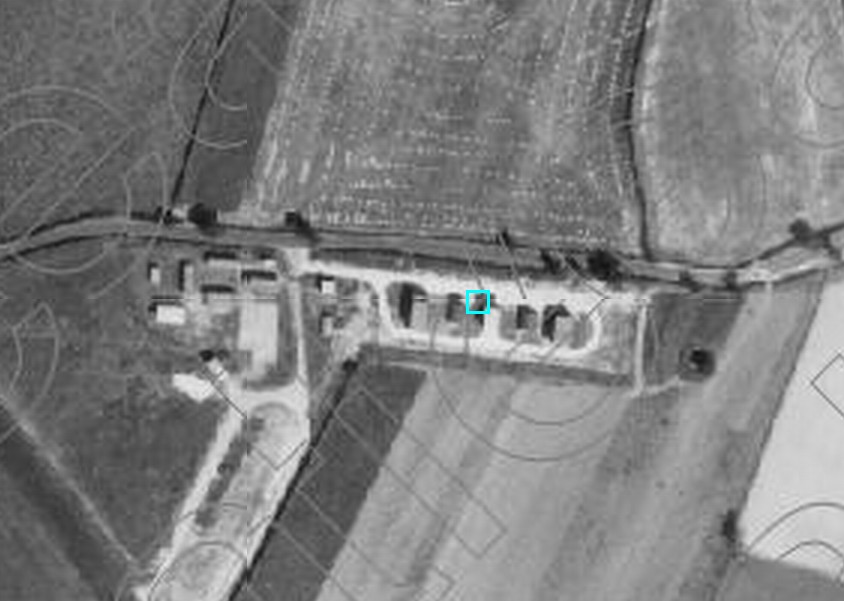
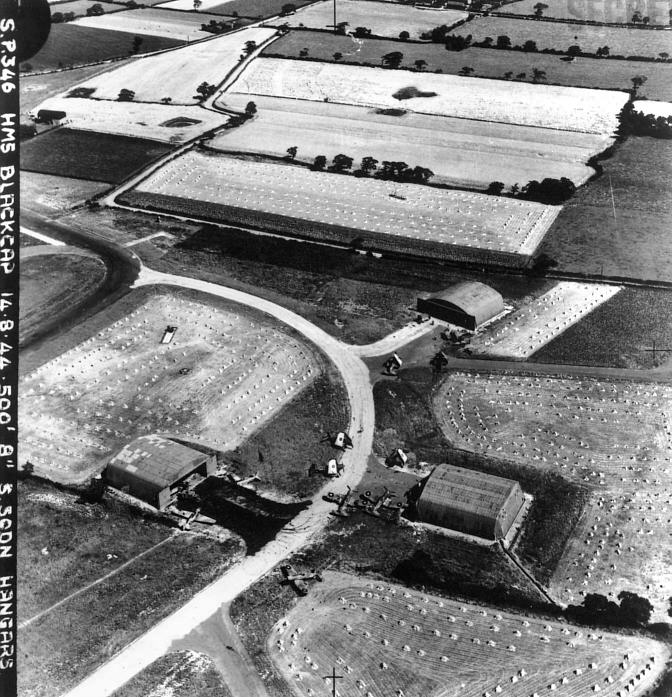
(Image Courtesy of Royal Navy Research Archive)
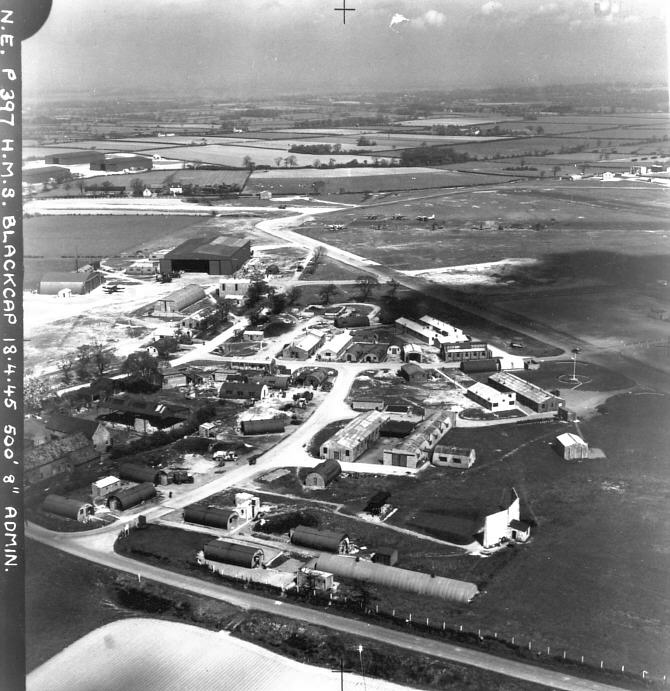
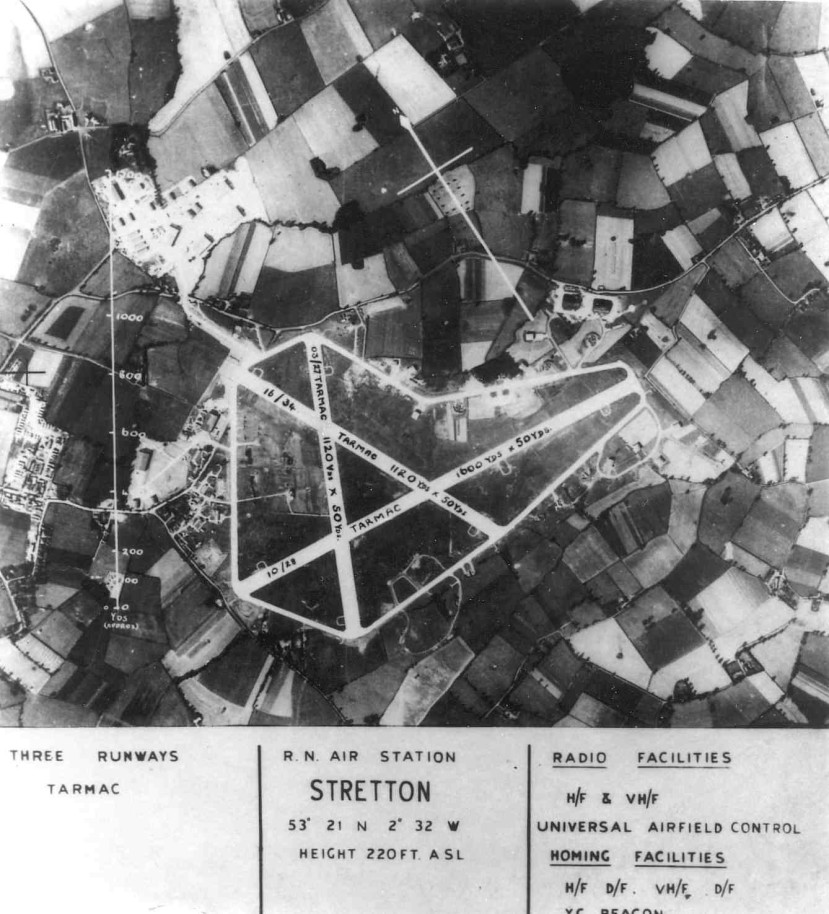
3 Miles SE of Warrington OS/Ref SJ652825 Height ASL 220 ft Opened 1st of June 1942 Closed 4th of November 1958 Planned as an RAF airfield but later transferred to the Admiralty on completion. 2 Control towers were constructed. The first control tower watch office for fighter satellite stations 3156/41 The second control tower type was watch office for all commands drawing number 12779/41
The airfield had the 3 RAF runway ‘A’ layout rather than it having the standard RNAS 4 runways.
16/34 1,120 yds long 03/27 1,120 yds long Main runway 10/28 1,600 yds long All 3 runways were 50 yds wide and constructed of concrete & surfaced with tarmac. Runway 28 was later extended & the North East & South taxi tracks extended to suit the new threshold of runway 28. The main runway was fitted out with a dummy deck landing area painted on it the same size as the carriers of the time to train pilots and landing signal officers (LSO).
4 squadron 60 x 70 x 20ft 4 squadron 60 x 70 x 17ft 1 Blister 1 ARS 185 x 105ft on North Side of airfield at repair yard
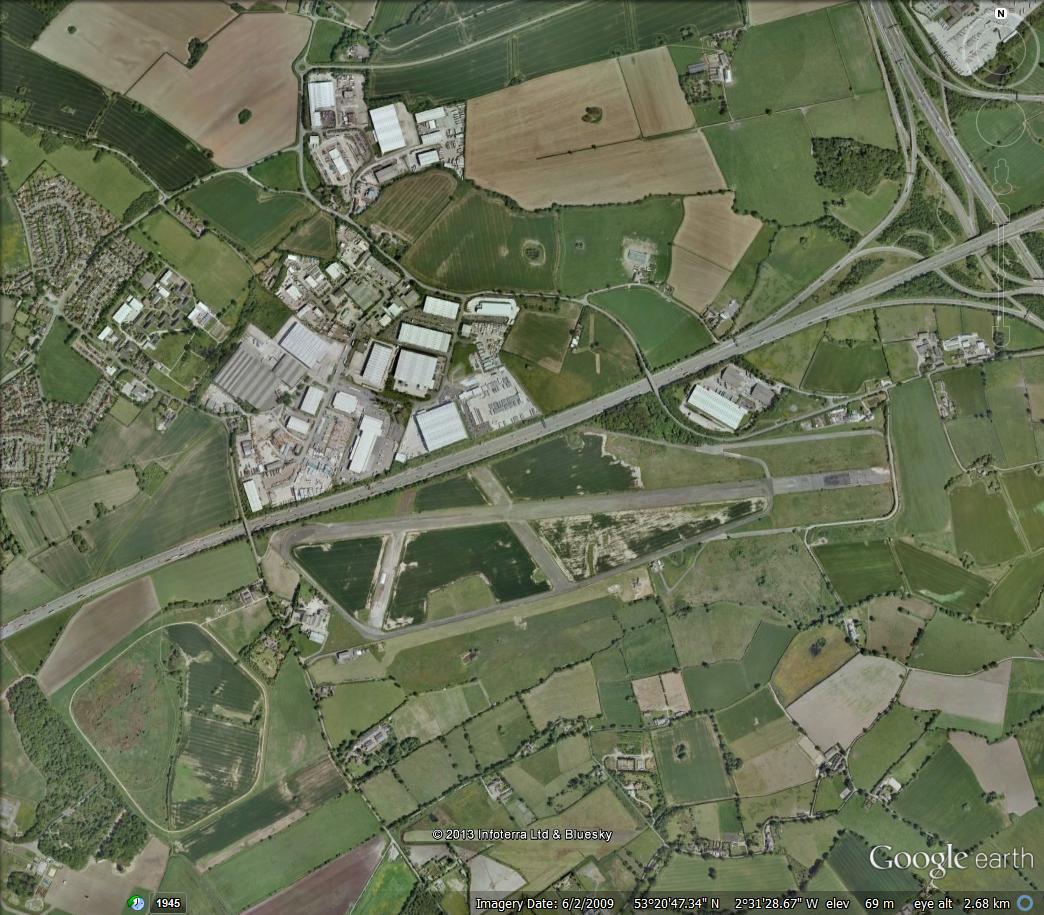
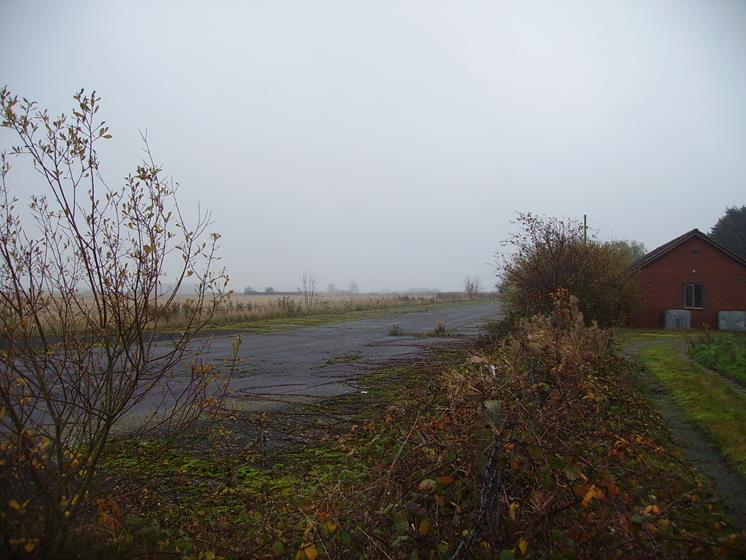
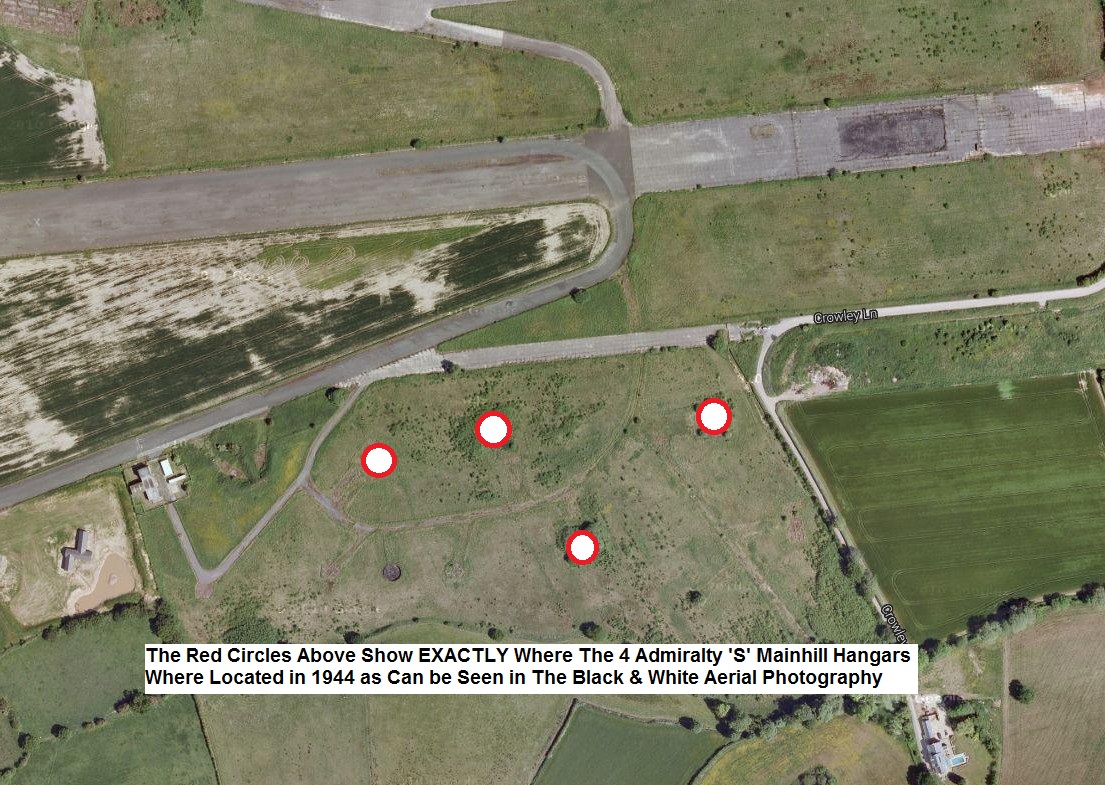
4 Teeside ‘S’ 60 x 70 x 20ft 6 Mains 60 x 70 x 17ft 1 Blister for ATC gliders Workshops at repair yard (Storage planned for 300 aircraft) 2 large A1 (Aircraft Production) Hangars – Drawing number 454/43 were built on the North East edge of the airfield for Fairey Aviation for the repair & modification and flight testing of Barracudas fire flies & fulmars. In 1944 an aircraft maintenance yard was built on the side of Barley Castle Lane access from the airfield to the maintenance yard was via a taxiway crossing Barlay Castle Lane. A police post was built and manned by Royal Navy Police to allow movement across the road. HMS Blackcap was the home to 41 Naval Air Squadrons including the home station of 1831 and 1842 squadrons RNVR. Post war the airfield was used by RNVR Squadrons and by the Naval Airyard. Today the M56 cuts across the airfield from East To West and the runways & taxi tracks remain on the South side of the M56 motorway & 2 type ‘B’ dispersal pens are still present. Other buildings on the South & North side of the motorway can still be seen also. Shell research ltd used the airfield as a test rack but are no longer using the site. Micro light flying uses part of the North East taxi way as of 2013. Airfield facilities consisted of Control tower inside the perimeter track on the west side of the landing area. and meteorological office in the control tower limited service by RN personnel.
16/34 1,120 yds long x 50 yds wide 03/27 1,120 yds long x 50 yds wide 10/28 1,600 yds long x 50 yds wide
45 feet wide perimeter track 40 feet wide track connects the north perimeter with the R.N. yard. two 20 feet wide tracks lead to the fairey aviation hangars on the N/E side of the airfield. Approach Recommended sector, mean QDM. 3050. Wind indicators windsocks inside the perimeter track on the north-west side of the landing area. and outside the perimeter track on the south-east side
D/F H/F and VH/F beacons YG. and 251 MS.
M/F and H/F 3 transmitters, and 4 receivers. VH/F 4 transmitters and 4 receivers.
R/T Stretton W/T mge identity letters -JA -ST from 1955.
six pens and nine A/C standings dispersed around the perimeter track. in addition to two aprons. dispersals for 200 A/C on hardstandings and Sommerfield tracking outside and inside of the perimeter.
Aviation-24,000 gallons in two tanks of 12,000 gallons each 100 octane 12,000 gallons of 87 octane in one tank. 12000 gallons of 73 octane in one tank mechanical transport 3,000 gallons in one tank of 1,030 gallons and one tank of 2,000 gallons and an additional 40-gallon drums as requires
D.E.R.N. - 650 gallons M.V.O. - 650 gallons
machine gun and cannon A/C test butt. 25 yards outdoors .303 weapons range. . 22 indoor range.
crash room and sickbay 500 yds north-west, sick quarters at grappenhall ,two half miles R.N.
officers and ratings living quarters in dispersed sites about 600 yds north-west of the airfield. W.R.N.S. quarters in dispersed sites 3 miles R.N. and in station
officers- 106 chief petty officers and ratings- 1,162 W.R.N.S.officers - 11 W.R.N.S. chief petty officers and ratings,-136
Stretton had five different male Accommodation sites. Each of the five sites had the names of aircraft carriers that had been lost on active service in the early days of world war II Each of the five accommodation sites is called:
HMS Courageous HMS Eagle HMS Hermes HMS Glorious
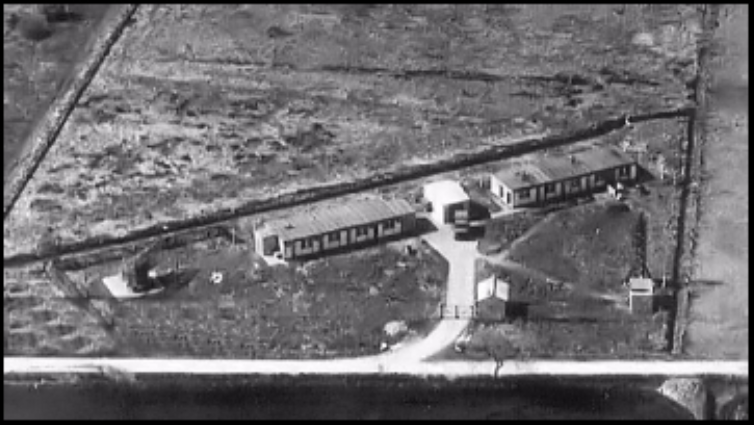
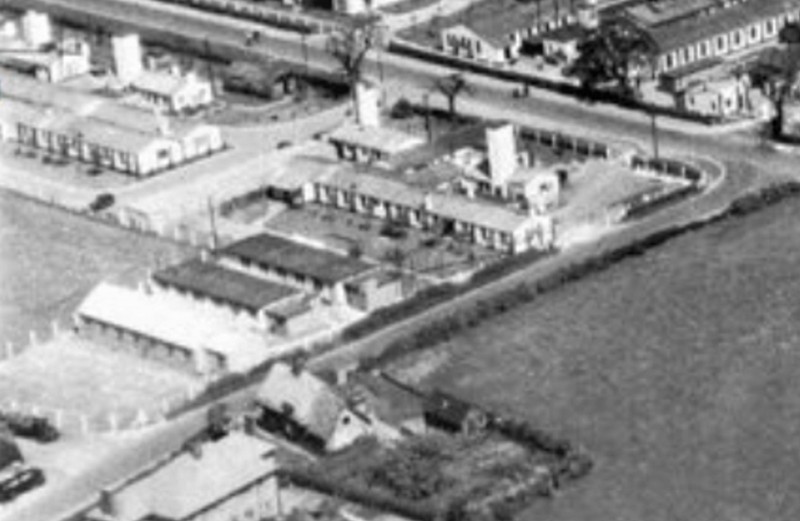
HMS Ark Royle site was located on the East side of Arley Road and was the largest of all the Accommodation sites and contained the main welfare services. Approximately 100 petty officers had their living quarters mess and ablutions blocks on this site. The site also housed a Petty officer's mess that contained a bar, snooker tables, a library, and a piano. On the bottom left of The photo across Arley road, the HMS Hermes Accommodation site can be seen.
today HMP Thorn Prison.
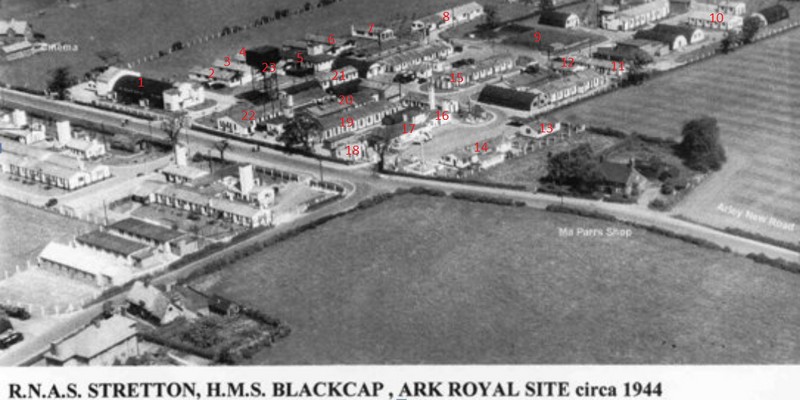
2, 3, 4, 5, 6, Five huts Were used as Petty Officers living quarters, the ablutions had showers, toilets, and washbasins and were linked by a corridor to the living quarters.
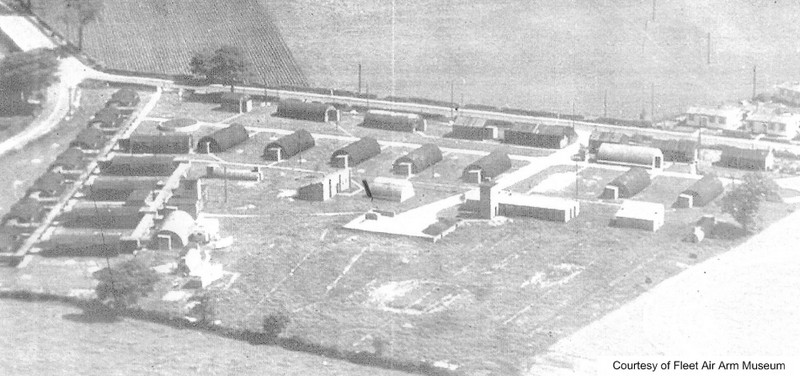
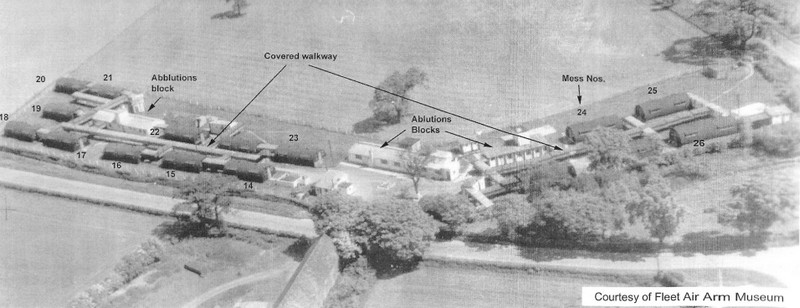
The accommodation was provided for 300 personnel in Nissen huts the site also housed the station football and hockey teams. The recreation pitches can be seen on the bottom right of the photo also the buildings on the top left are for the civilian workers HMS EAGLE SITE- (Credit to the fleet air arm museum)
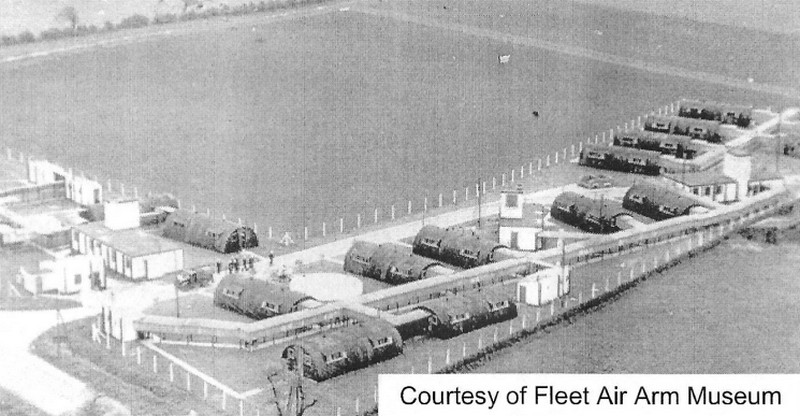
There was also an entrance to it from Grappenhall Lane. The accommodation was provided for 250 personnel in Nissen huts, and also a covered walkway connected the ablutions with the Nissan huts. HMS HERMES SITE- (Credit to the fleet air arm museum)
The site had accommodation for 100 officers, the chief petty officers' mess and quarters wardroom, ablutions, and separate dining rooms for the NCOs and the officers from the other ranks. HMS GLORIOUS SITE - (Credit to the fleet air arm museum)
HMS Glorious site was located between Lumb Brook Road and Thorn Tree Green near the Thorn Inn public house. The accommodation was provided for 400 personnel in Nissen huts a covered walkway connected the ablutions with the Nissen huts. Women's Royal Naval Service [WRNS] Accommodation WRNS Accommodation Grappenhall Heyes Hall
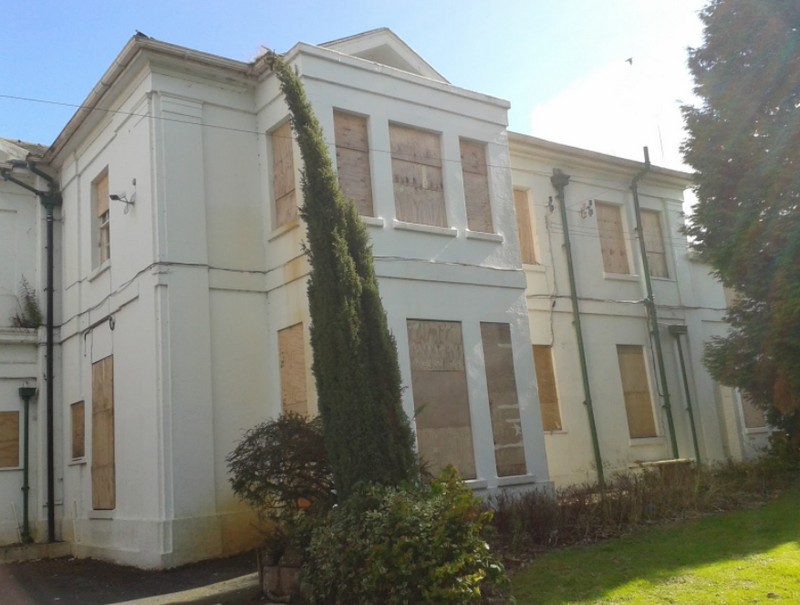
Two country Mansions were Requisitioned for the Women's Royal Naval Service in the Parish of Grappenhall in Warrington about 3 miles away from Stretton. Thefirstcountry Mansion house selected for the Women's Royal Naval Service was at Grappenhall Hall. Grappenhall Hall was located on the South Side of church lane in Grappenhall Village. There was Accommodation there for about 30 WRENS that were transported to Stretton daily. The Mansion house was first owned by the Greenall family in 1876. in 1958 the house became a special school for children financed and run by Warrington Council The school has now moved to a different location in Warrington, and the future of the Mansion house is still ongoing in 2022.

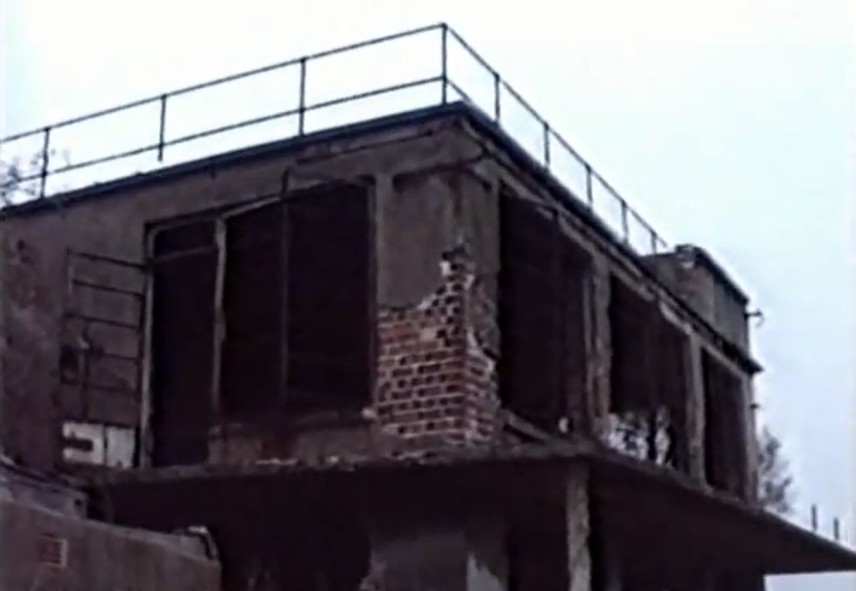
The second country Mansion house selected for the Women's Royal Naval Service was at Grappenhall Heyes located on the East side of Lumbrook Lane Grappenhall. The house could Accommodate about 50 WRENS including some officers, Naval Transport, Buses, and Bicycles were used to travel to Stretton and back. The WRENS Described the Mansion as Magnificent and said that The Mansion was a big place and no one else or family members was living in the house. They also stated that the rooms were large with 8 bunk beds in each room. During the winter it was very cold with no heating or fires, the girls were left to their own devices sometimes they went into Warrington to spend some money. The Mansion was Built-in 1830 by Thomas Parr, later J Charlton Parr inherited the Estate in 1870. The Parr family did not live in the house after 1941 and was vacated by the Navy in 1949. The Parr family sold the estate in 1951 to the road haulage executive, and in 1975 the estate was purchased by Warrington Borough Council. During this period of time, The Mansion house started to get in a bad state of a repair being infested by woodlice, beetles, and mice and in 1975 the Mansion house was demolished.
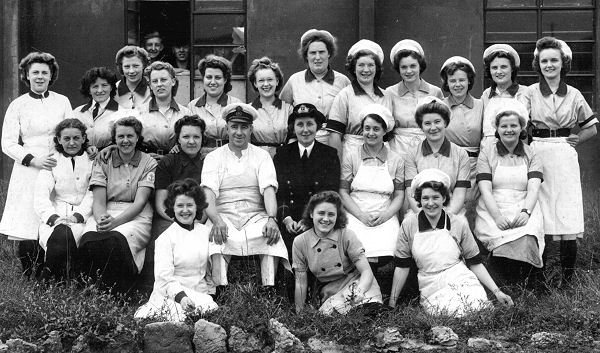
Grappenhall Heyes during world war 2. Doris is in the middle front row kneeling down with her WRNS friends 1944/45.

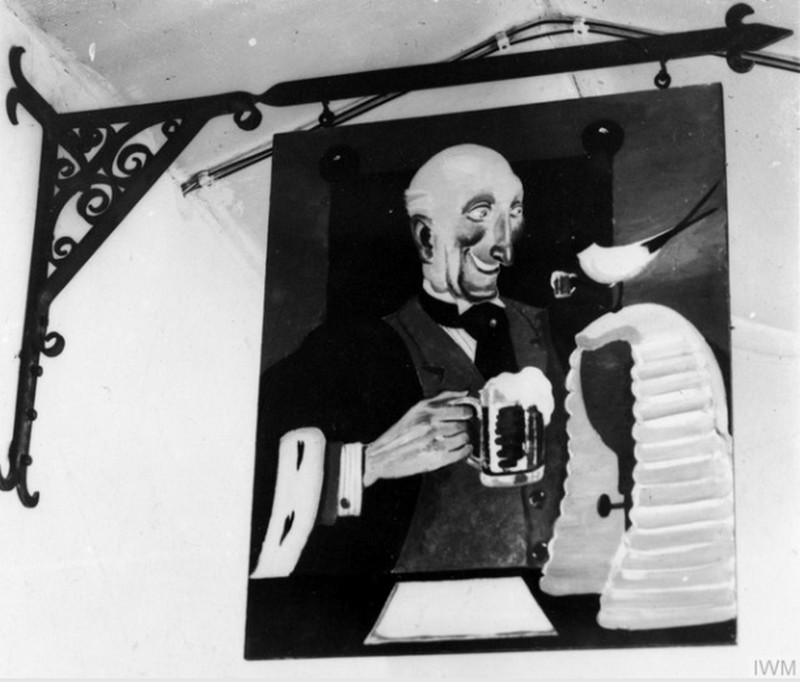
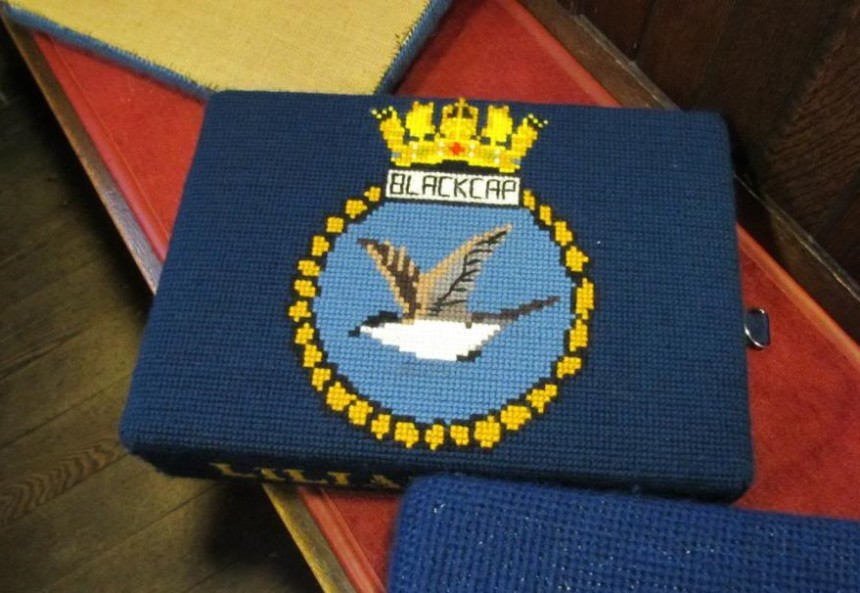
HMS Blackcap Reproductions of Doris Zinkeisen's Old English Style Sign For The Wardroom. Both Photos Below Credit IWM.

During the 1950s the Admiralty decided to build 100 houses that were built at Appleton which was local to RNAS Stretton. Some of these houses were built for the Married Quarters of all Ranks Houses in Dale Lane and Wood Lane were occupied by the Officers, and other ranks lived in houses at Bridge Lane. Most senior officers found private housing accommodation within the surrounding area. Former officer's housing at Dale Lane Appleton.

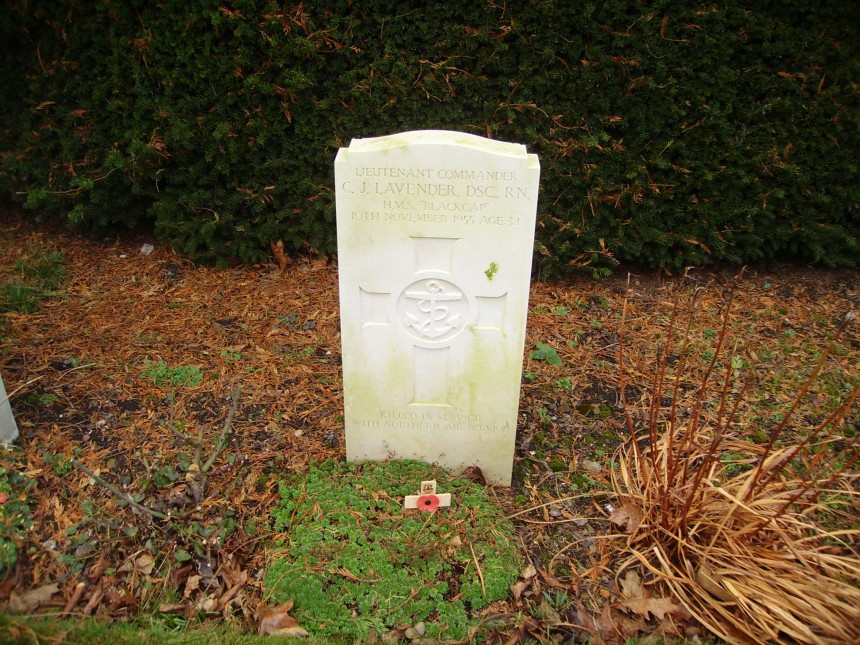
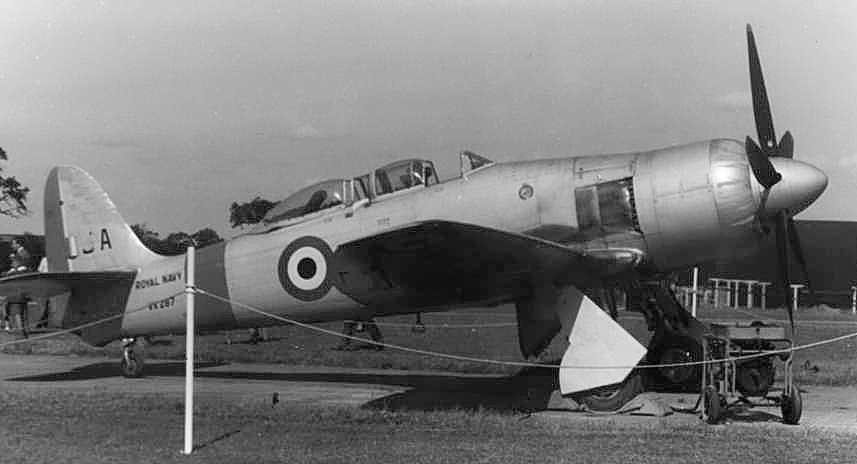
aircraft & Westland Wyvern VZ773 (Photo credit to IWM)

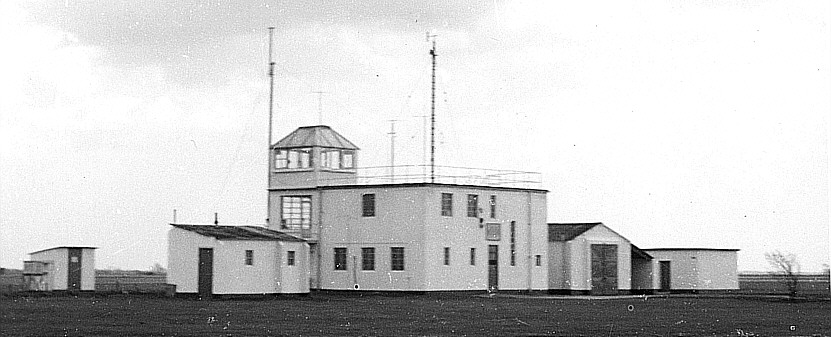
Fairey Swordfish NF389 torpedo aircraft stands parked with Westland Wyvern VZ773 torpedo strike fighter on the apron of Royal Naval Air Station Stretton prior to an airshow. The Wyvern possibly belongs to the 813 Squadron Fleet Air Arm. Control tower photo/ fairy swordfish NF389 overflies the control tower at RNA Stretton prior to the start of an airshow in summer 1953

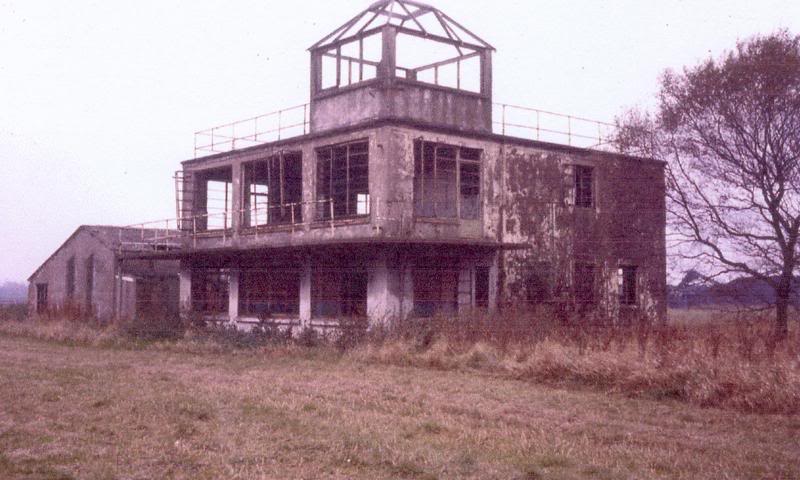
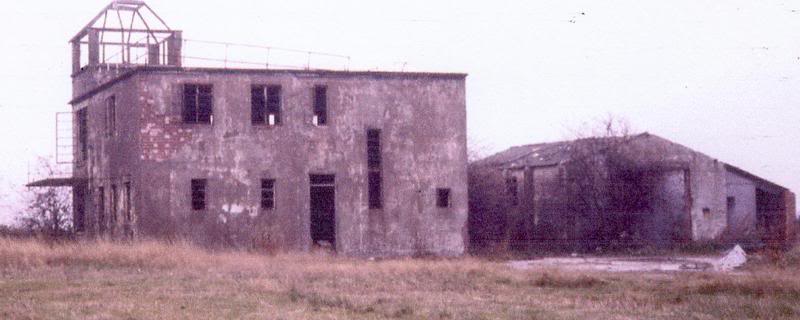
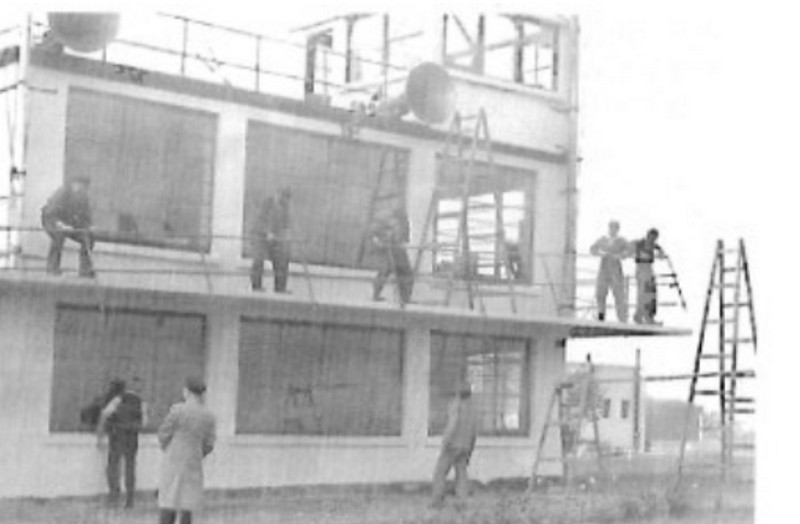
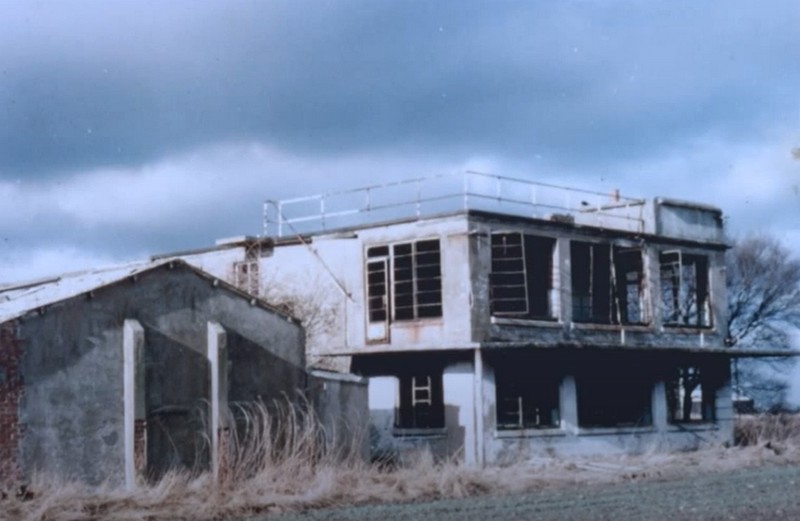
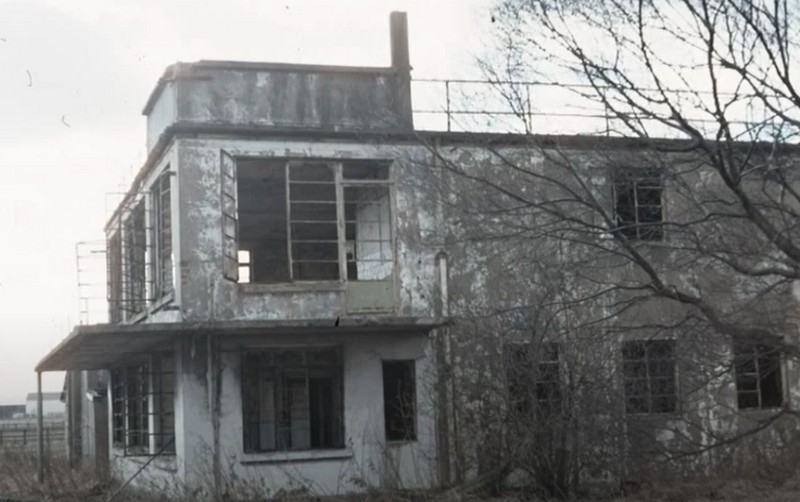
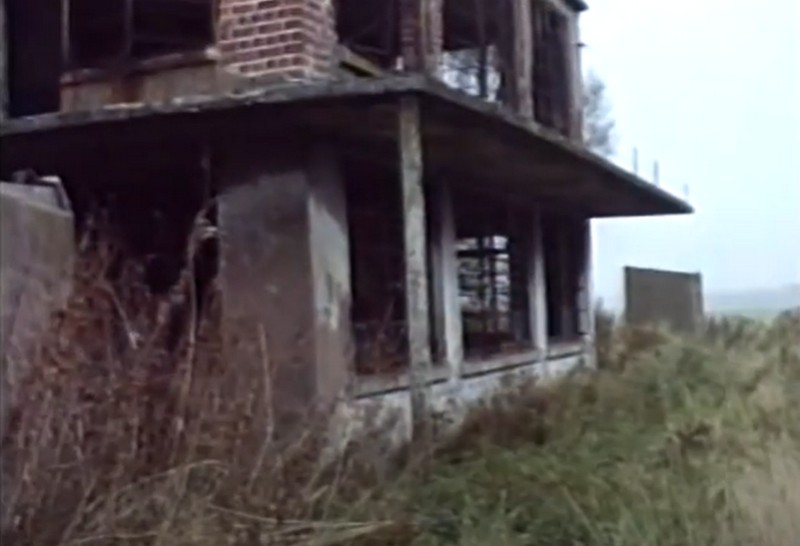
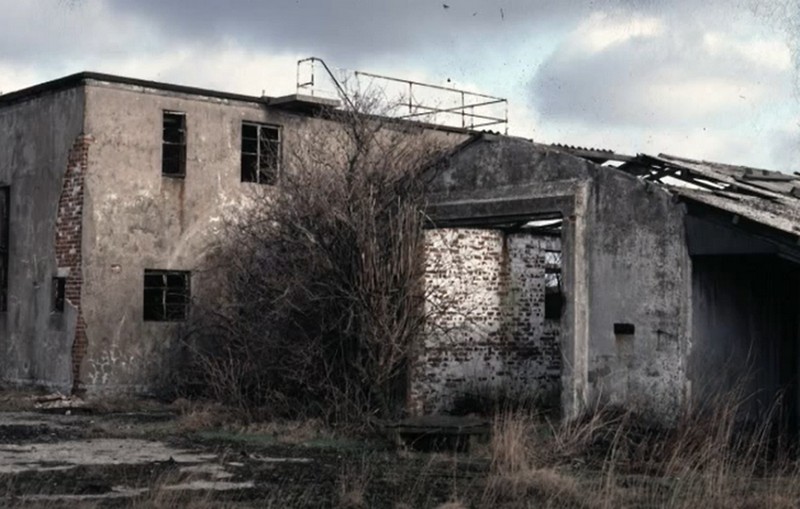
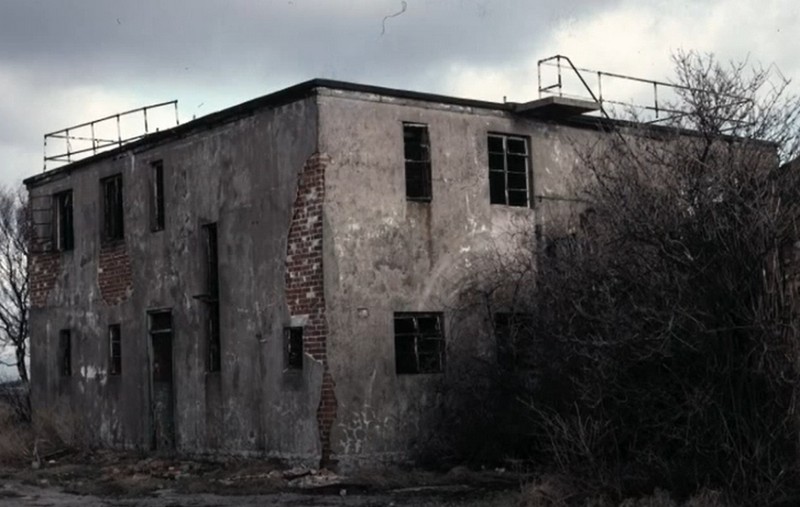
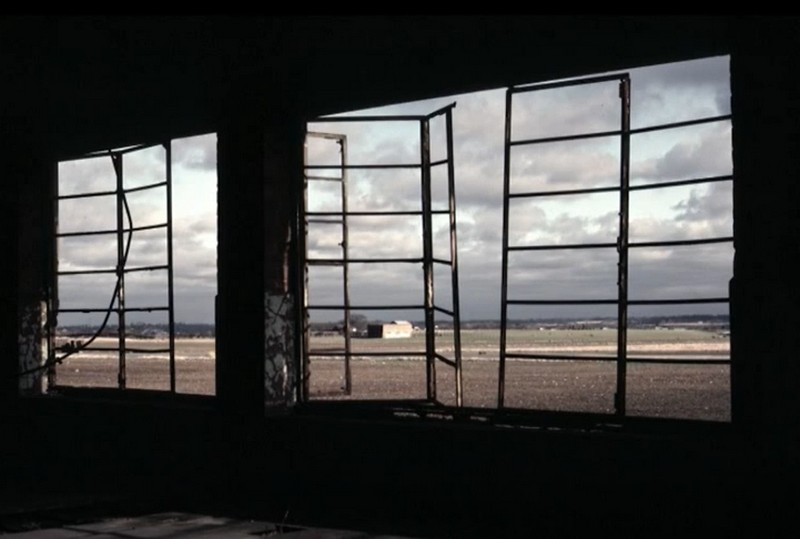
The Control Tower/Watch Office built at Stretton is designed to the air ministry's directorate of works and buildings, as a watch office for all commands designed to air ministry drawing number 12779/41. The two-story building is constructed with temporary brick with a sand and cement rendered finish, and the roof is waterproofed with ash felt. The front elevation of the building is 34ft 6 ins and the side elevations 36 ft 9 ins. Outside viewing is provided by large multi-paned steel casement windows to the front and to flank walls of the control room and watch office. The first-floor exit door leads out to the concrete balcony and onto a steel staircase gaining access to the roof. The balcony and roof are fitted with tubular steel railings supported by iron columns. The ground floor has access to the first floor by an internal flight of concrete stairs. Watch office Ground-floor plan
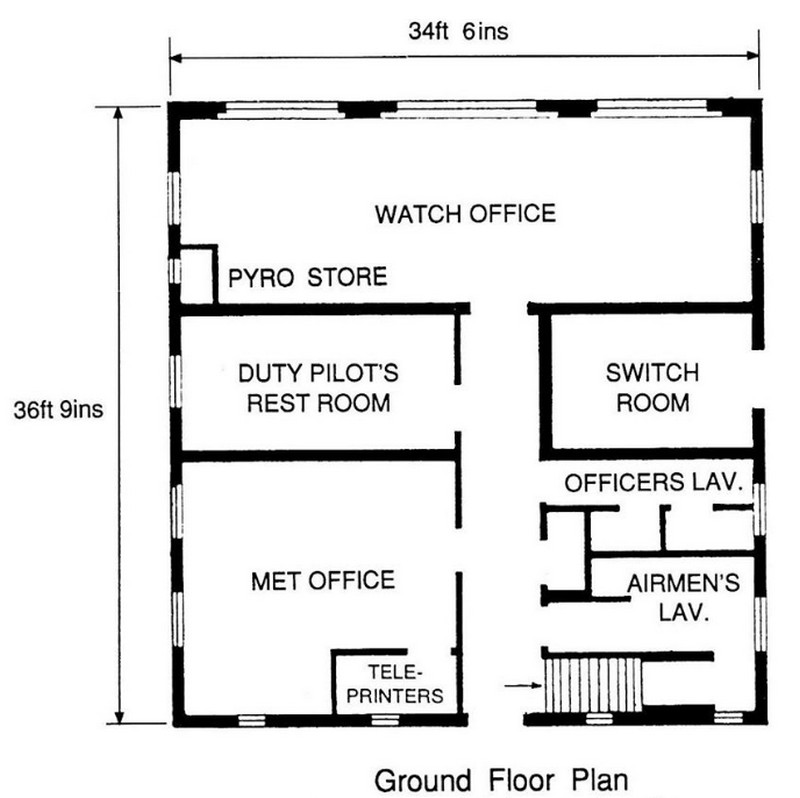

office balcony steel railings.
is the rear of the crash fire tender house, constructed to air ministry drawing number 7829/41
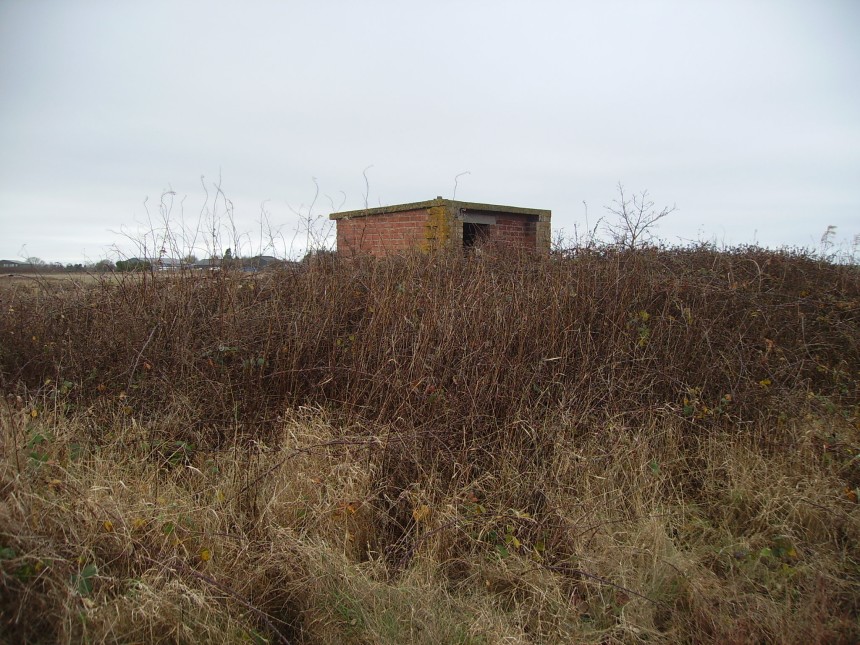
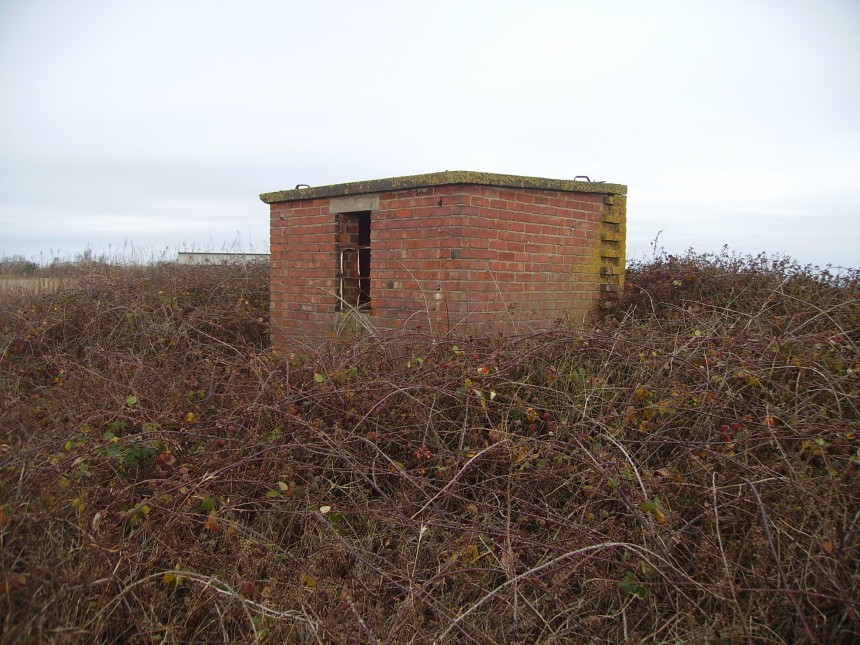
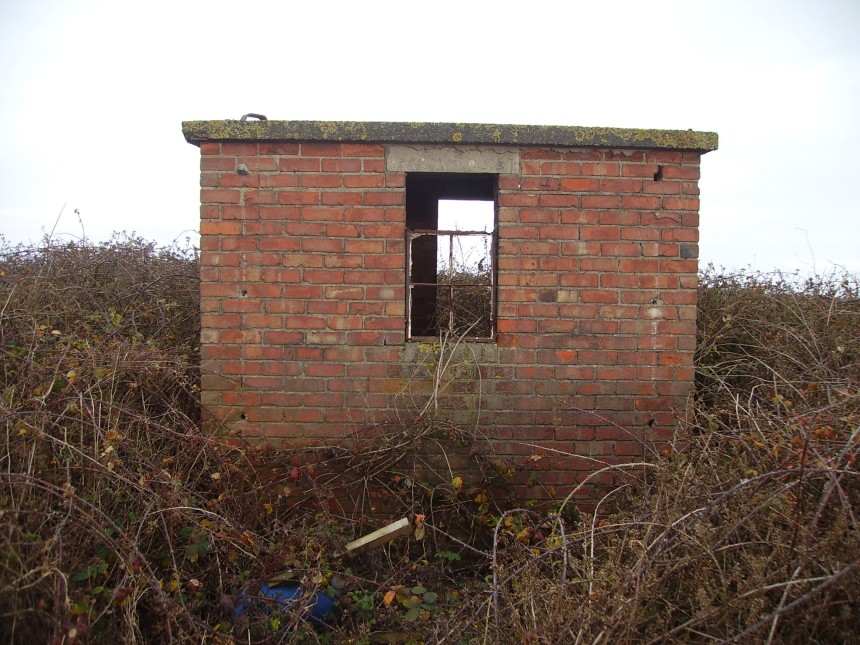
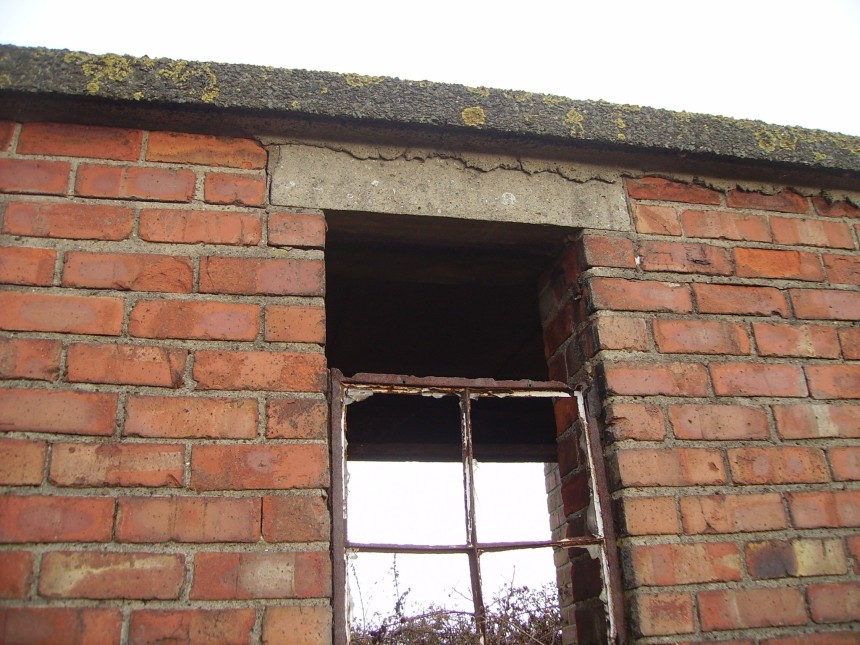
is the Meteorological weather balloon filling hut.
front of the crash fire tender house, constructed to air ministry drawing number 7829/41, it appears to have had an added lean-to at the side built at some period.
the crash fire tender house, constructed to air ministry drawing number 7829/41.
to the tree is the Meteorological weather balloon filling hut.
constructed to air ministry drawing number 9026/41.
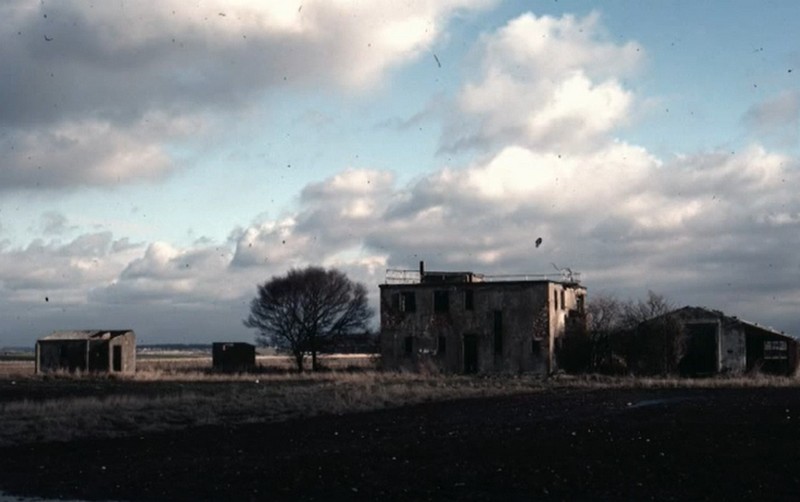
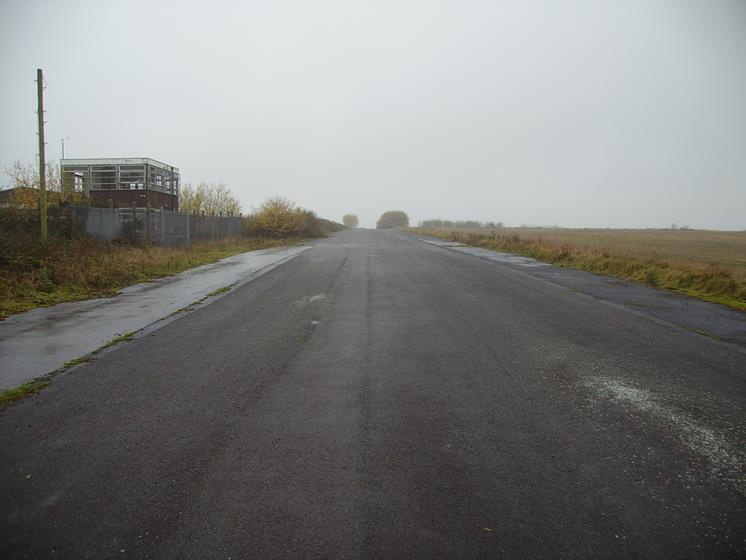
watch office across the airfield.
at the bottom of the internal staircase.
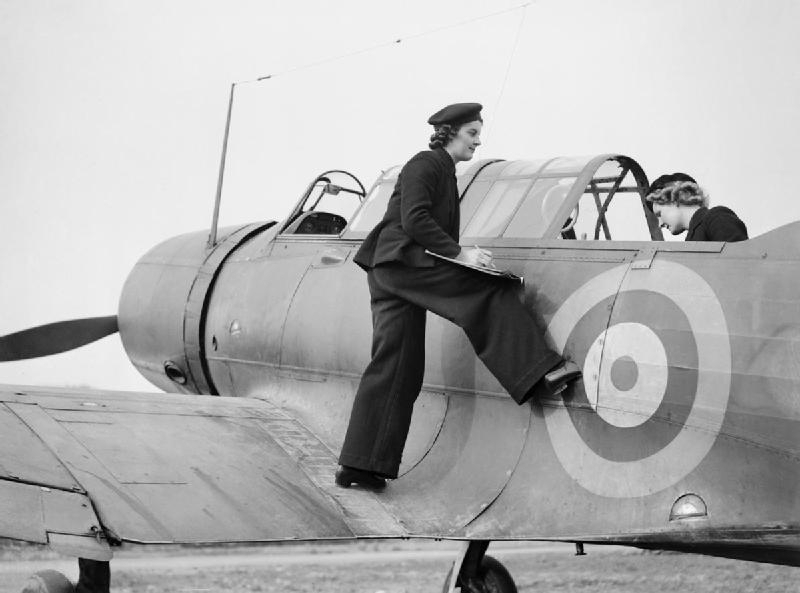
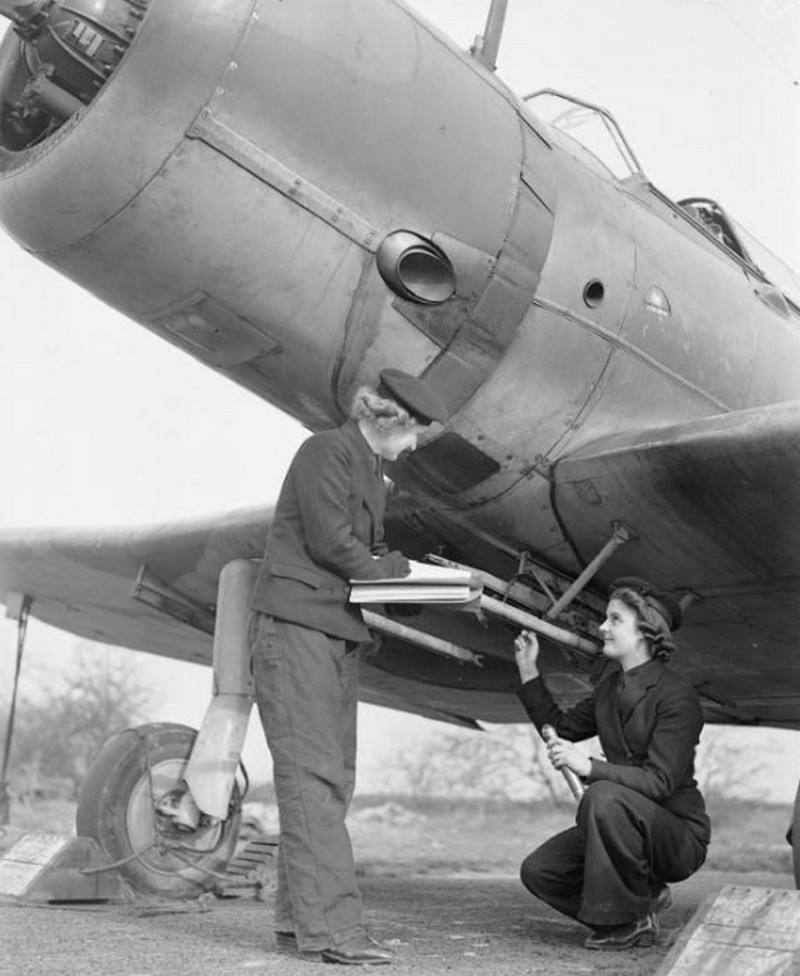
the Runway Control Van February 1944 (credit IWM)
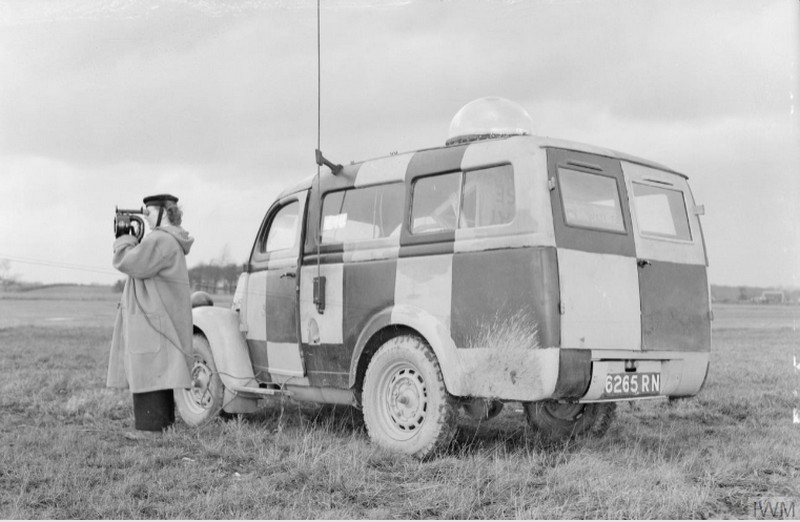
Standing by the Runway Control Van on an isolated part of Stretton Aerodrome, Wren Jean Bull of Glasgow flashes the "Take-off" signal to the pilot of an aircraft. The van which is in radio communication with the main control tower is stationed at the end of the runway in use, and from it, the traffic of aircraft on to and off the runway is directed. Photo Below From 'Geoff' a Fellow WWII Enthusiast
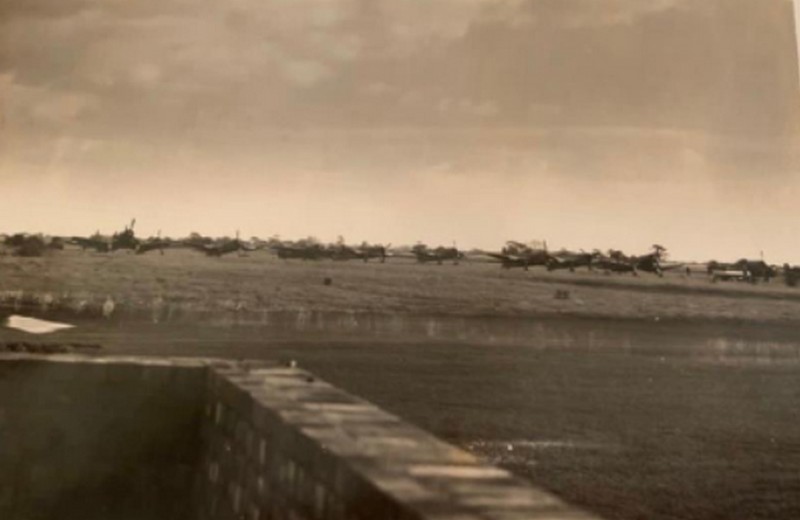
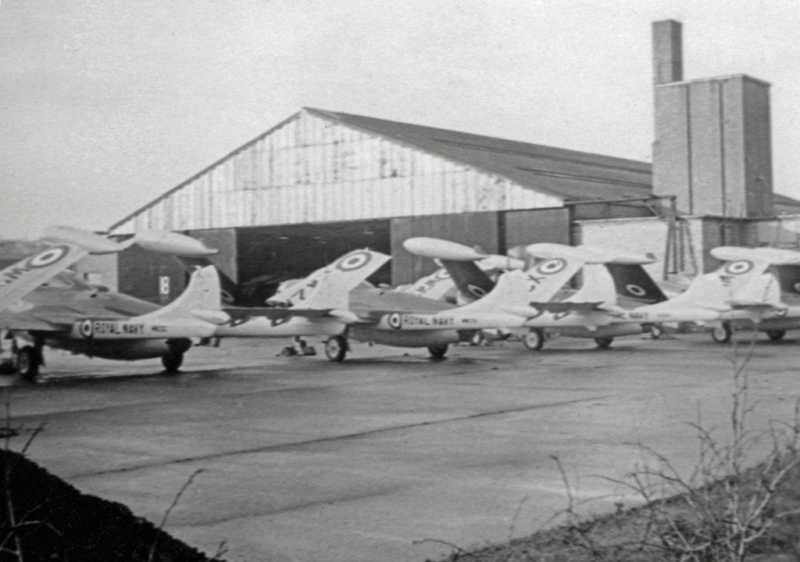
from 'Geoff' regarding his Mum "Hi, I’ve been researching my mother’s life as a Wren. In 1944 she was at HMS Blackcap working in aircraft radios. We have this photo of The aircraft at Stretton. I can’t make out what they are? Thought you might like the photo." 'Geoff'
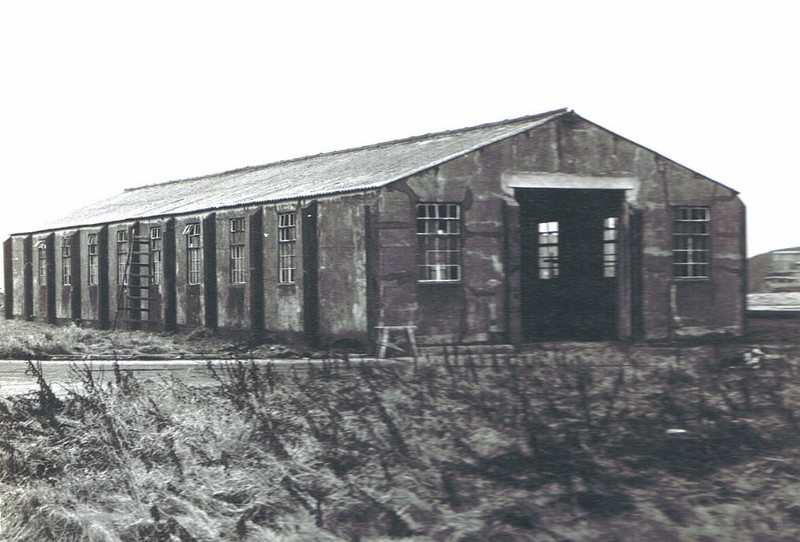
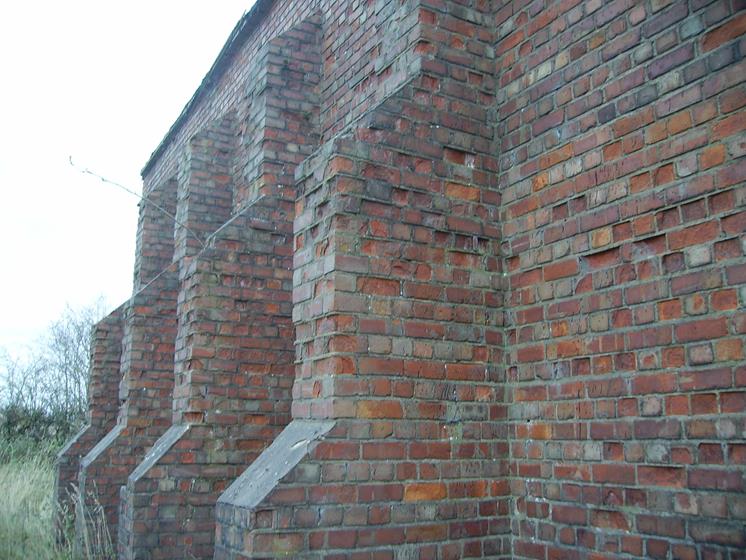
The Station Headquarters at Stretton was Built during WW2 and Constructed to the Temporary Design Type, having a Span of 28 Feet, and 10 Bays Being 100 feet Long. Many Buildings of This type of Temporary Design was constructed in different sizes at Stretton depending on what they were to be used for Windows were generally metal Crittall units which came in many different pane configurations. These buildings were designed to last for the duration of the war and have a life span of 10 years and were built out of single brick walls without a cavity.The walls are supported by brick piers spaced at 10-feet centers. with internal spans of 18 or 28 feet. The walls also supported a light steel frame carrying corrugated asbestos sheeting or board with felt roofing. Outside the brickwork was rendered with cement whilst inside the walls were painted a variety of colors. The buildings had concrete floors.
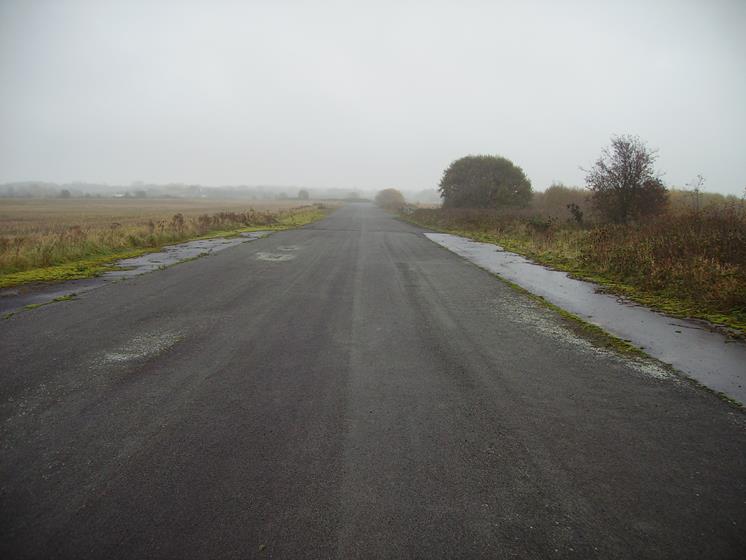
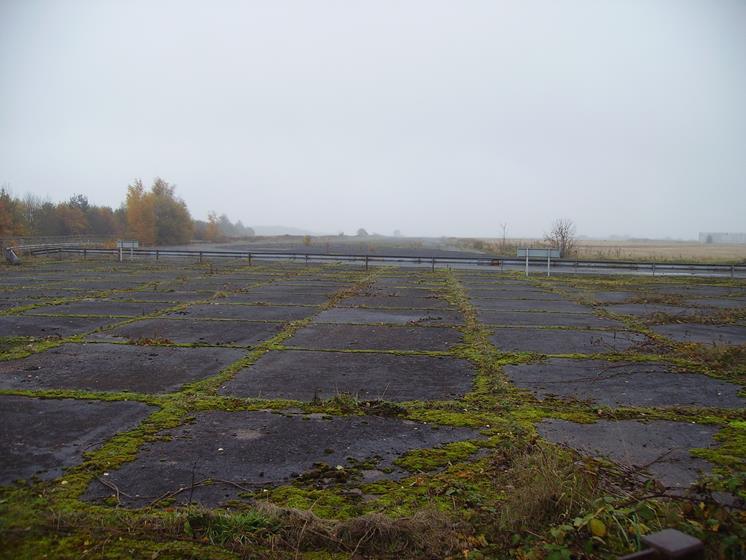
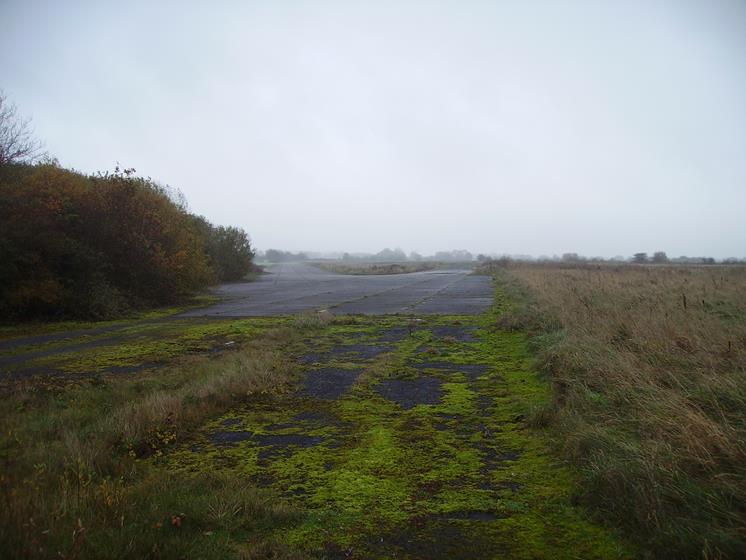
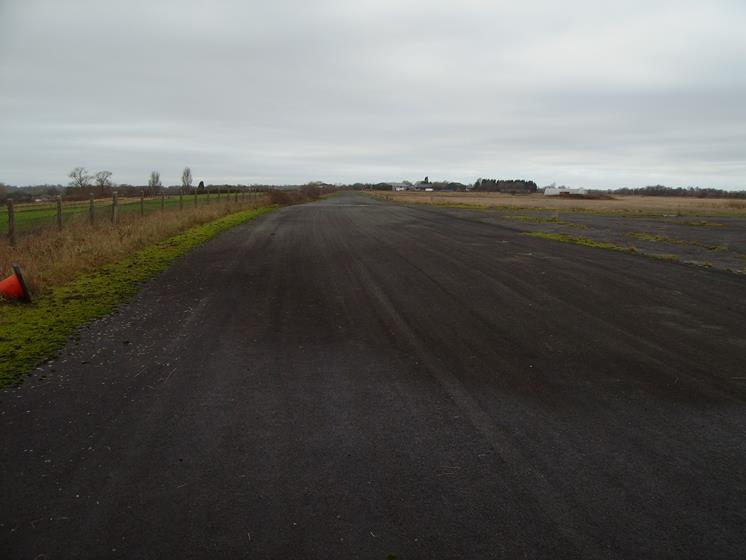
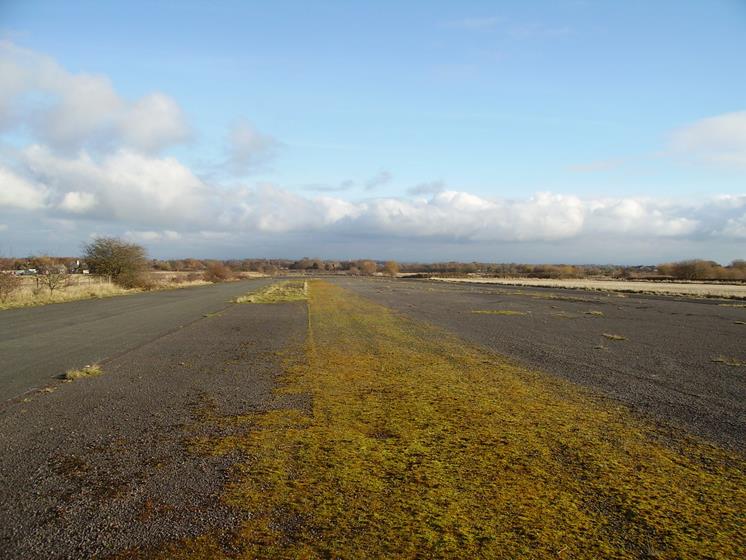
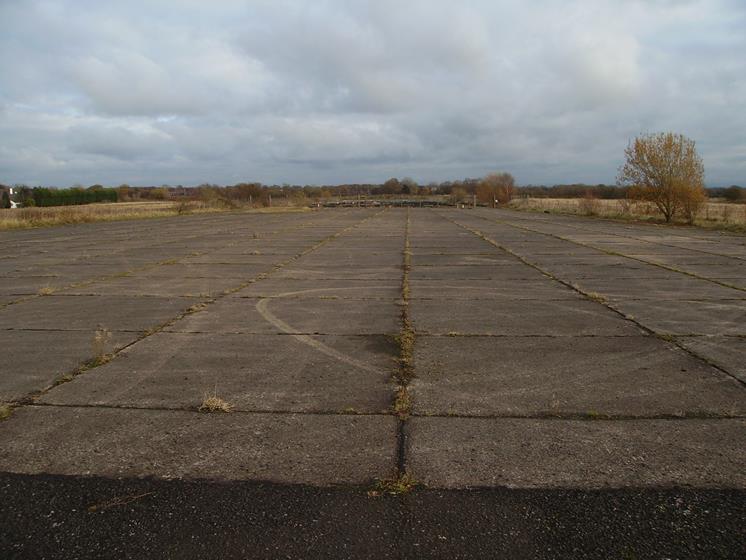
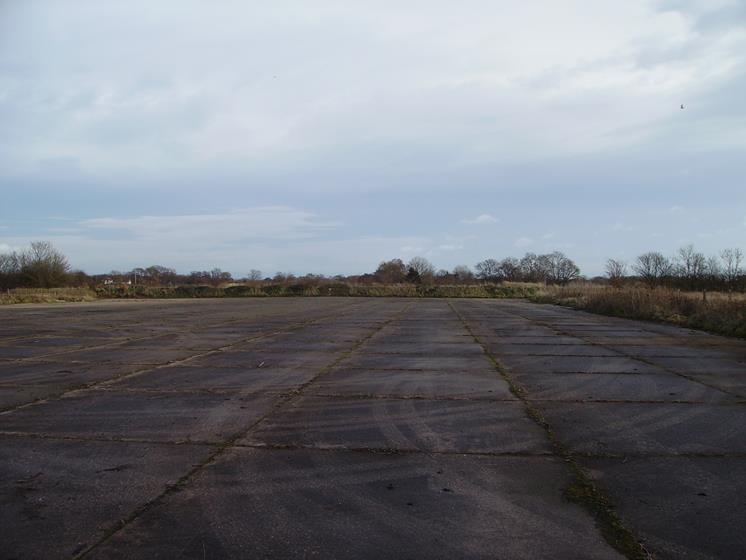
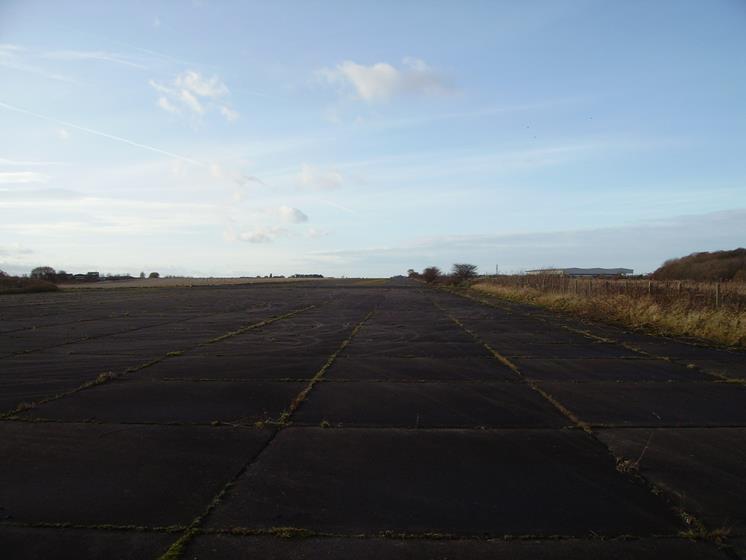
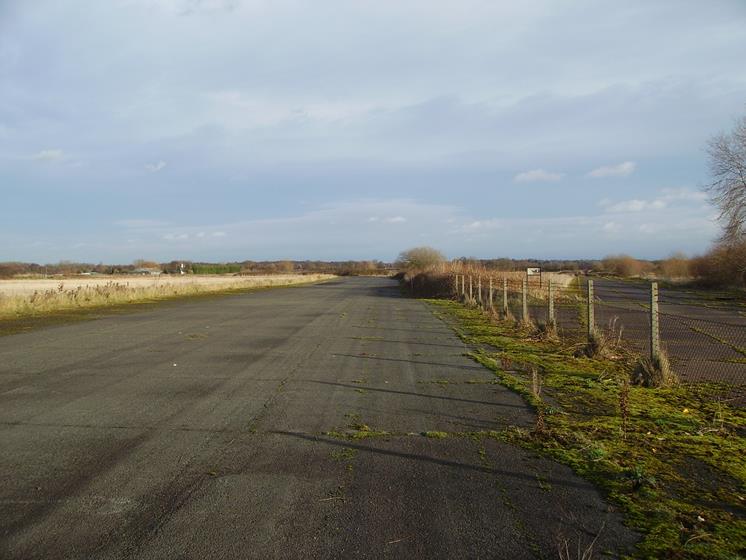
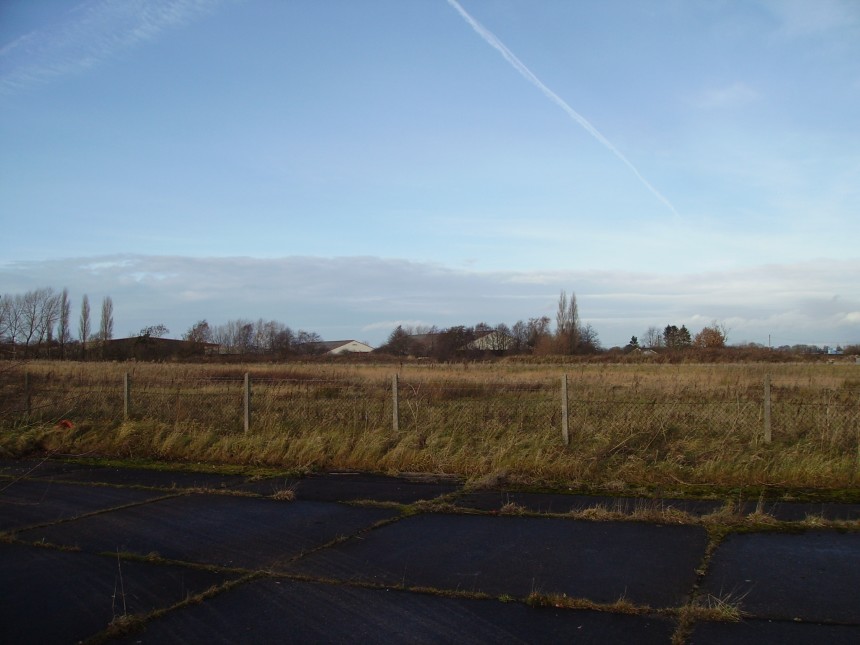
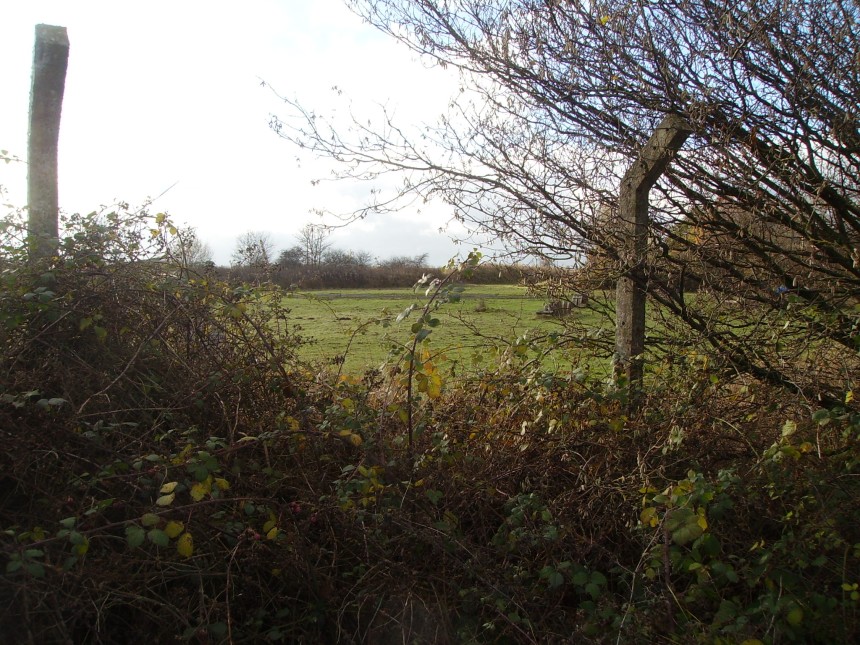
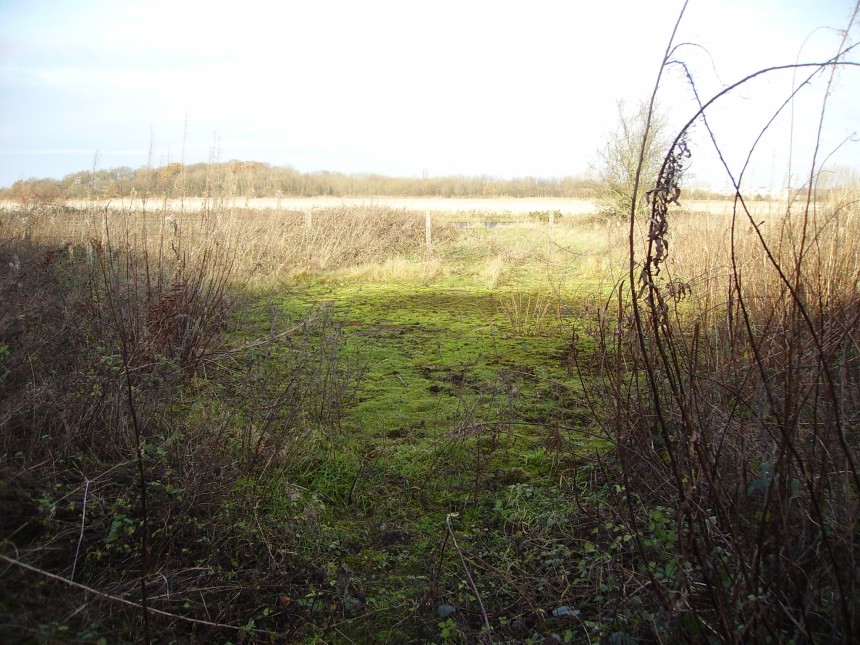
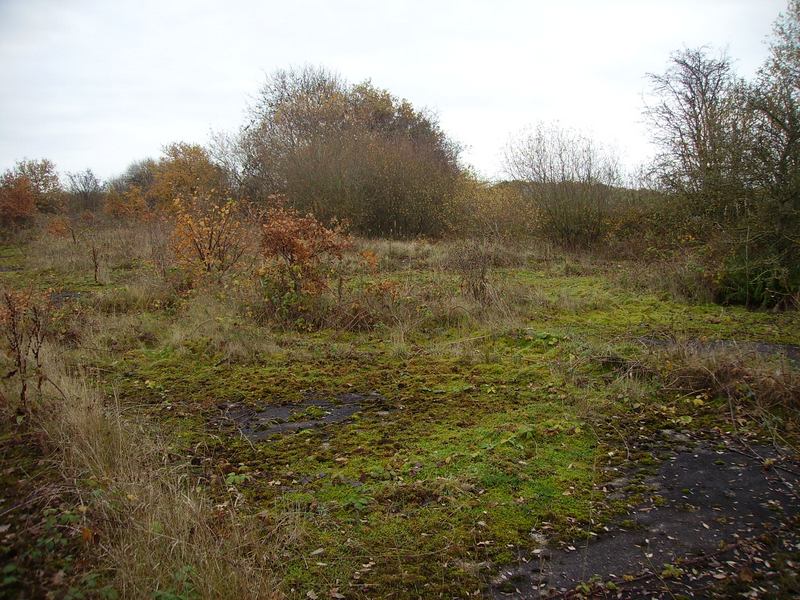
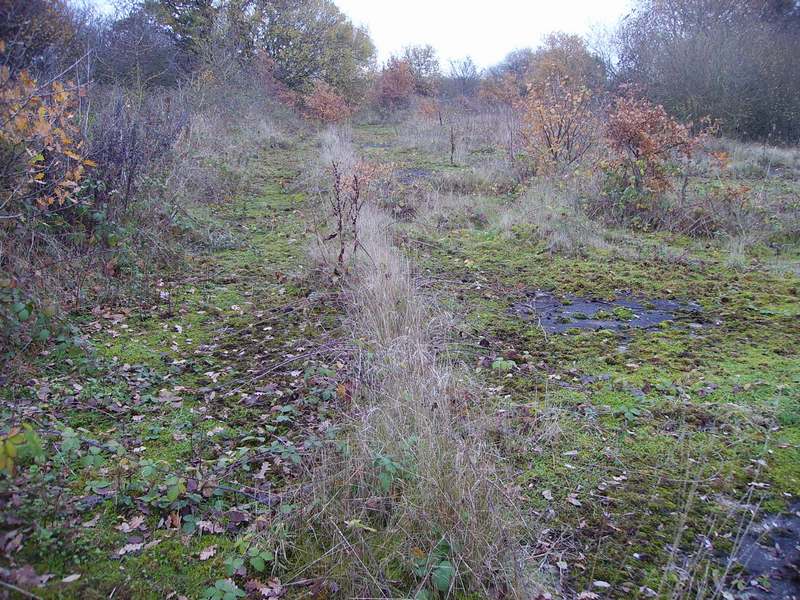
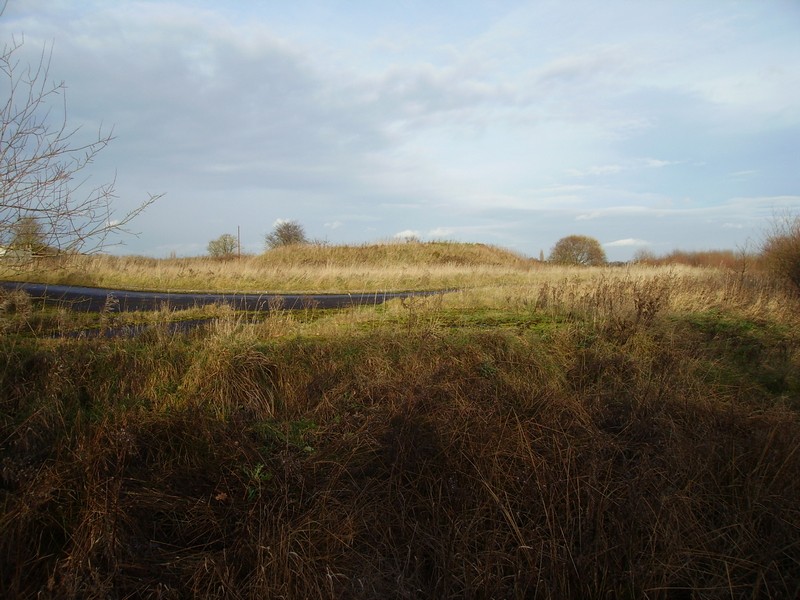
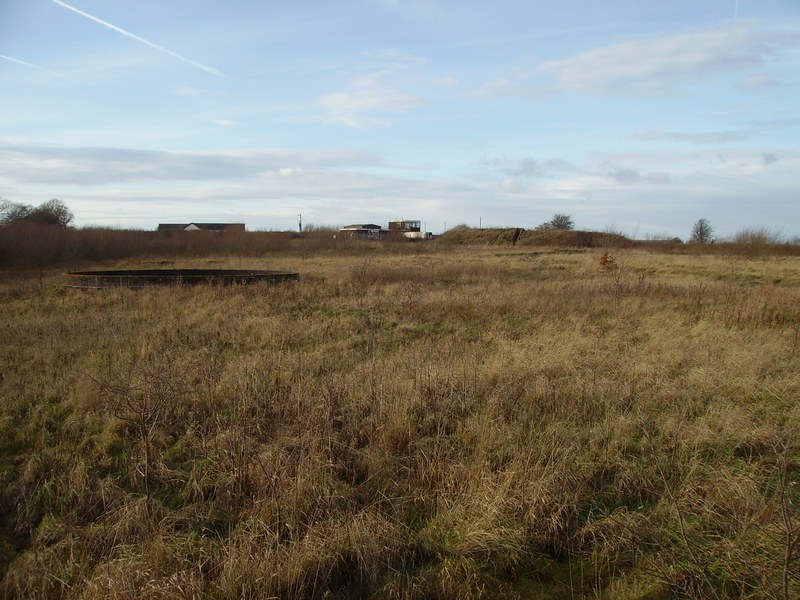
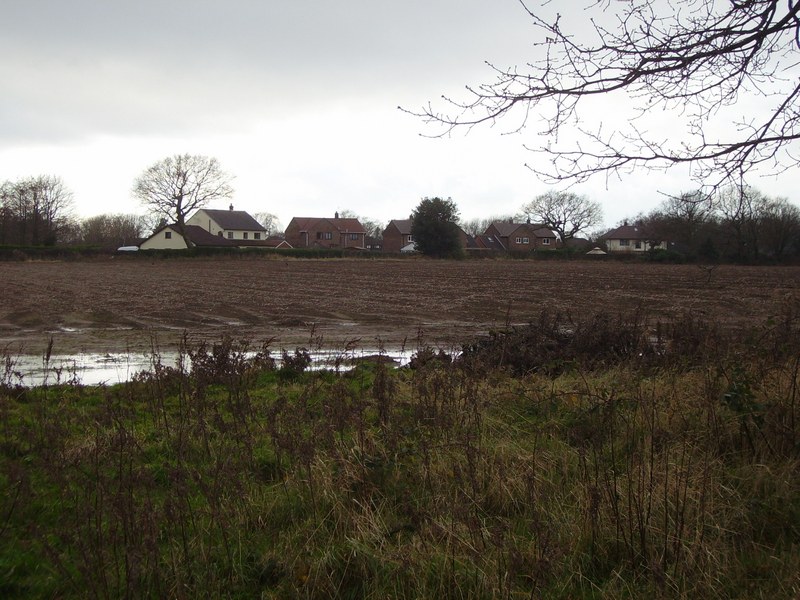
Looking East From The Middle of The Airfield
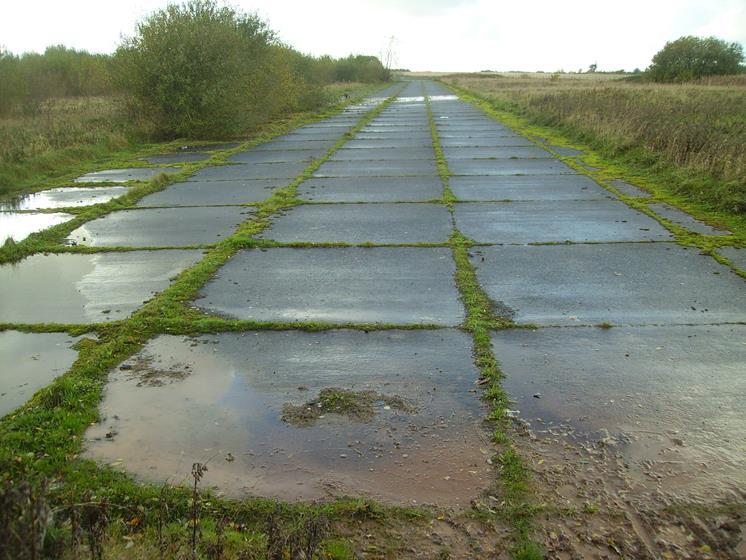
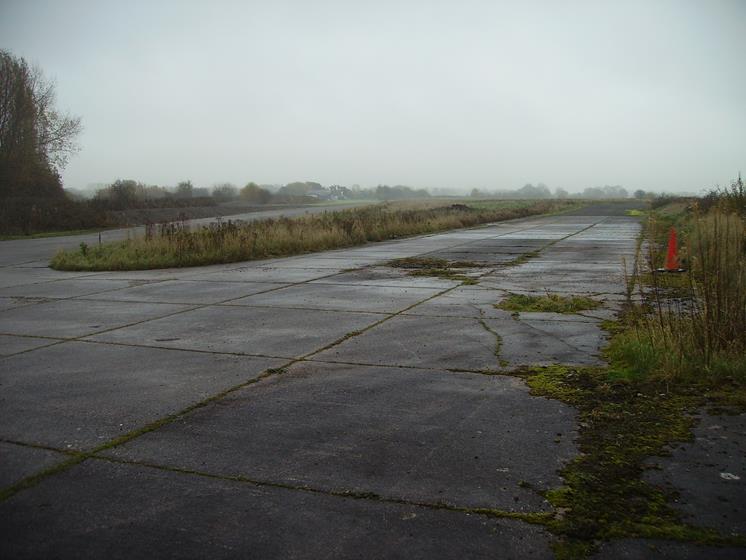
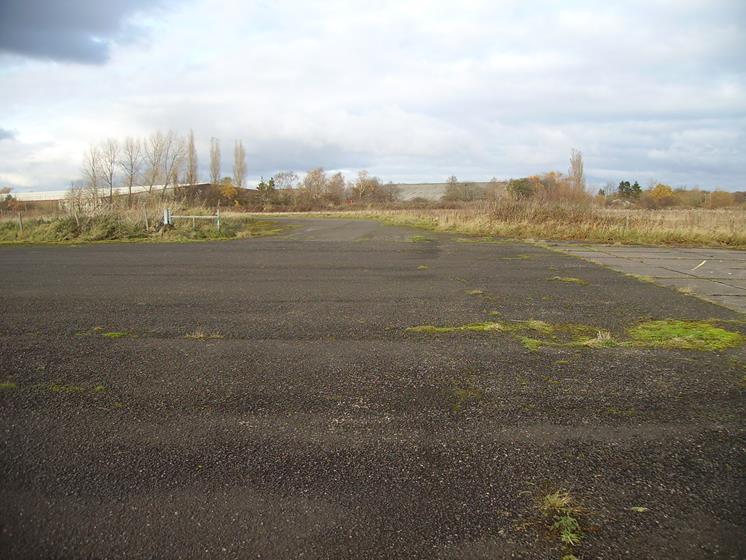
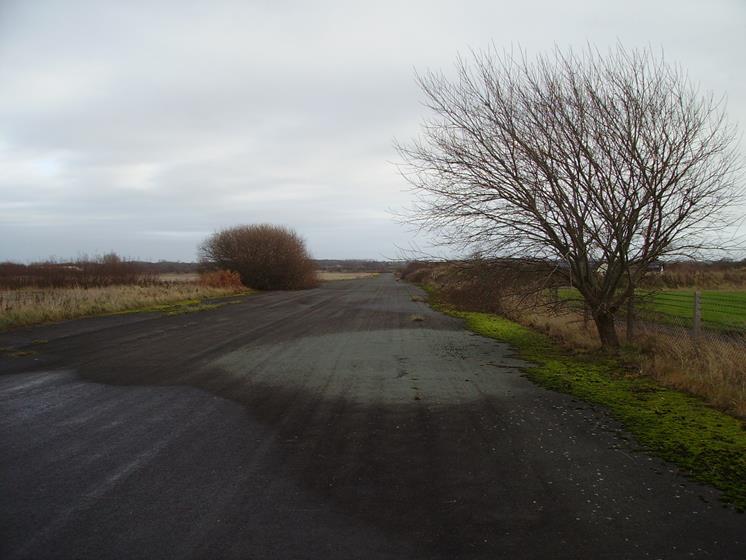
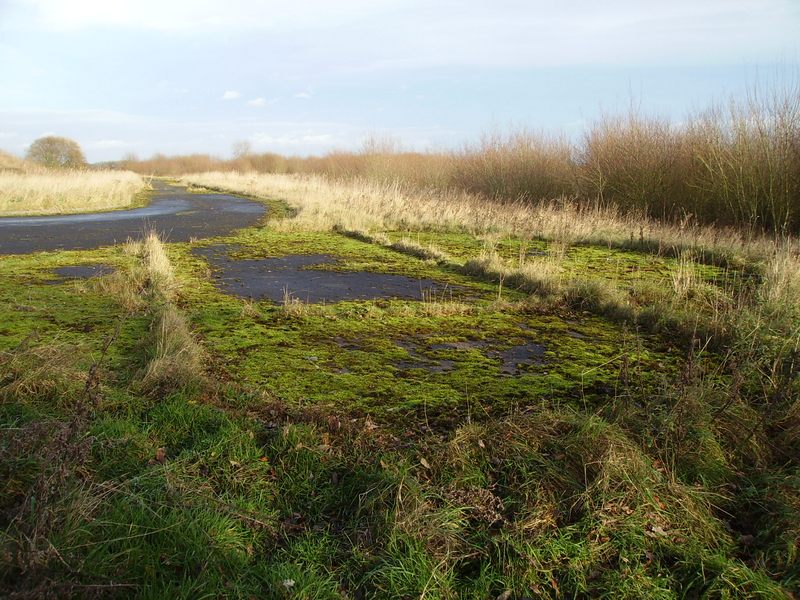
West Quite Near To The End of The Main Runway 28 This Taxi-Way Was Added Later & We Aren't Sure Why? If Anyone Knows Then Please Contact us at: [email protected]
(There is a White Cross on The Left Just Over The Barriers) The White Cross Simply Means 'Runway Closed'
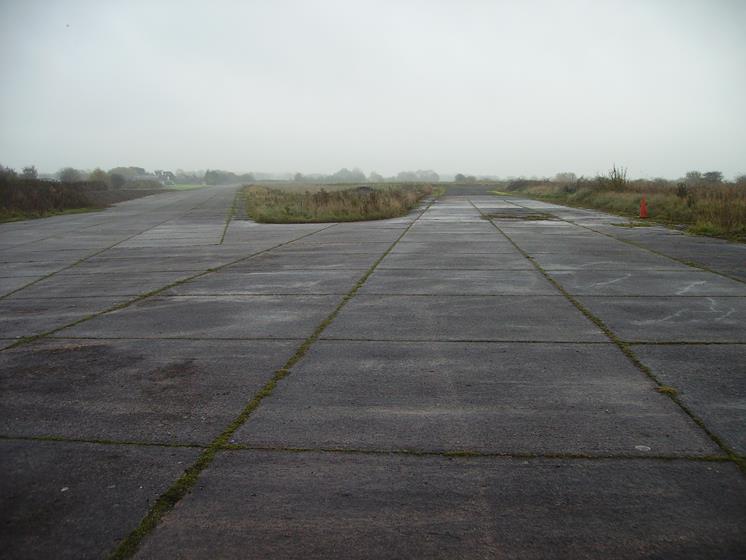
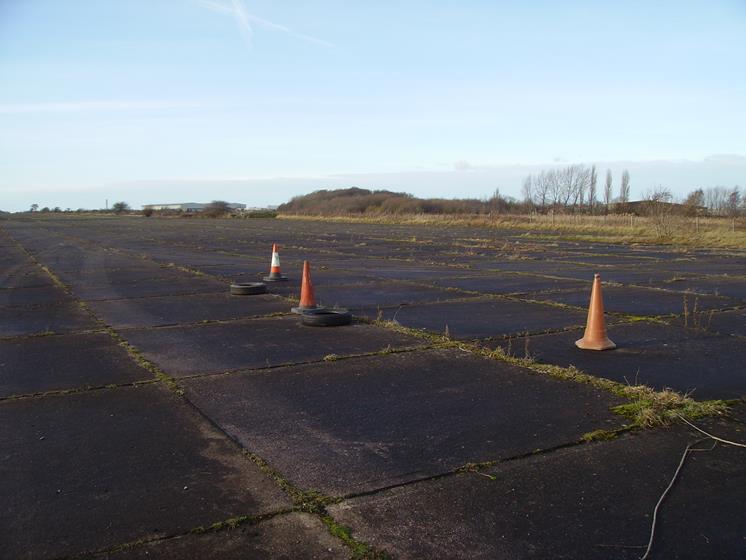
To The Left of The Island (in the middle of the photo) is The Later Extended North East Taxi Way to the Head of Runway 28
To The Left of The Island (in the middle of the photo) is The Later Extended North East Taxi Way to the Head of Runway 28
To The Left of The Island (in the middle of the photo) is The Later Extended North East Taxi Way to the Head of Runway 28
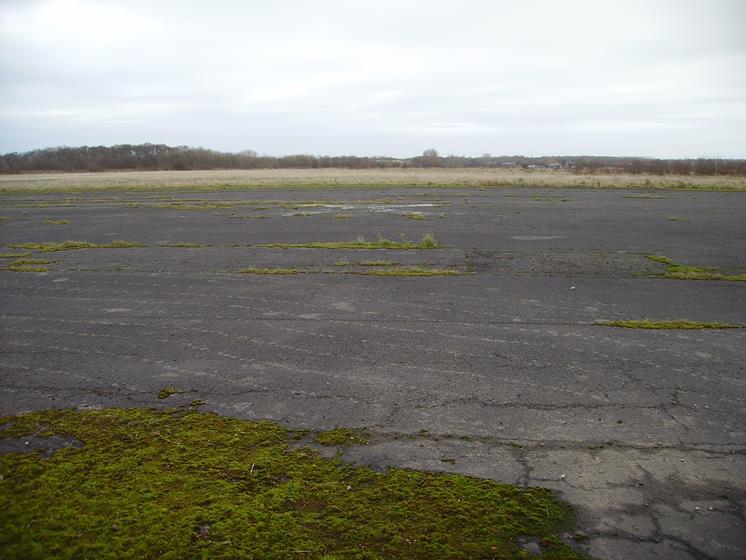
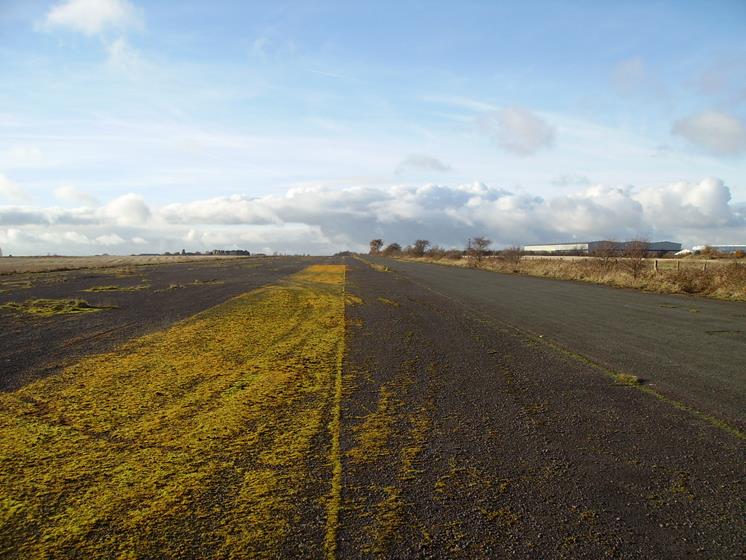
of The Main Runway Looking West
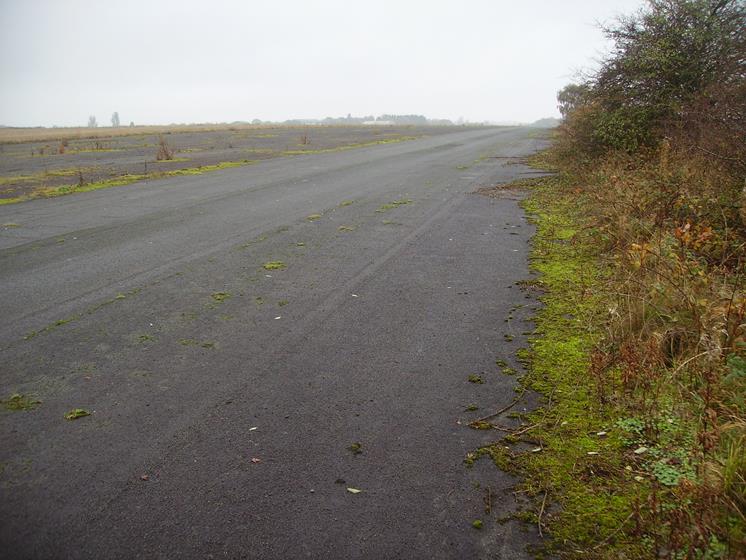
of The Main Runway Looking East

(Please Note That the Head of Runway 34 is on the Right of The Photo)
In The Background is Runway 34 Runway 34 Runs North-Westerly Across the Airfield You Can Just See The White Cross on Runway 34 The White Cross Simply Means 'Runway Closed'

Cross on The Head of Runway 34
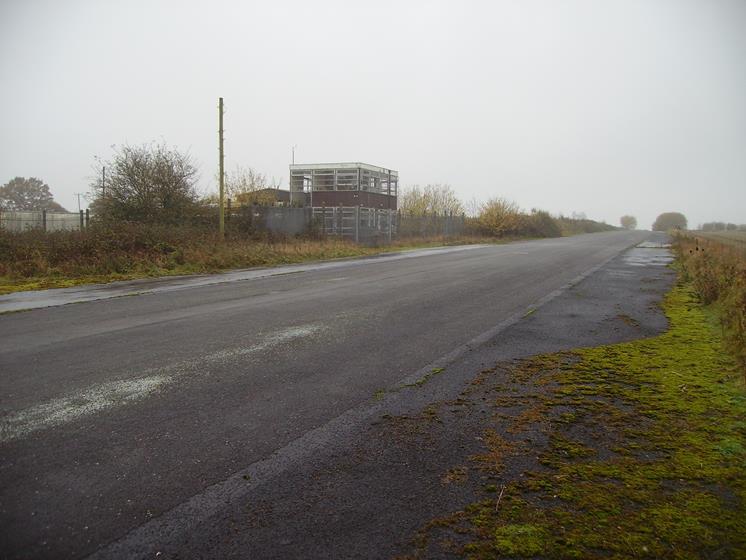
The Building on the Left Was Used By Shell Research When Being Used as a Test Track
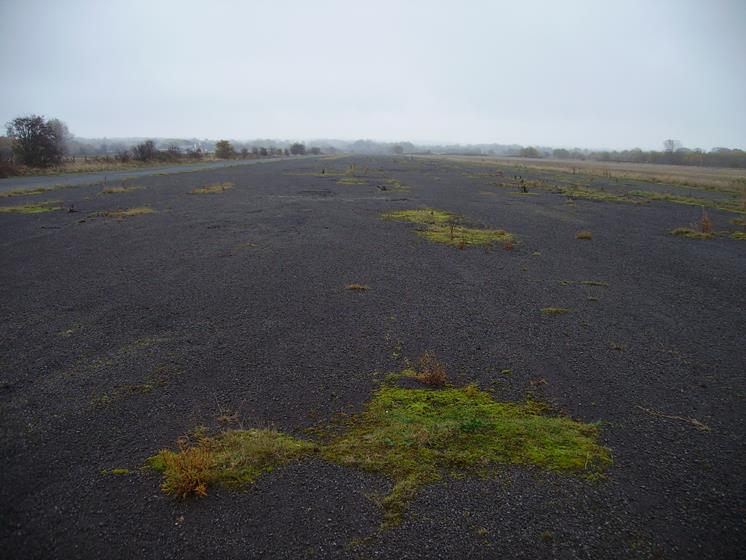
Quite Near The Head of Runway 28
Towards the Head of Runway 28
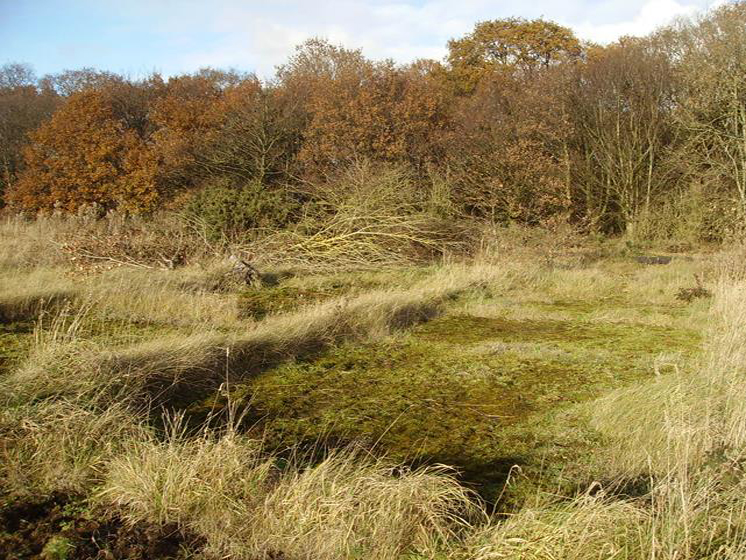
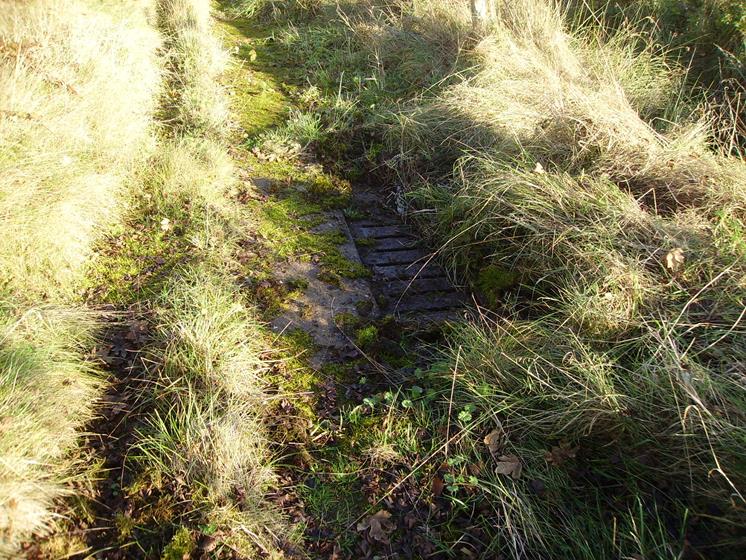
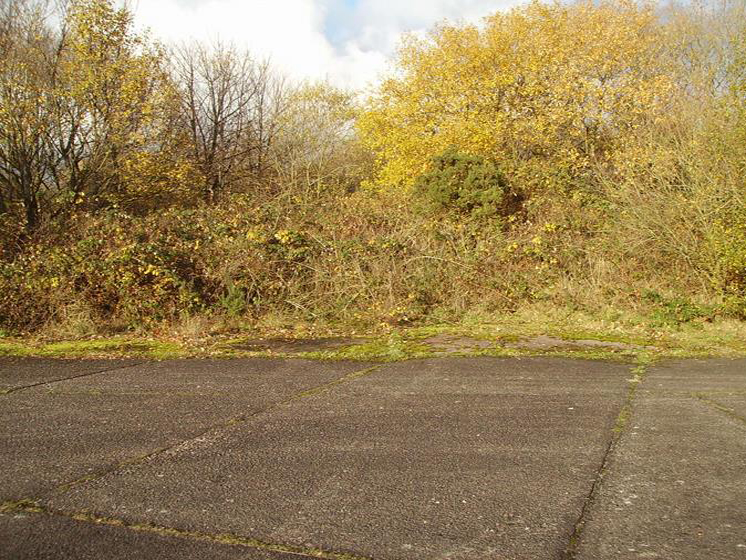
on the Threshold of The North East Taxi-Way (Now Demolished Within The Undergrowth)
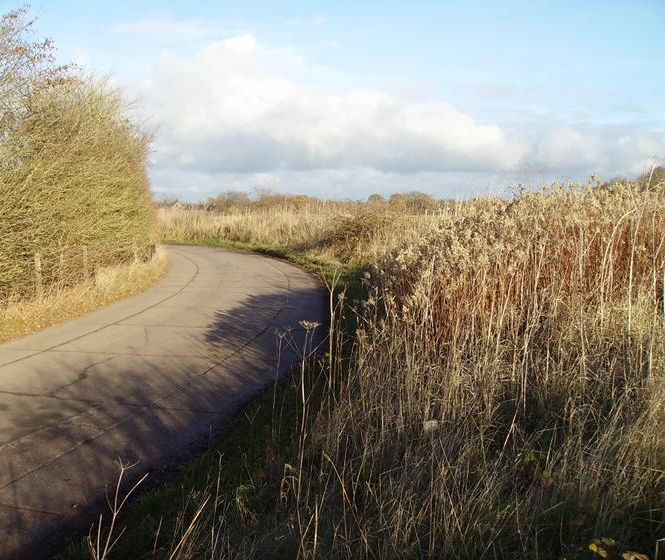
(The Sweeping Bend is the Shell Test-Track)
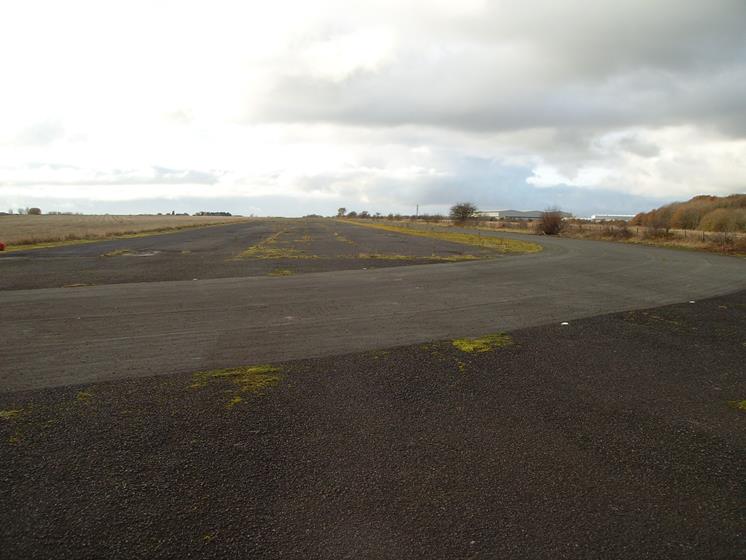
(Please Note: The Concreted Area to the Right is The Added Main Runway 28 Extension)
(Fairey Aviation Hangars Can be Seen on the Right)
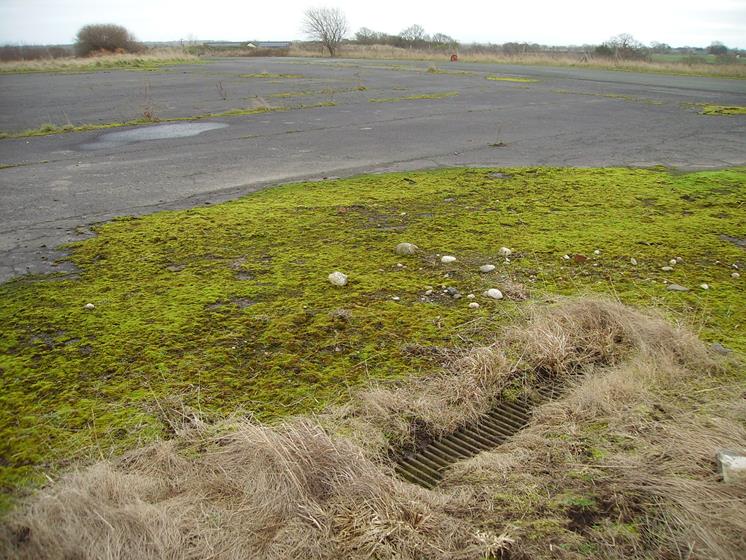
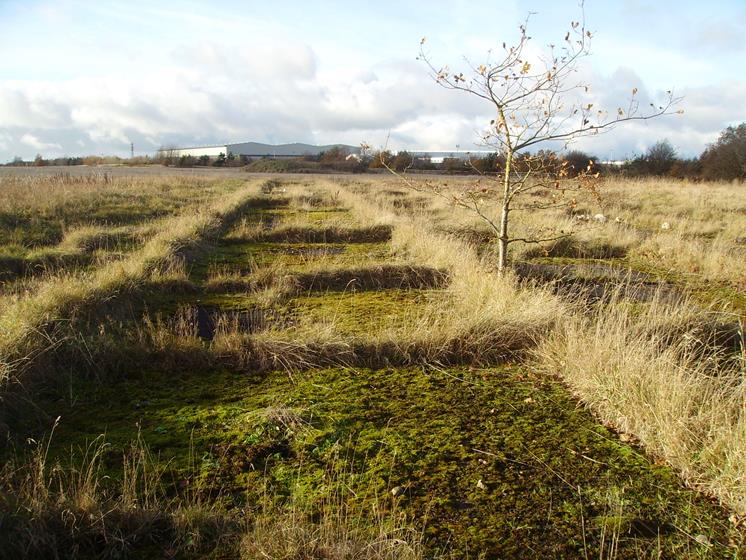
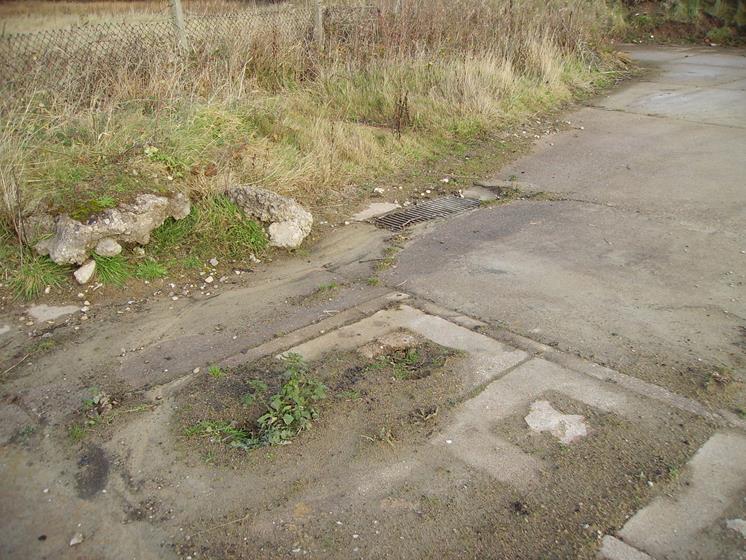
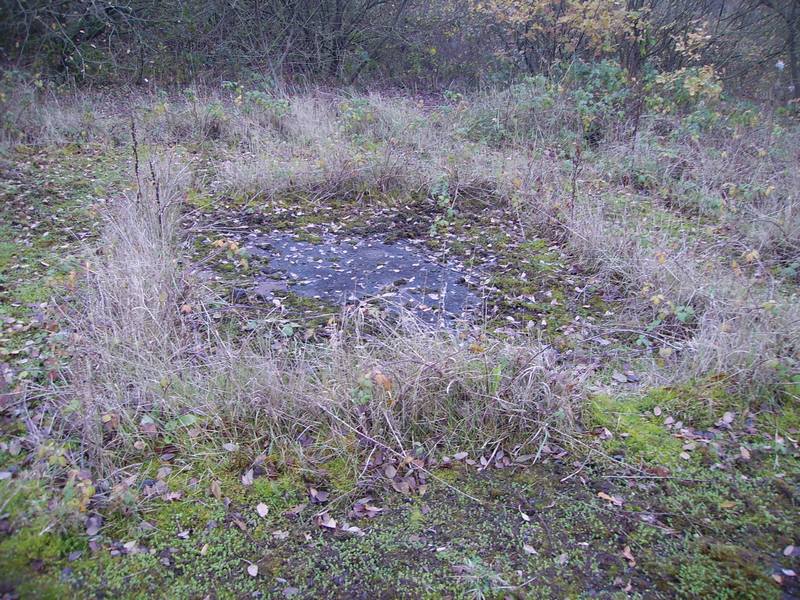
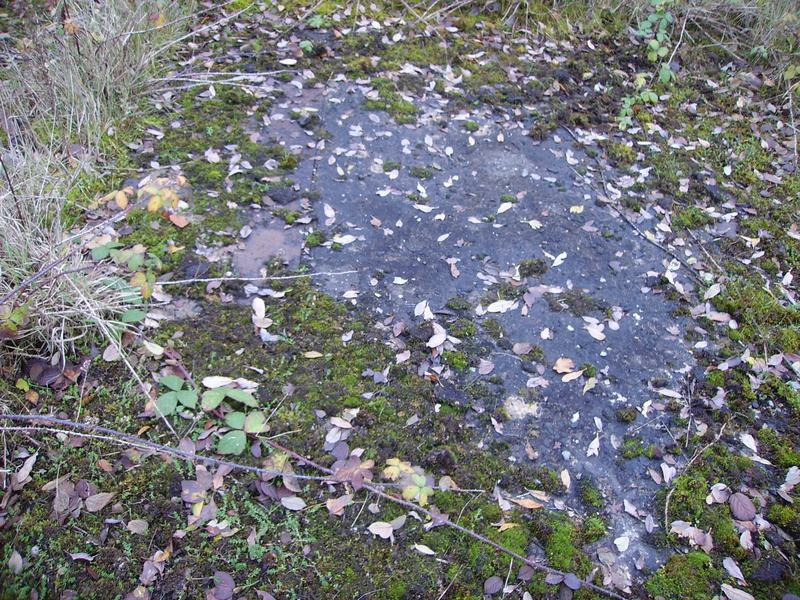
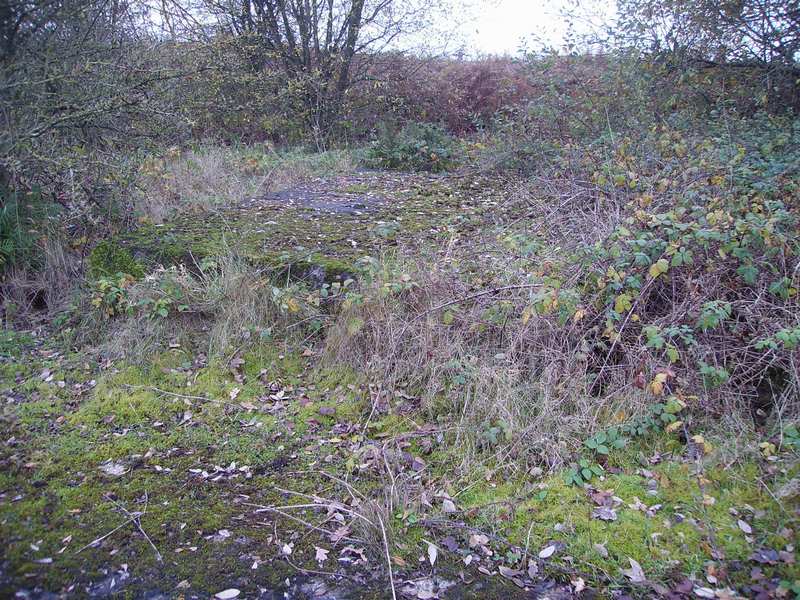
Something to do With 'Dummy' Deck Practice Landing?
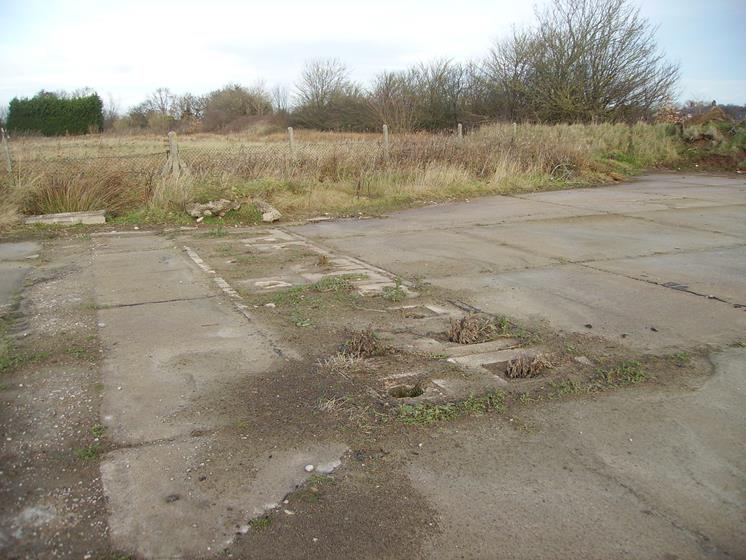
Think Has Something to do With 'Dummy' Deck Practice Landing?
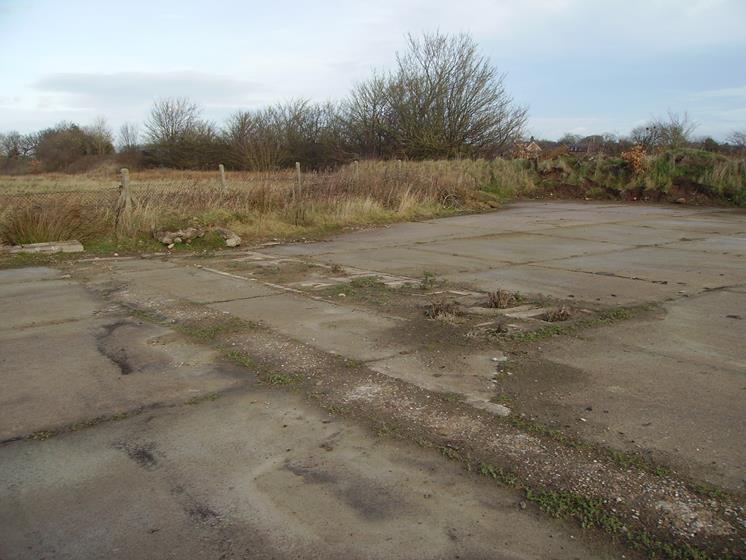
Think Has Something to do With 'Dummy' Deck Practice Landing?
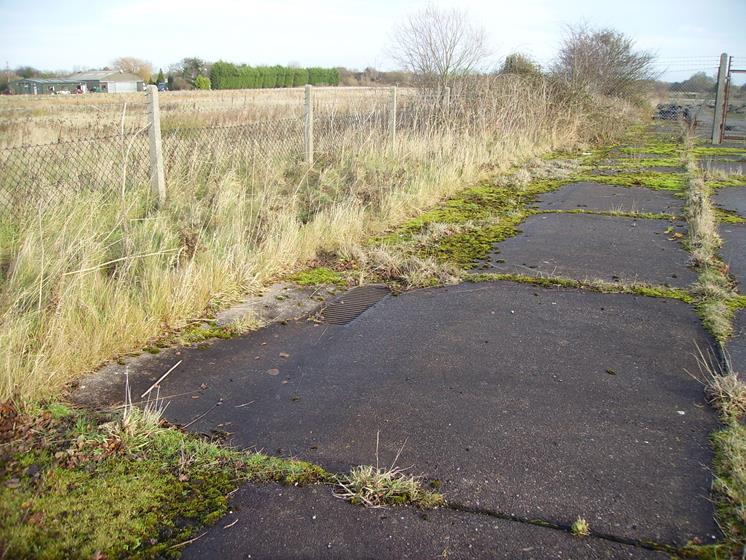
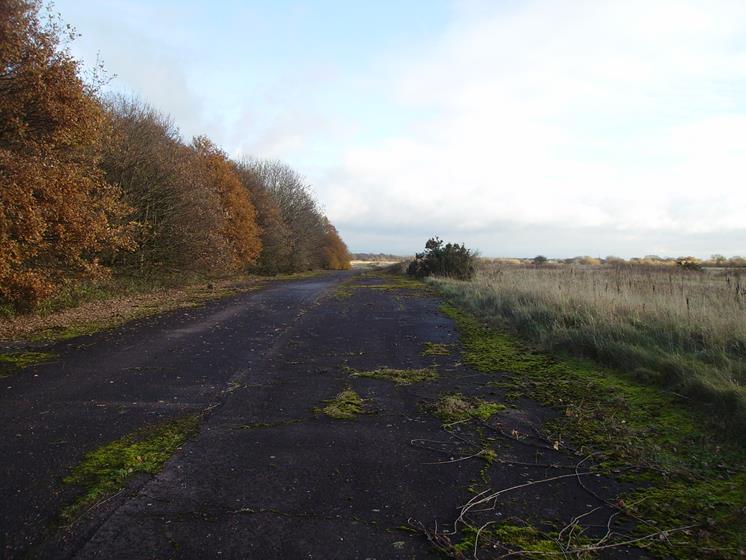
The Main Head (Extended) of Runway 28 is Just Over the Fence on The Left The Earthed up Banking Shown Here on the Right has Reduced The Original Taxi-Way to Half of it's Width
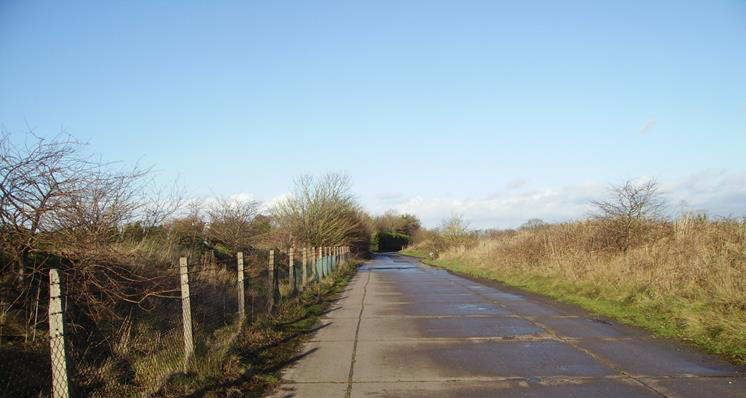
You Can See Quite Clearly The 'Swing' of the Taxi-Way (Especially on Photo 2)
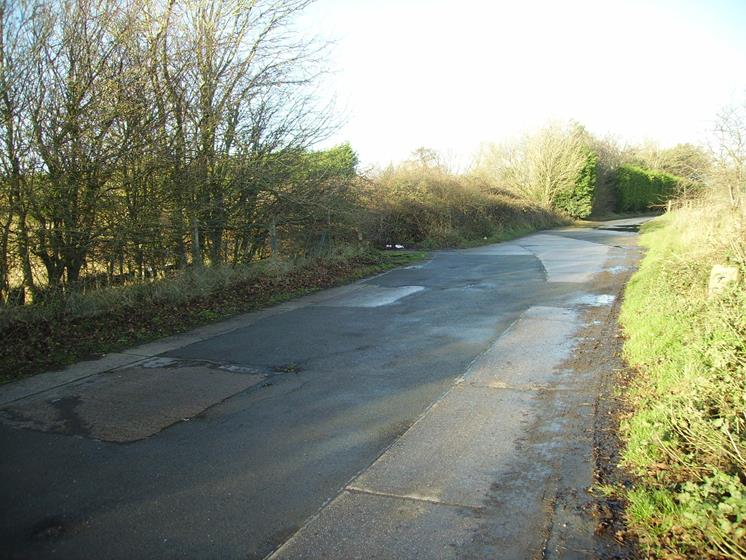
You Can See Quite Clearly The 'Swing' of the Taxi-Way

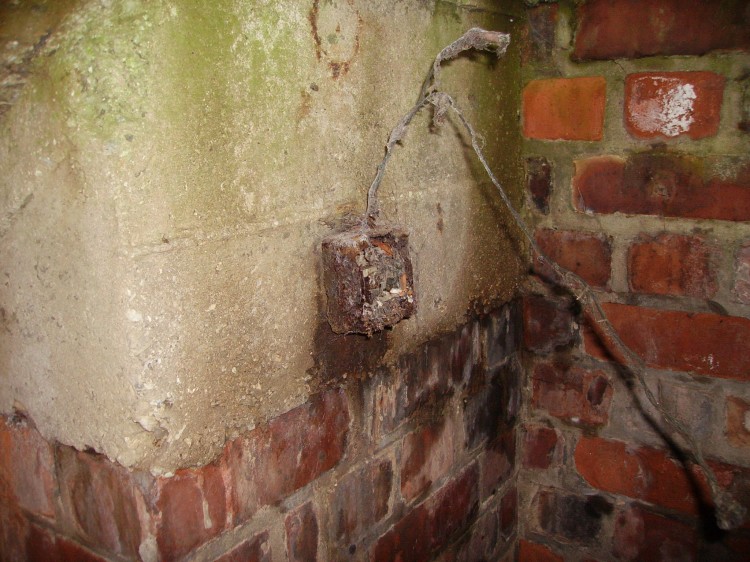
It has a concrete roof supporting a wooden lattice tower and access ladder that allows for gaining access to the radio antenna. The homing beacon was used as an aid for returning aircraft to locate the airfield.
and is Still in a Well Preserved State as You Can See
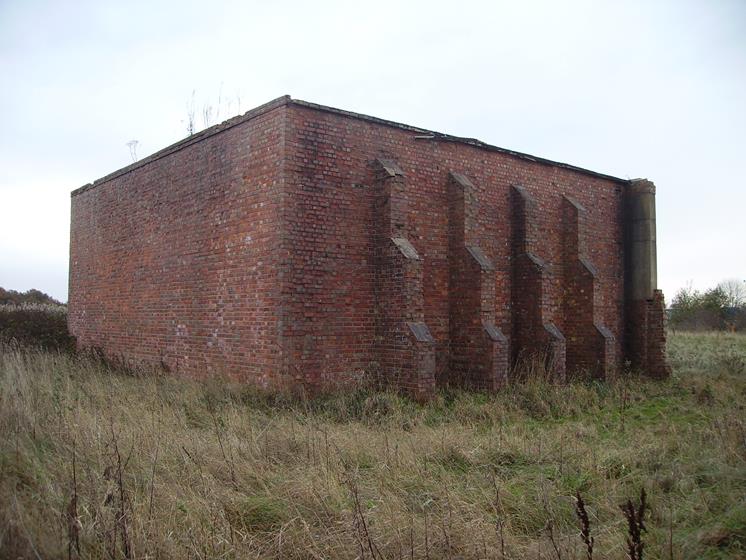
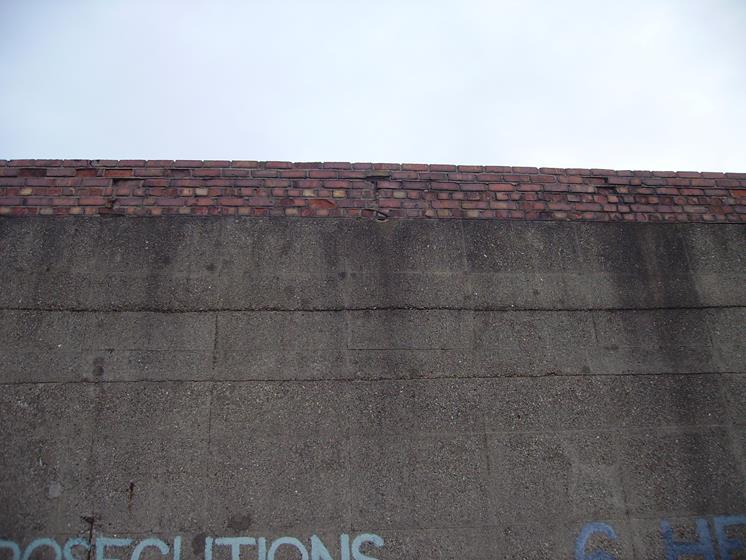
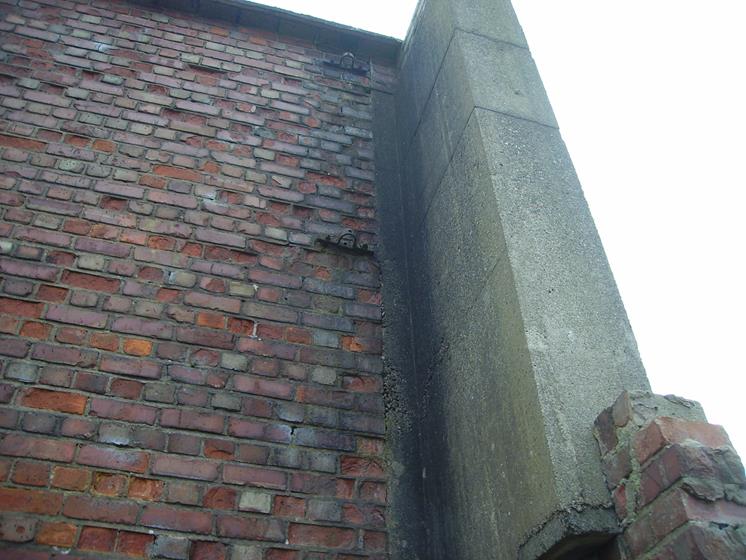
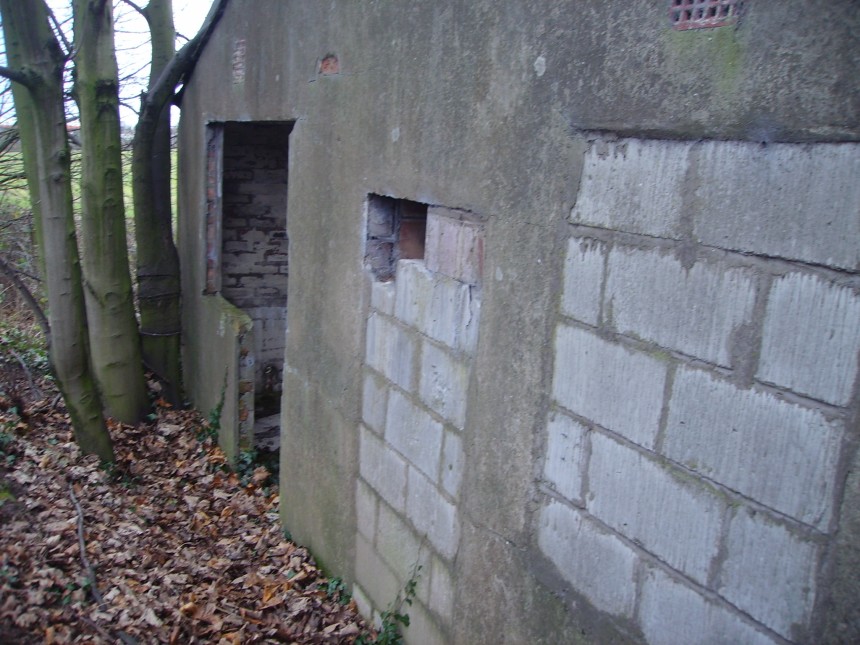
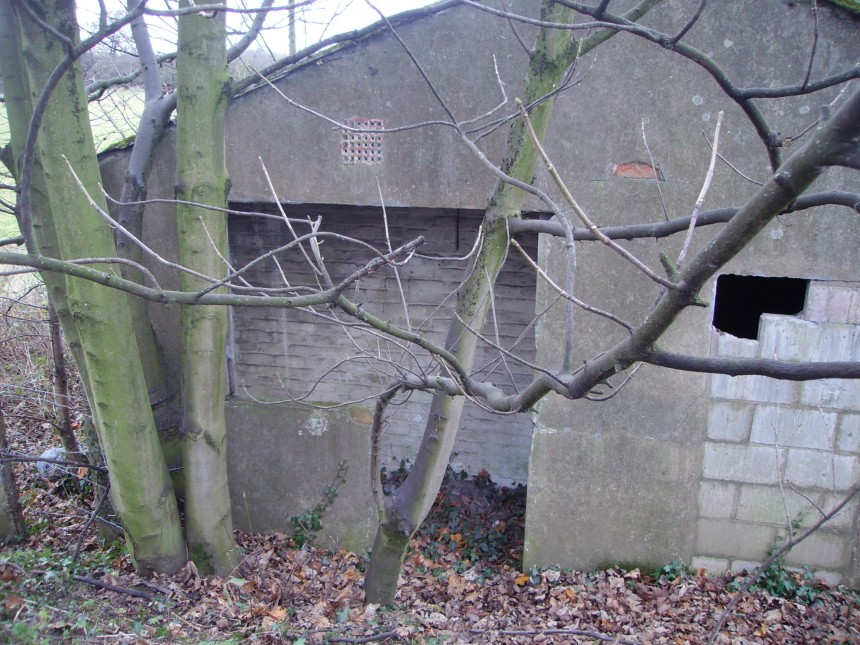
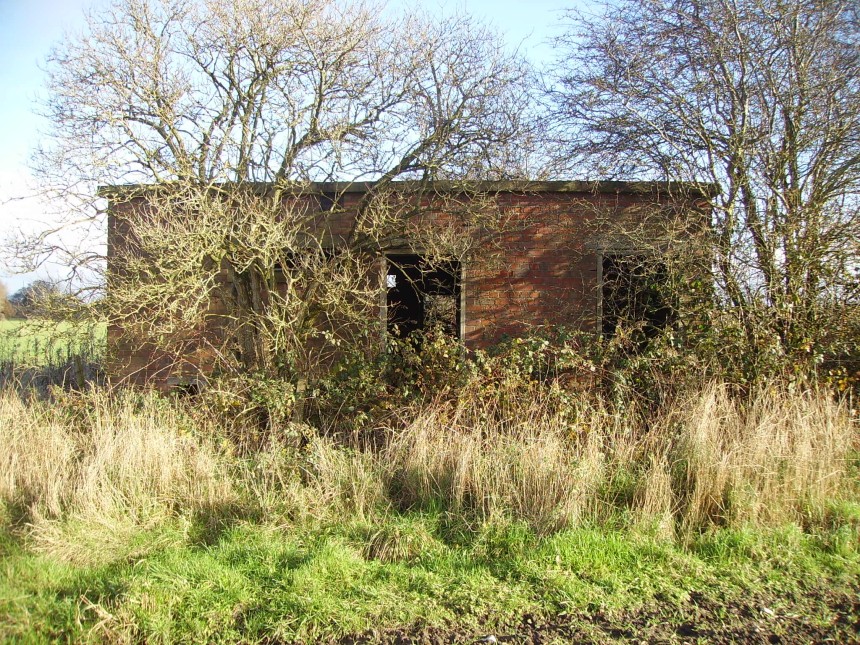
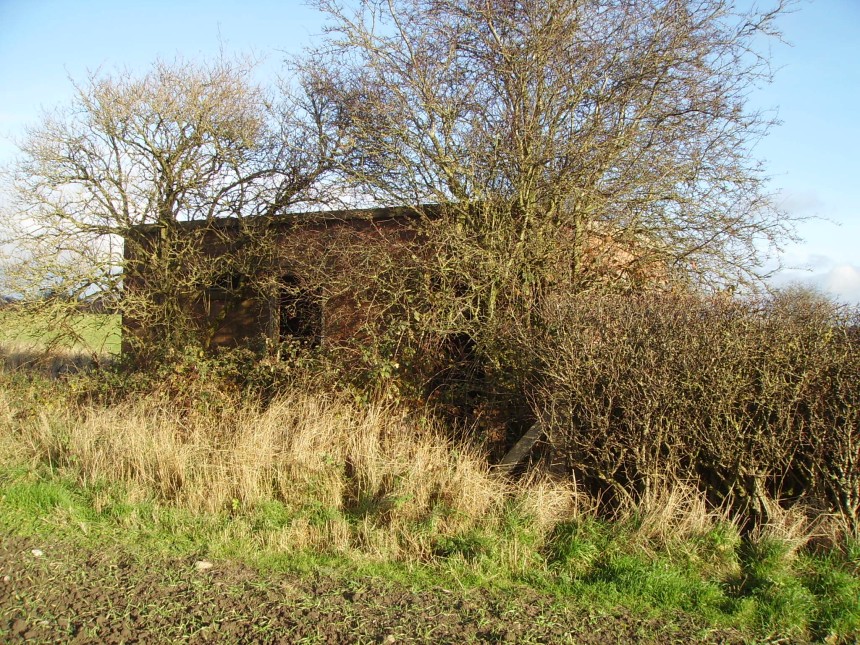
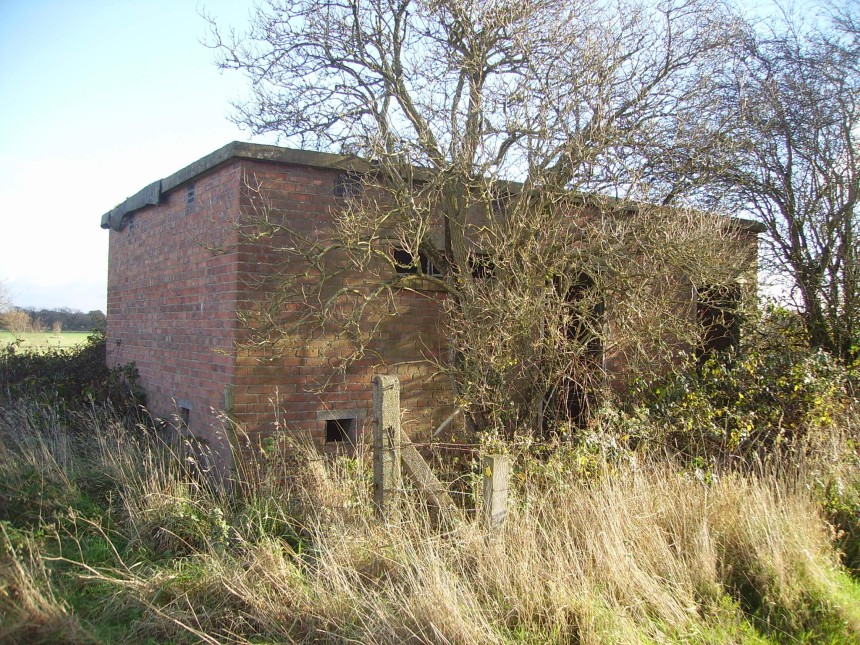
A shooting in butt for aircraft with installed guns. A tail trestle was put in position to raise the aircraft to the normal flying attitude. Aircraft would test & harmonise their machine guns by blasting into a bank of sand at the rear of the butts. The blast of the rounds in the butt were dispelled through 2 roof apertures. A red warning flag was raised when the test butt was in use.
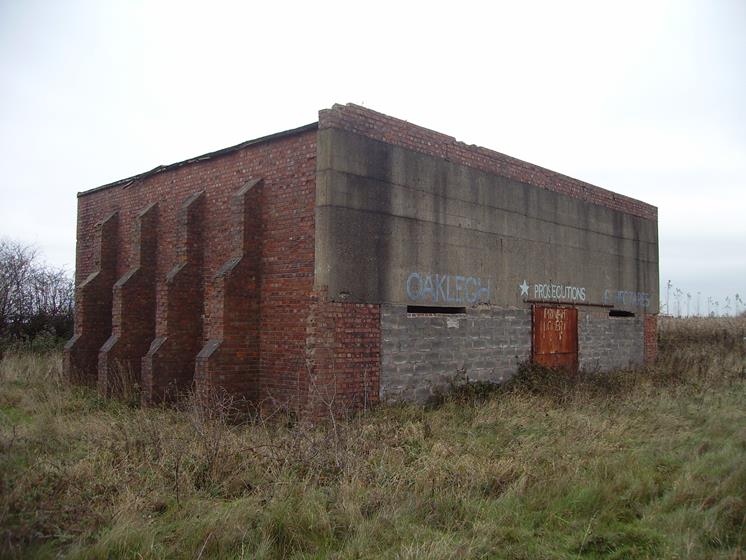
(Originally, on the left where the brickwork is, there would have been a small annex building)
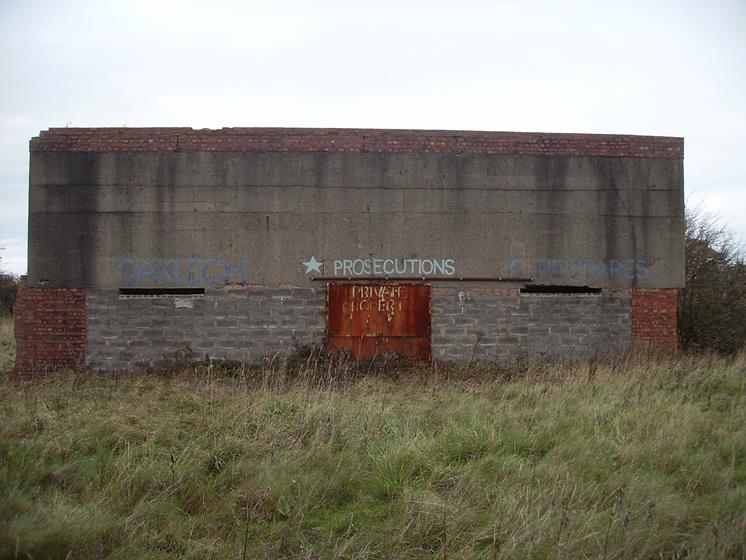
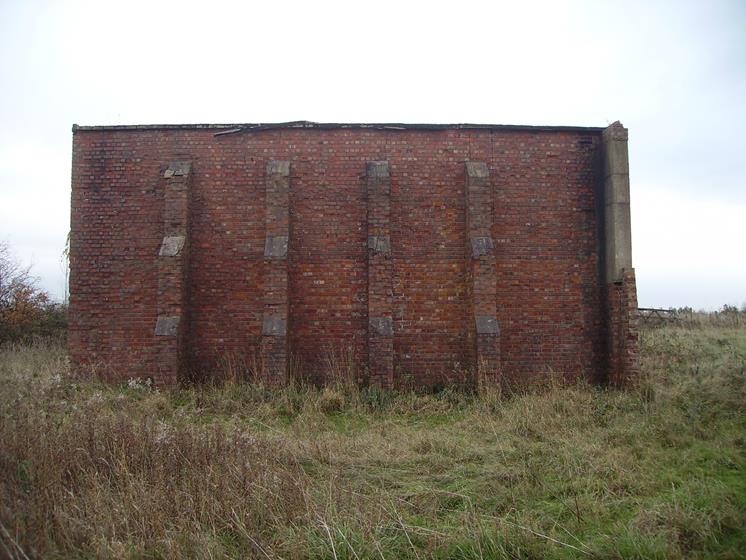
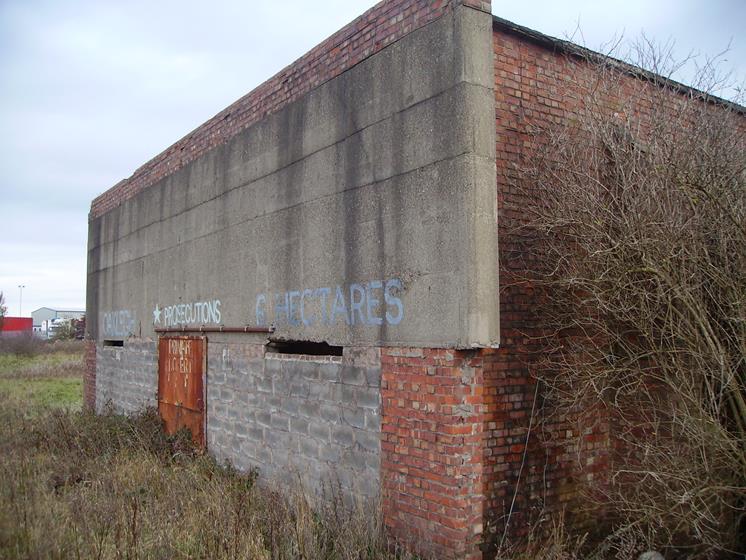
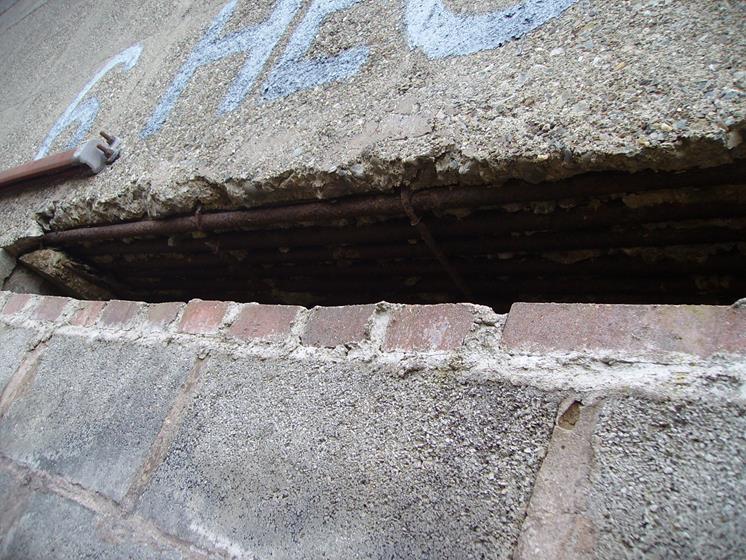
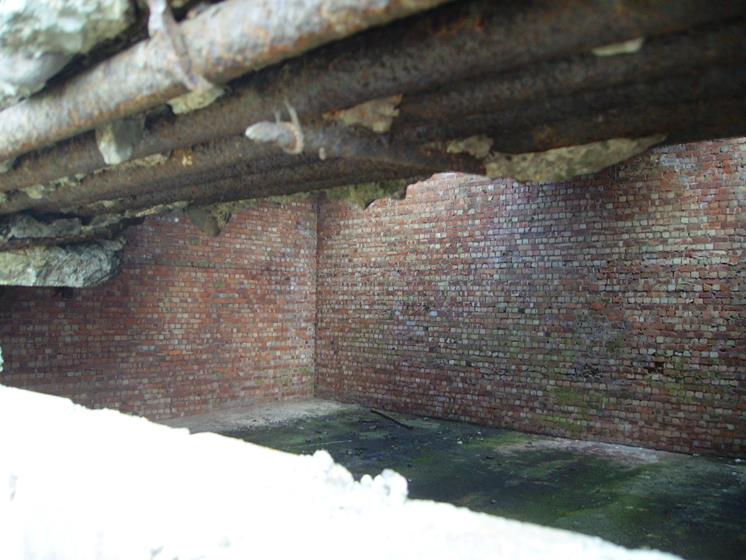
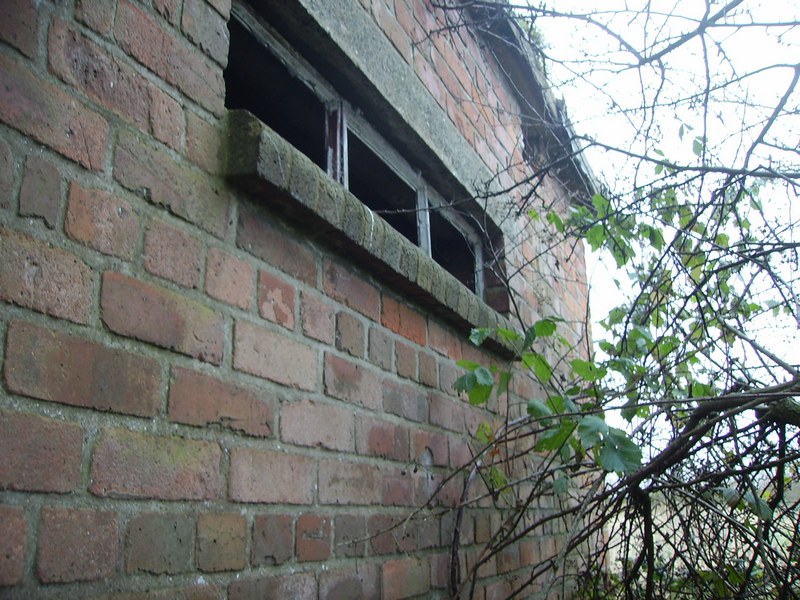
The back wall would have had huge sand banking to absorb machine gun and canon rounds. You can see the light coming in through the 2 apertures in the gun butt roof. These apertures were their to dispel the blasts of the rounds.
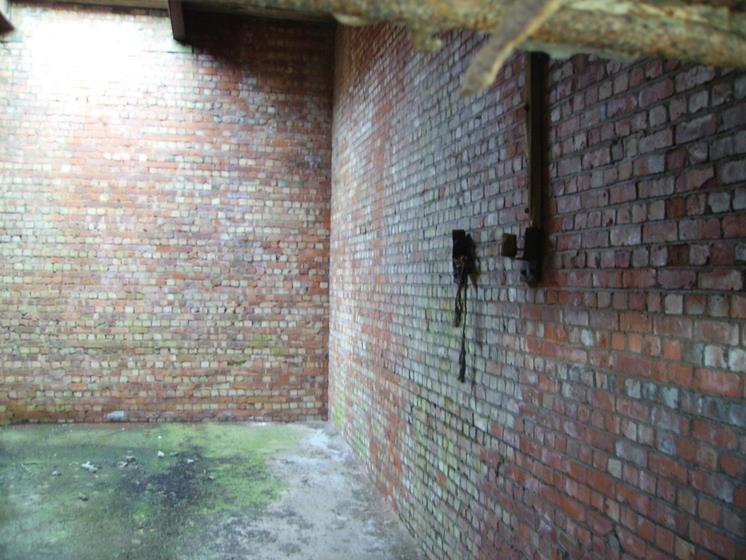


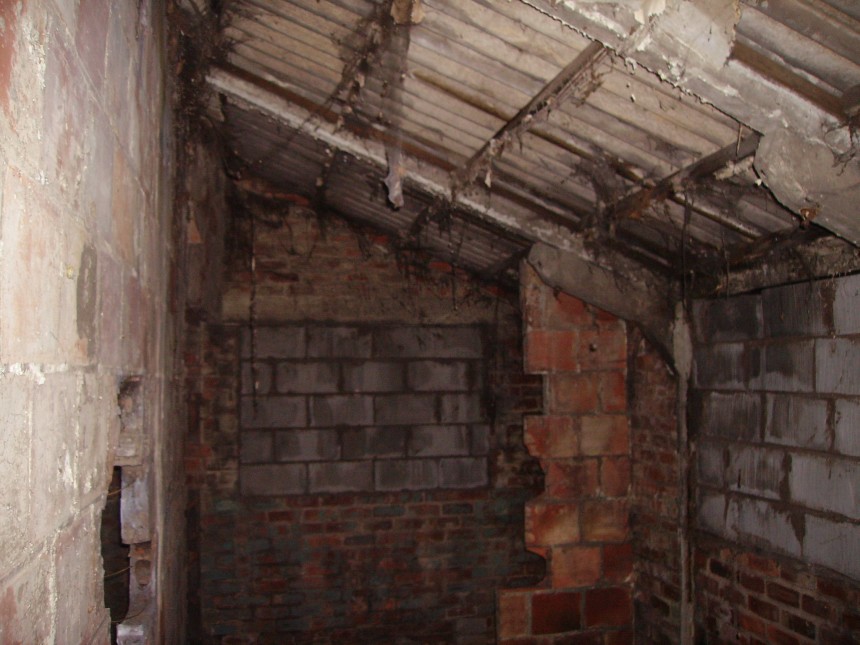
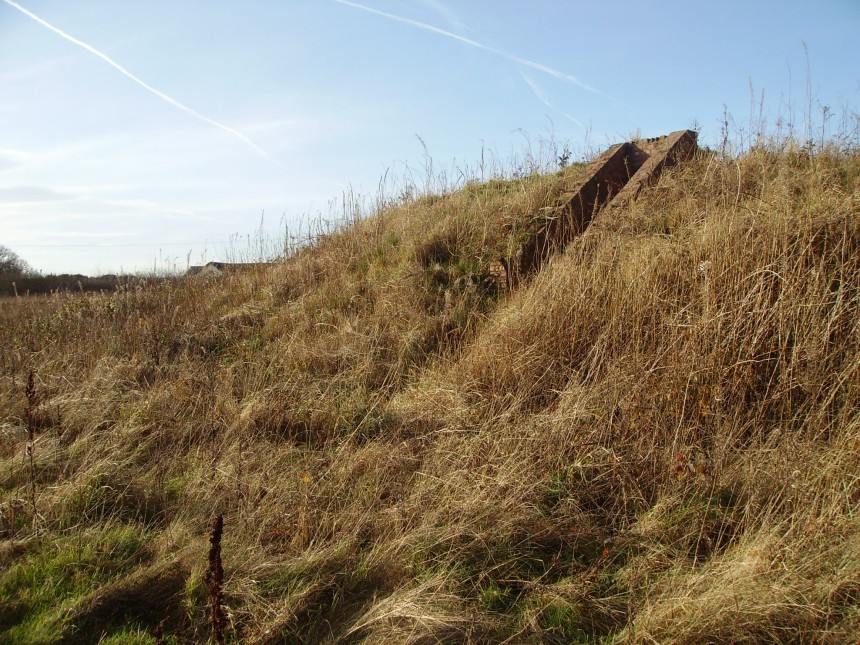
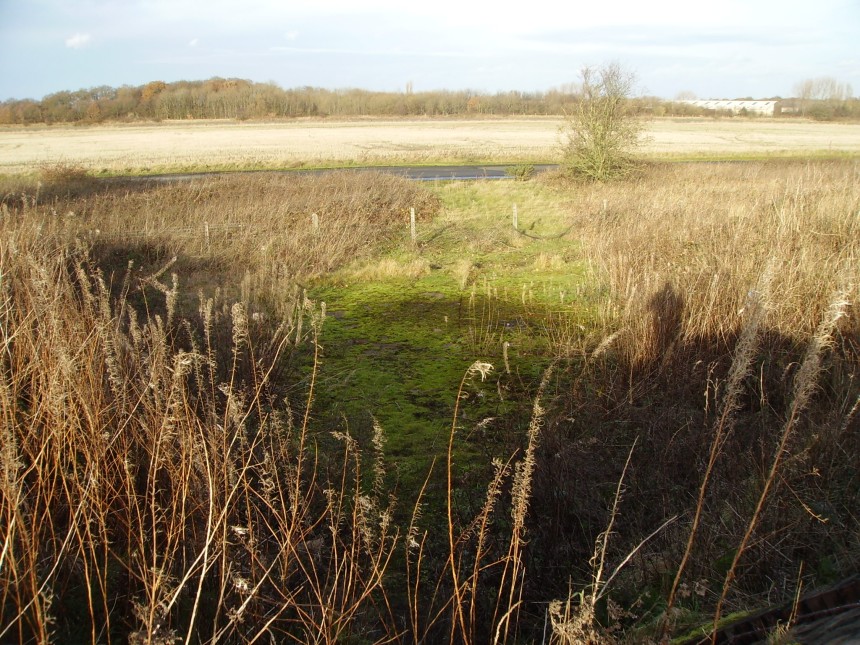
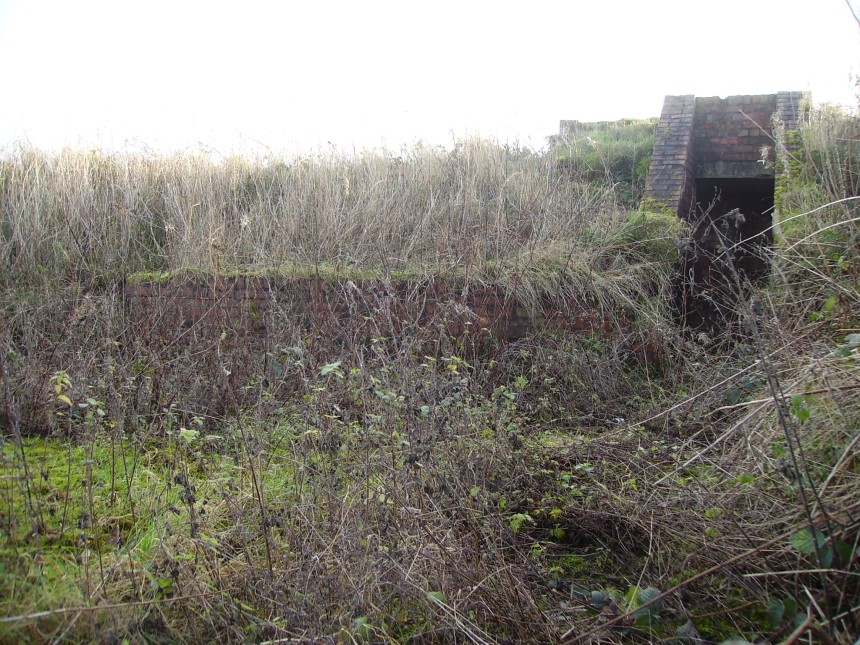
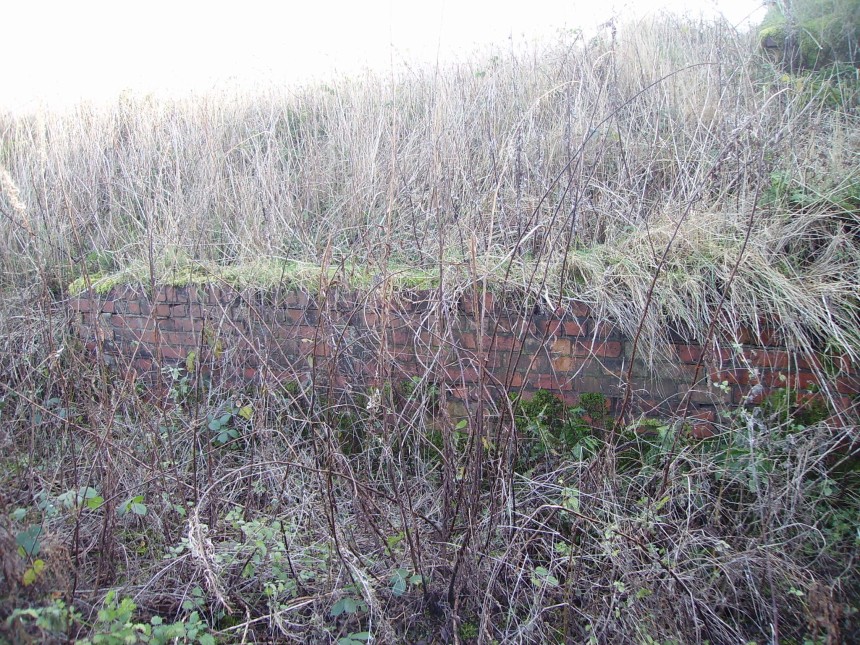
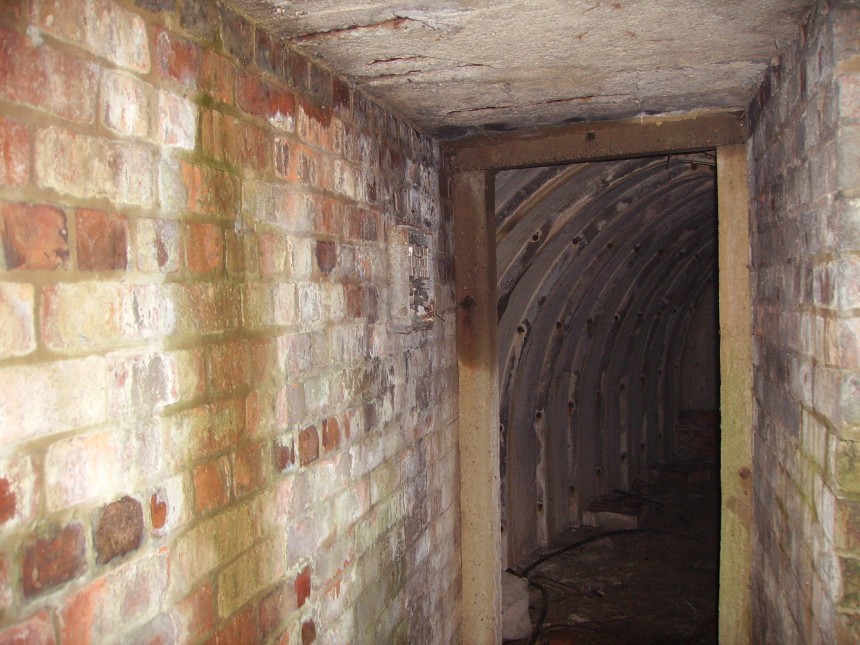
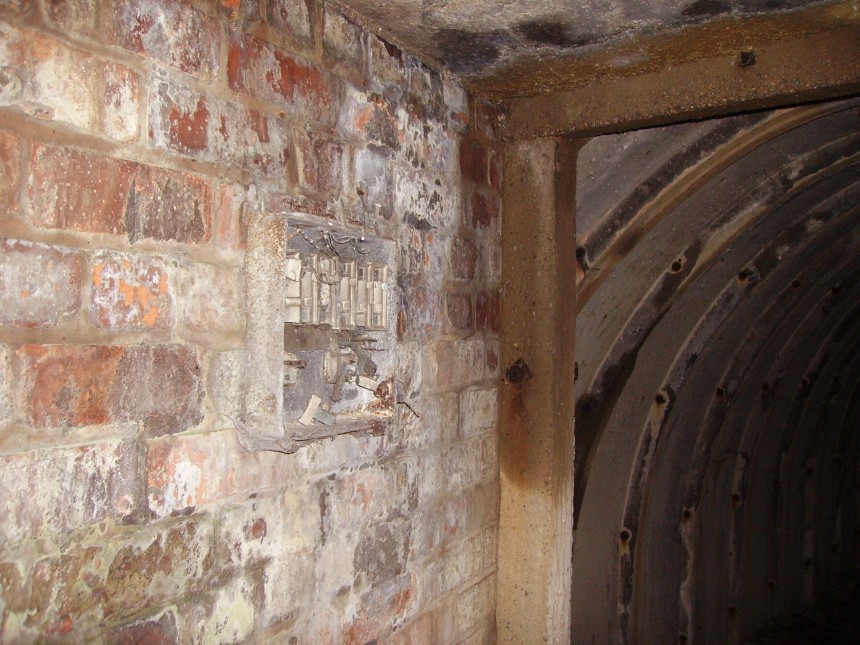
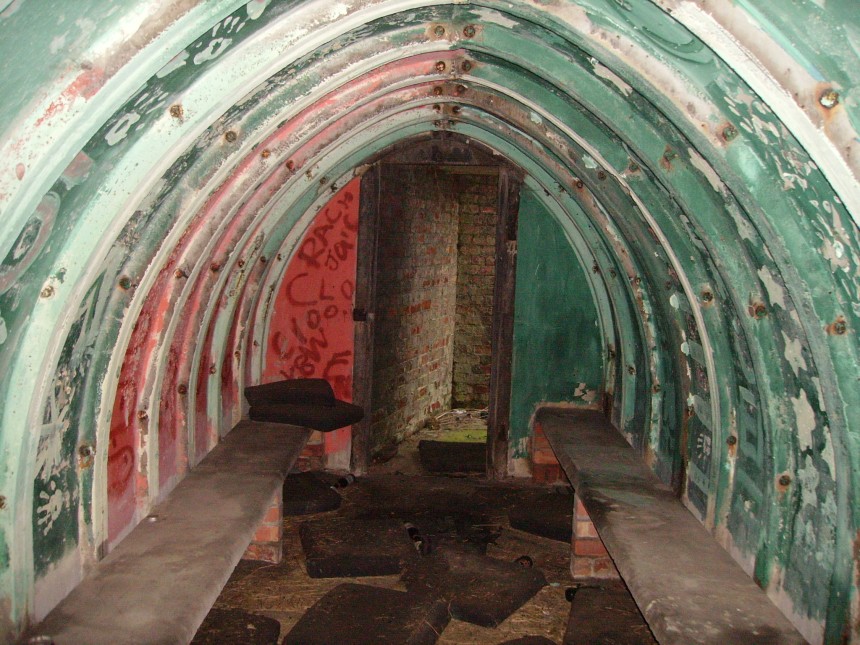
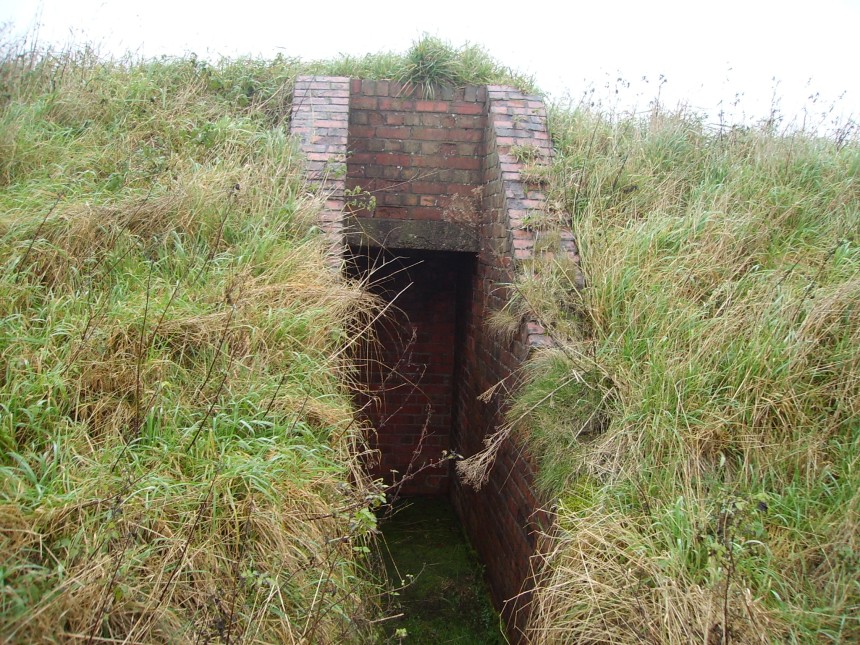
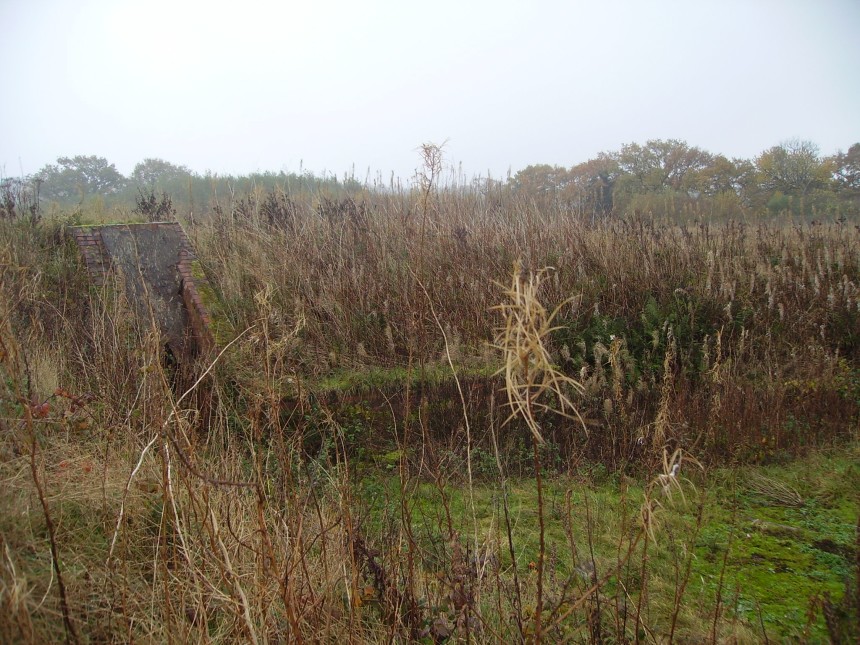
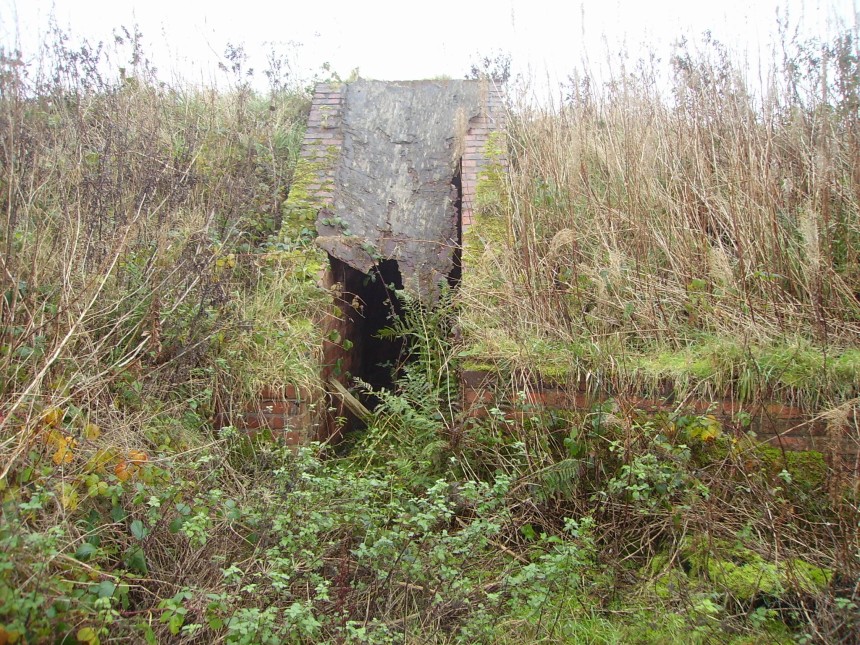
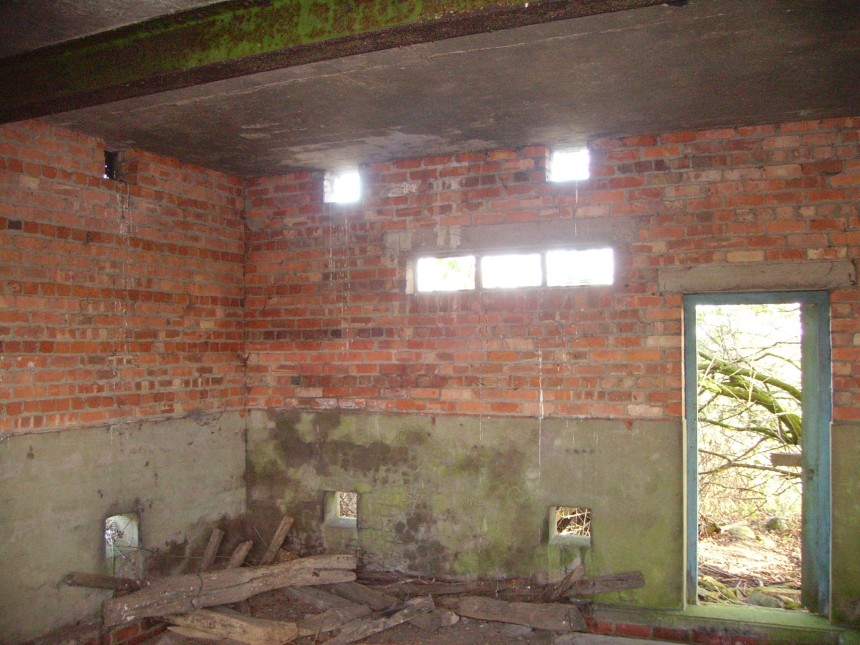
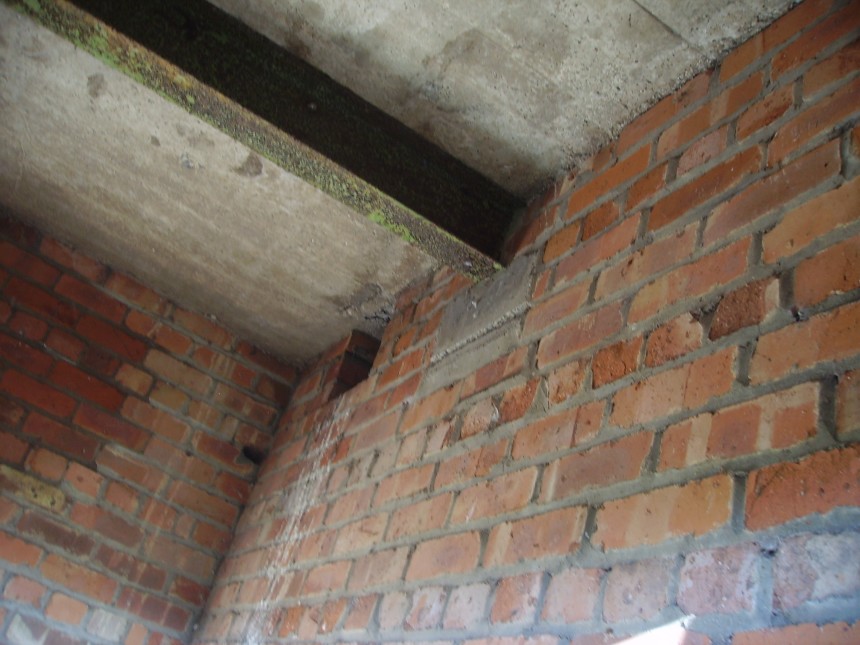
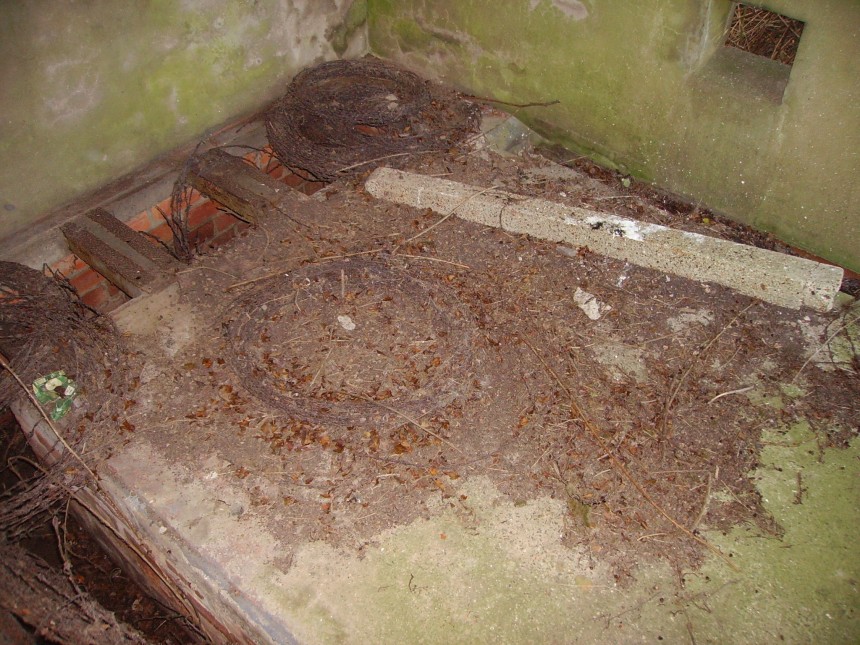
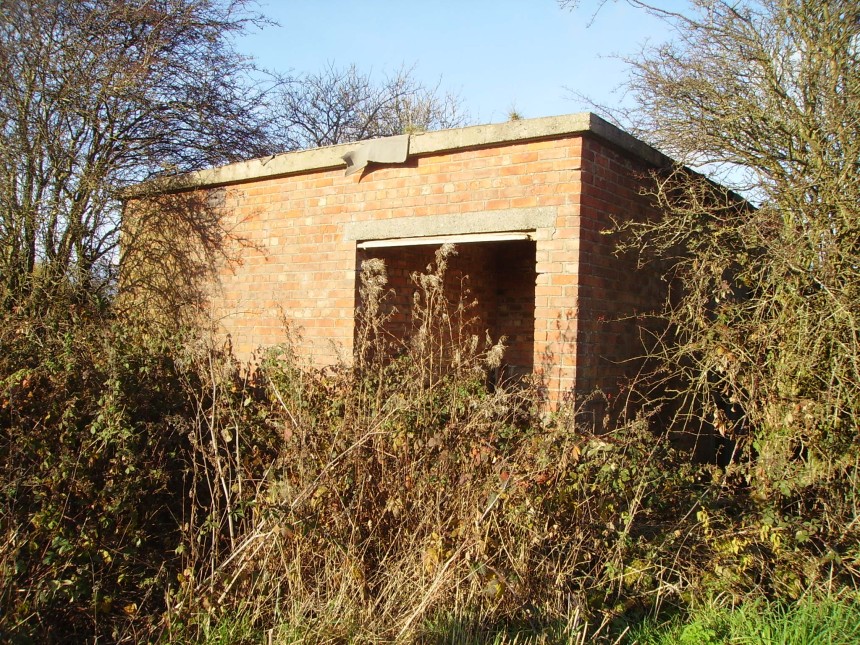
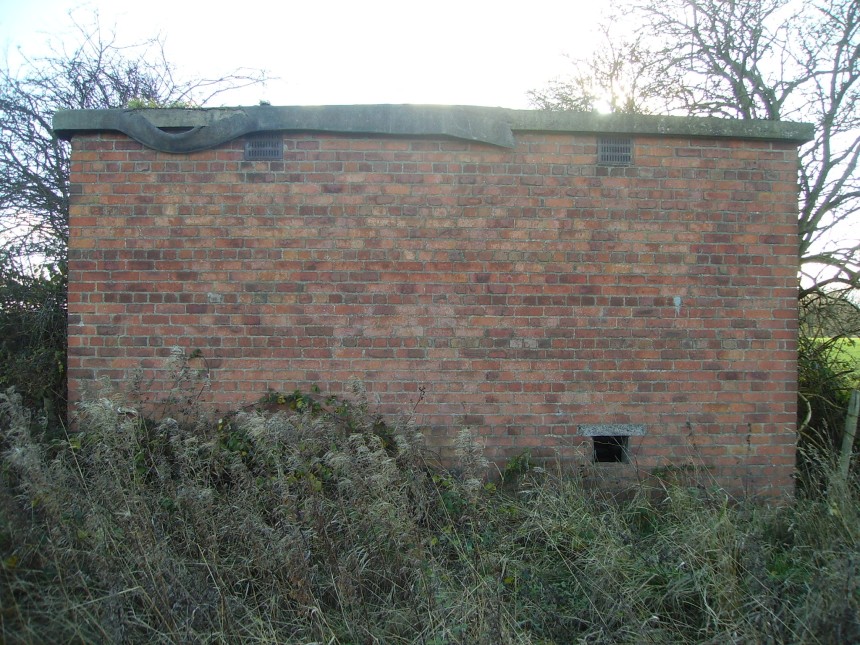
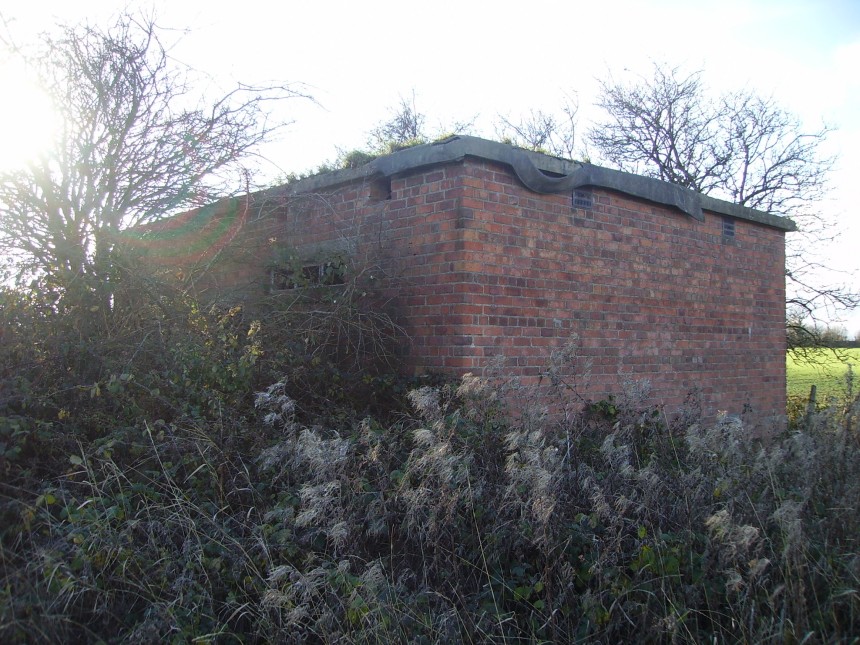
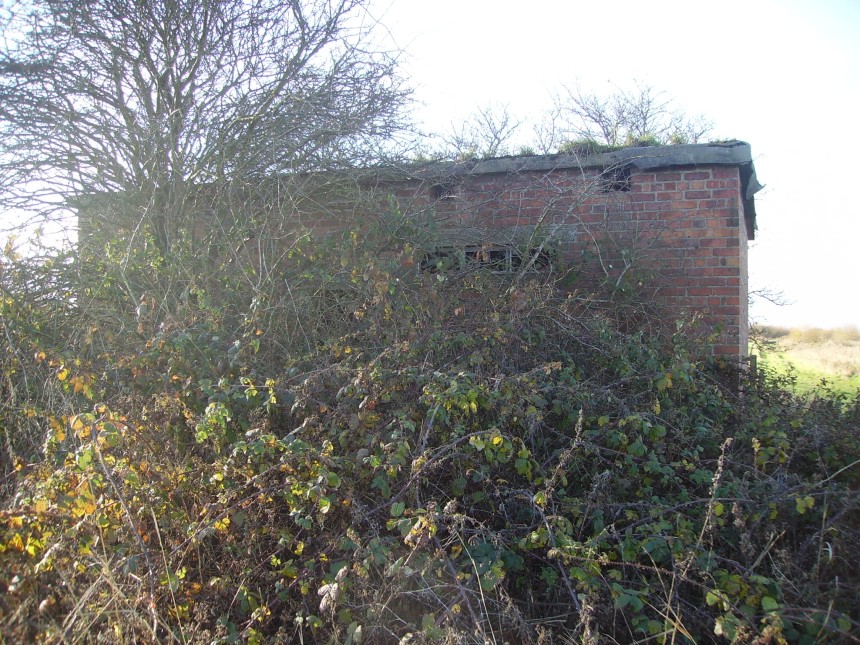
Battle Headquarters Built to Air Ministry drawing number 11008/41 The battle headquarters was used to coordinate the defences of the airfield against enemy ground attack. It was built mostly underground. There was a main entrance that lead to a main passageway. It then consisted of 5 rooms, which were: 1 The PBX telephone/switchboard room. 2 Messengers and 'runners' room (In the event of the telephone lines being disabled or inoperable, 'runners' were sent out to deliver messages to the relevant areas of the airfield). 3 Defence officers room. 4 A semi sunken observation room (note the emergency exit with a steel ladder). 5 A water closet (elsan toilet cubicle).
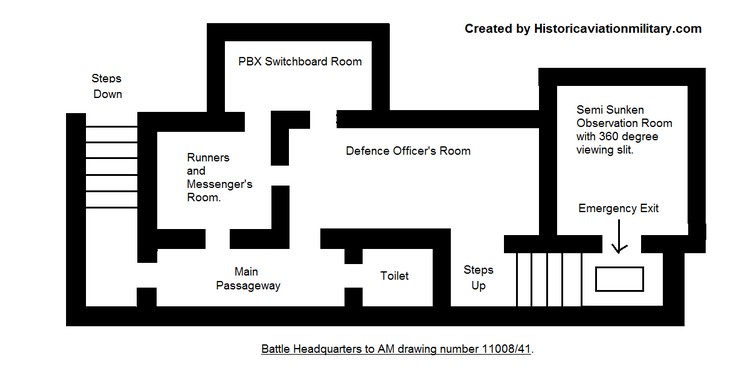
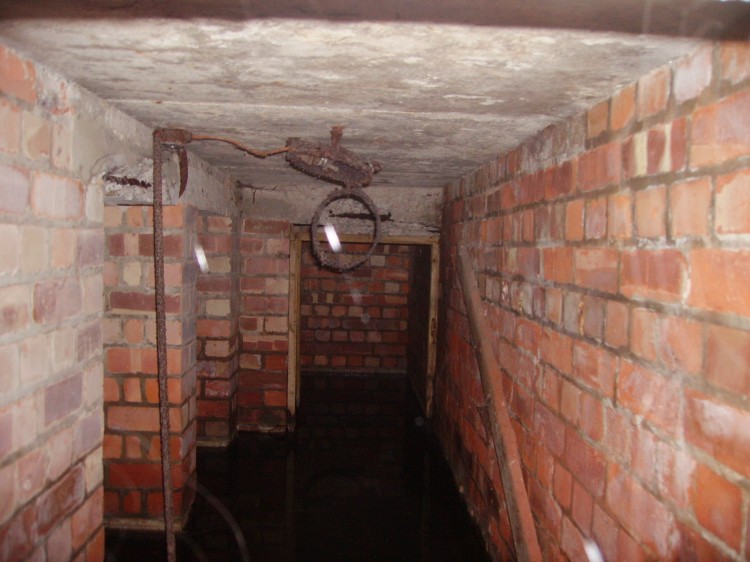
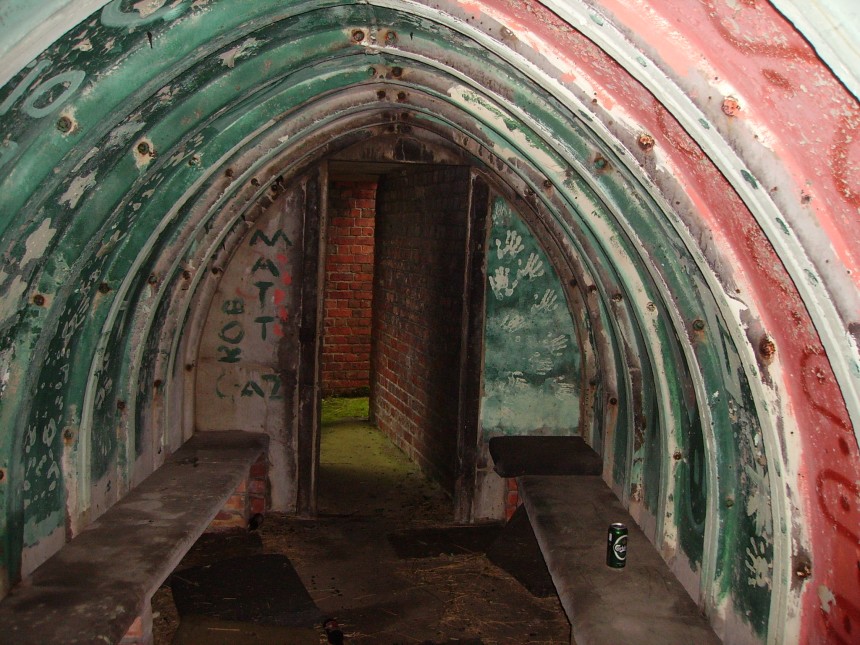
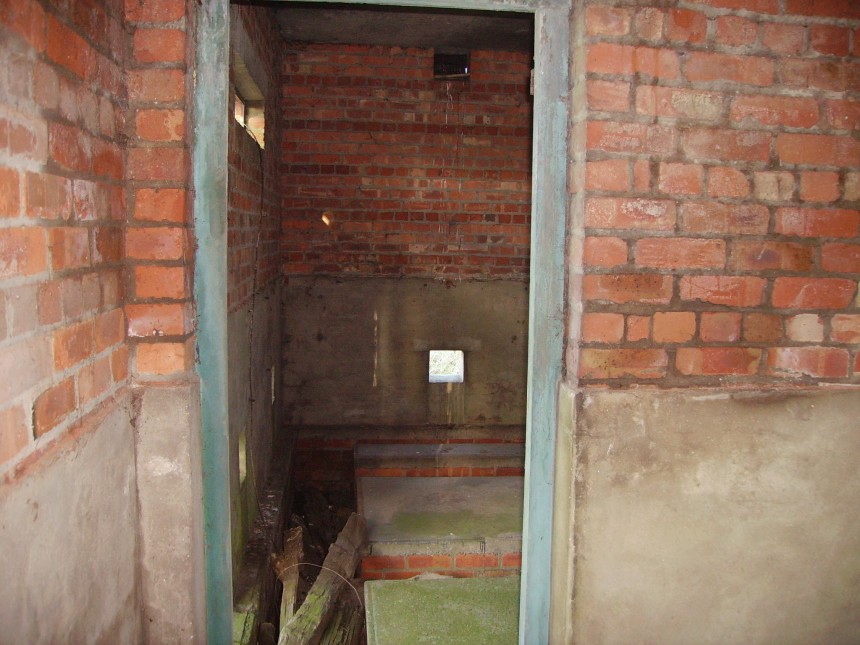
The 1st opening on the left is the 'runners' and messengers room. The 2nd opening on the left is the defence officers room. This room was the defence room and was used to coordinate the defence of the airfield. The opening at the end (facing you) is the (elsan) toilet room. You can still see the electrical conduit and bulkheads hanging from the ceiling.
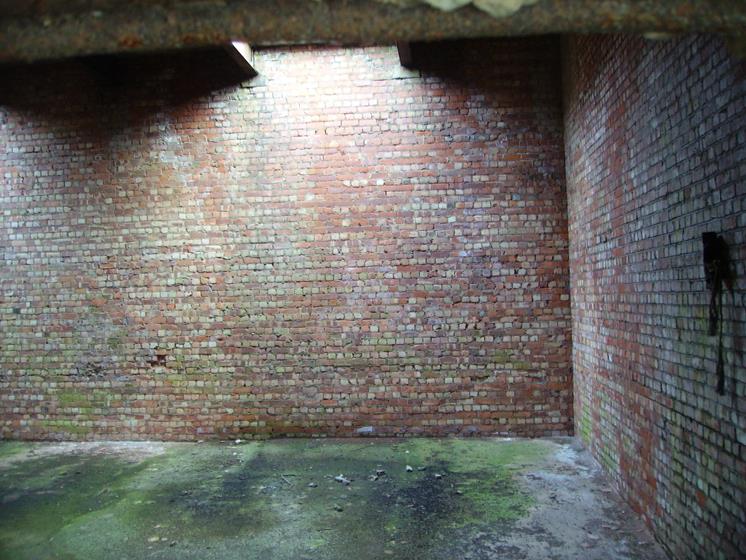
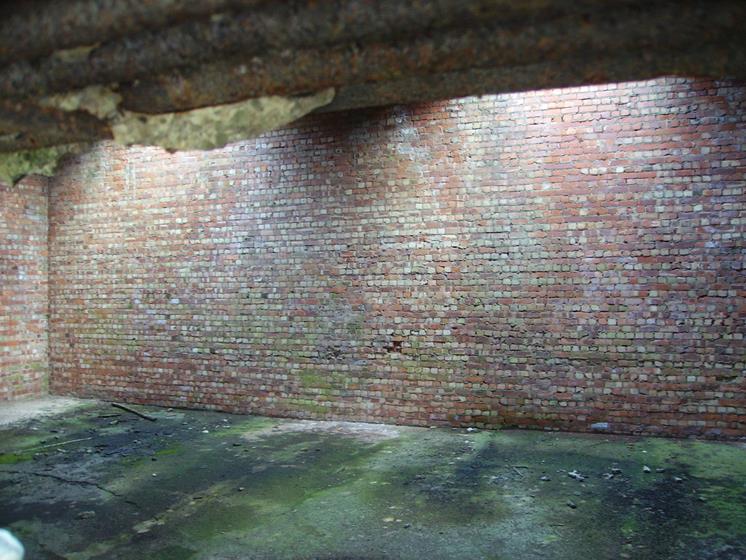
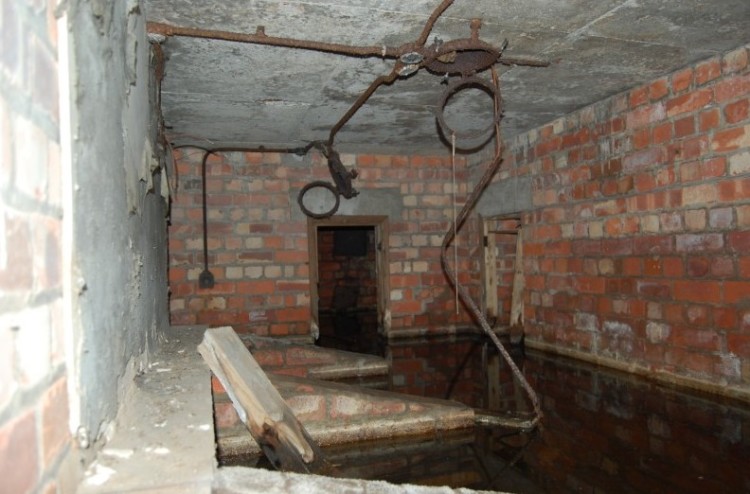
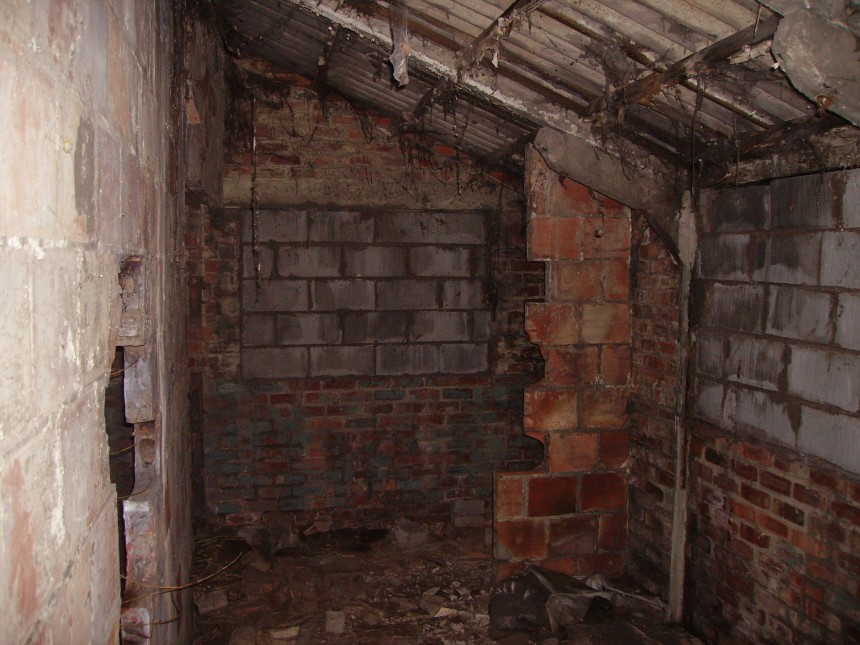
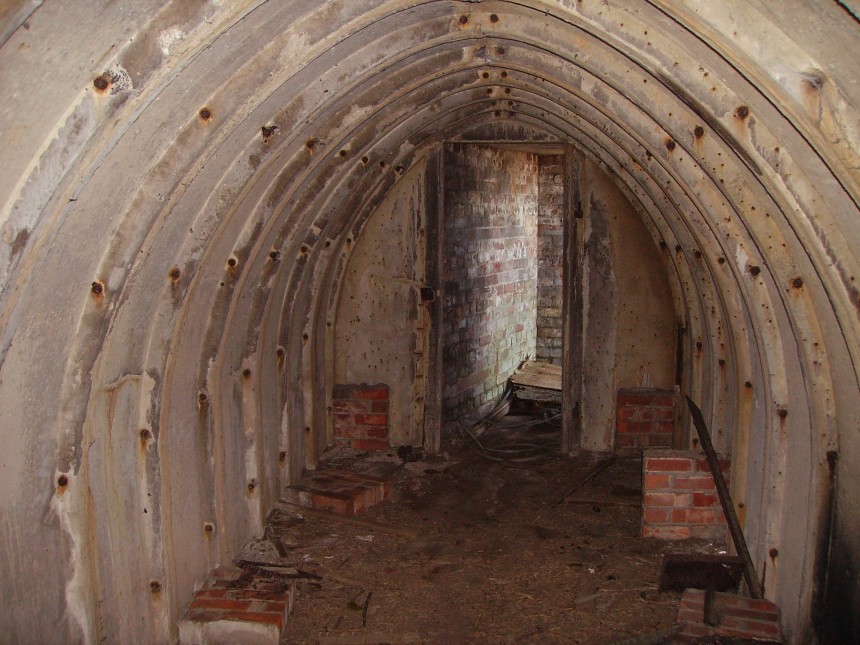
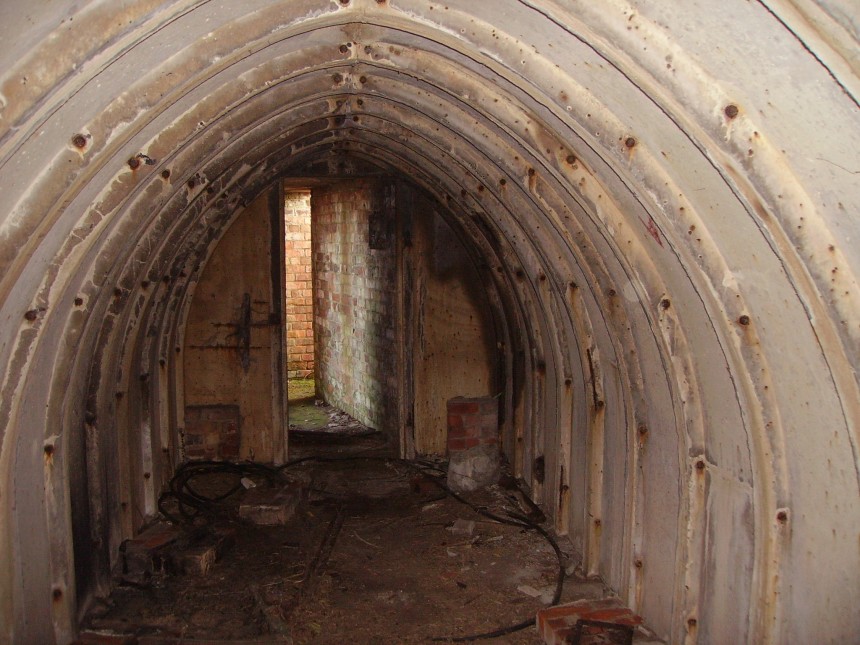
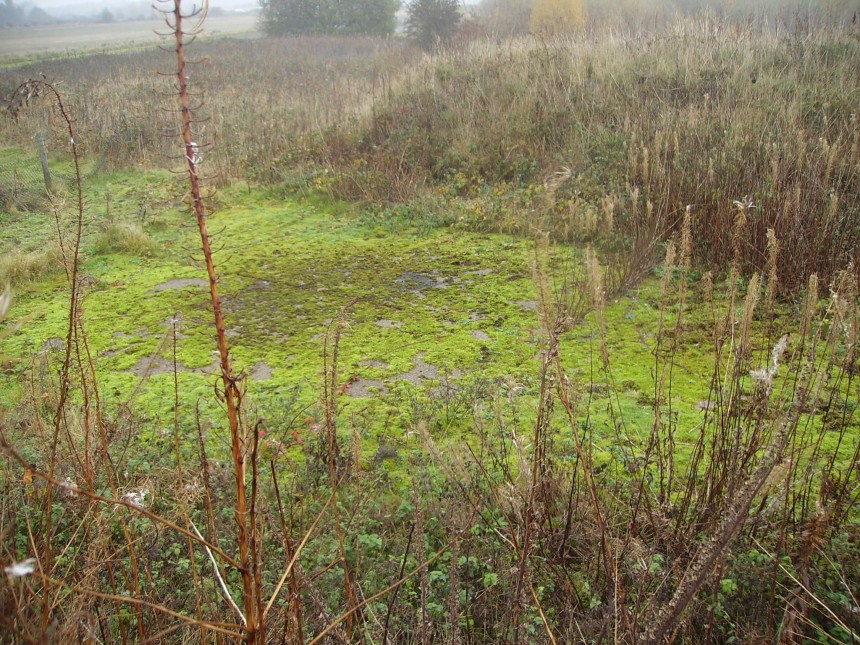
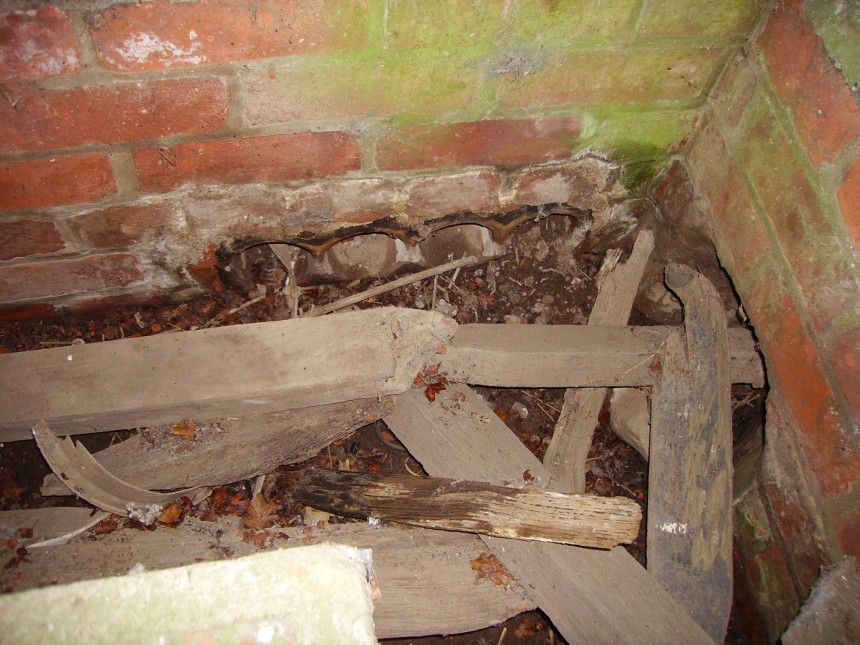
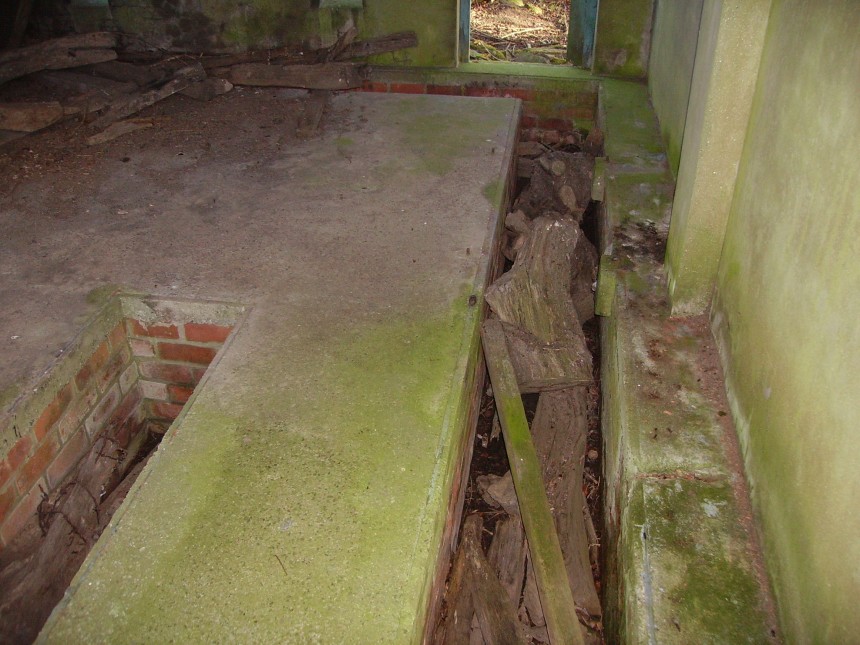
(Photo taken from the steps down from the observation room) The opening on the left (where you can see the steel conduit and light switch) is the main passageway (main passageway is photo above) and the opening in the centre of the photo is the messenger's and 'runners' room and the opening on the right is the PBX telephone/switchboard room. Almost all the rooms are flooded to about 3 feet when the photos were taken (25th of May 2014). The 3 sloping brick walls was the support for the plotting table. Hanging from the ceiling are the electrical steel conduits and what is left of the bulkhead light fittings.
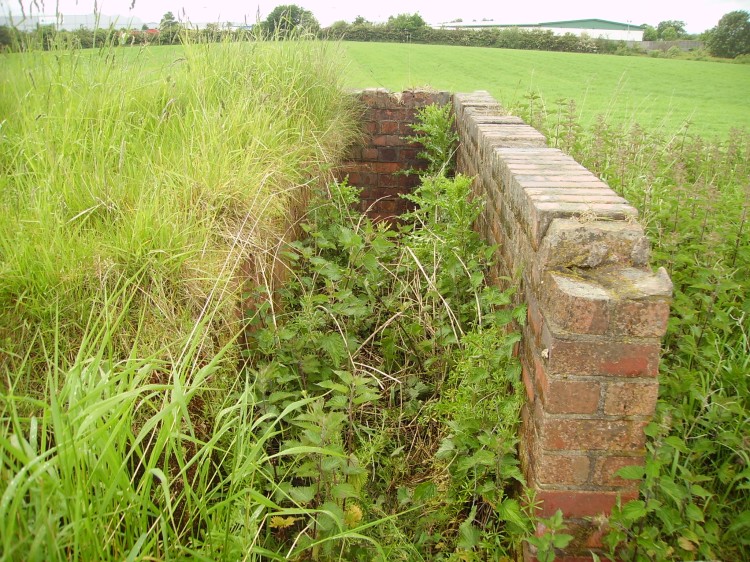
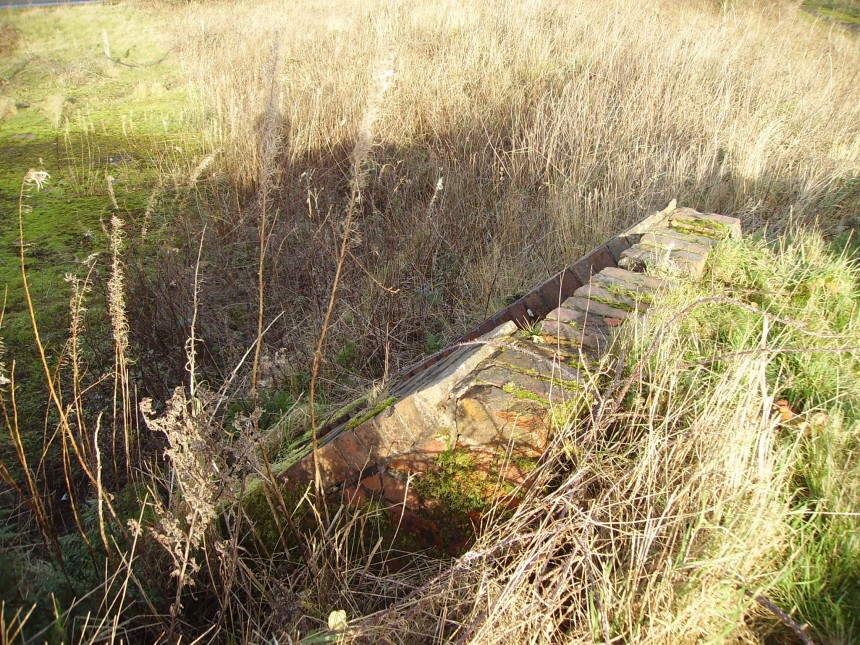
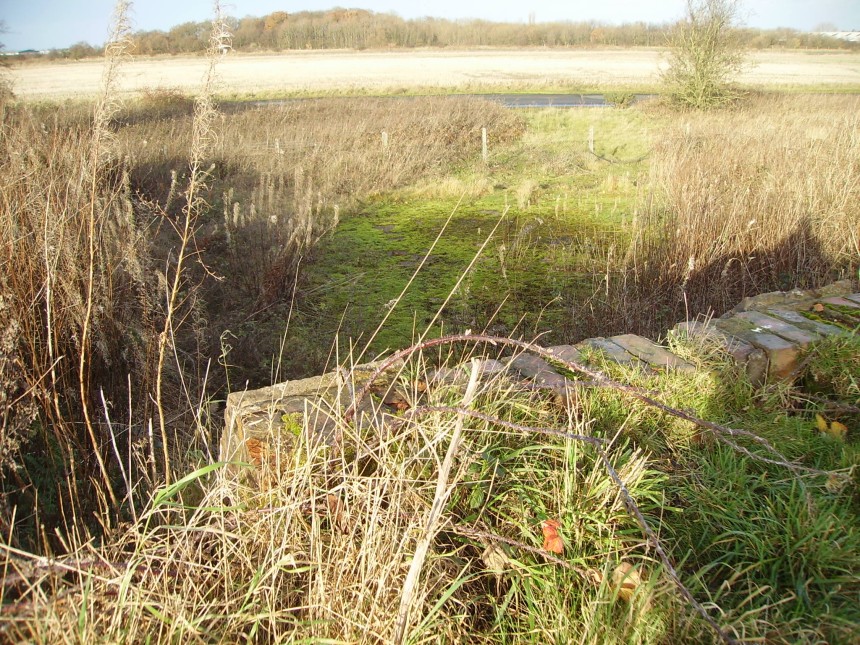
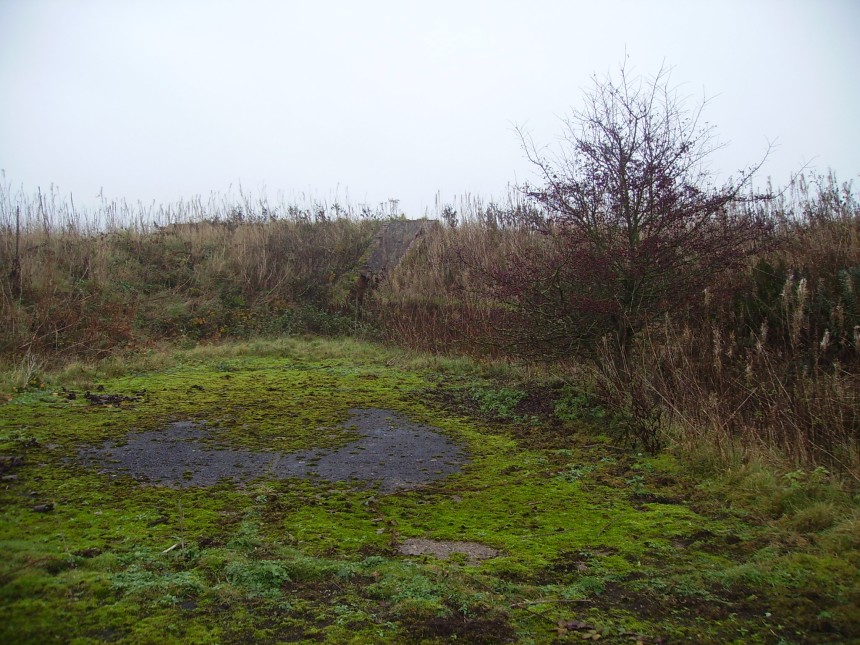
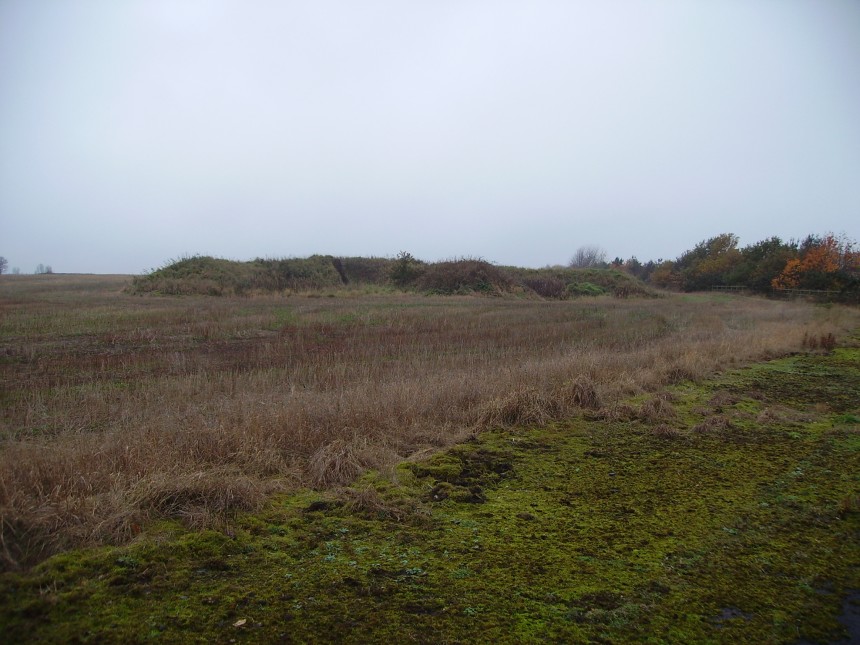
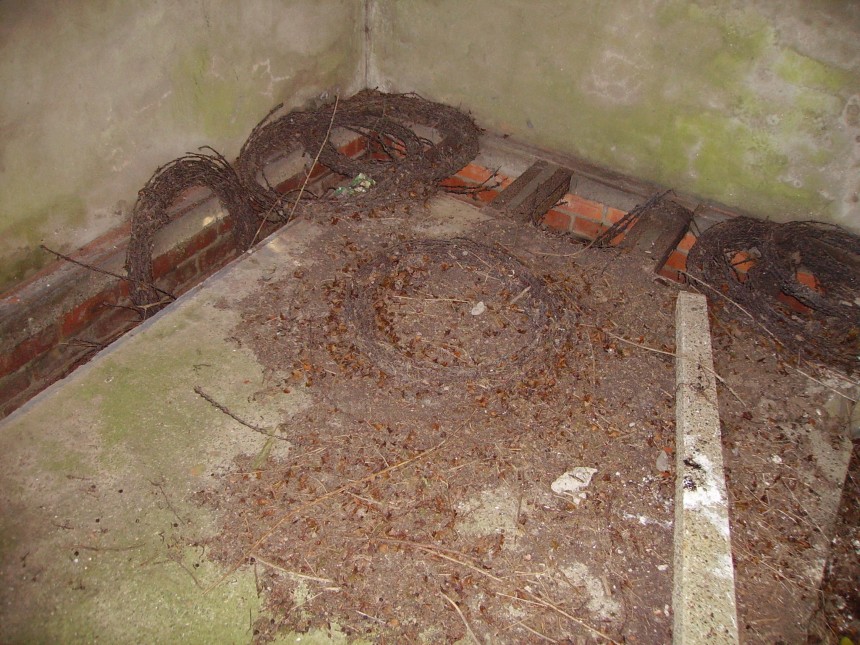
Concrete Coupler & 360 Degree Viewing Slit. The small concrete square on the left is the emergency exit.

Taken From Inside The Observation Room

Would Have Originally Been Fitted With a Steel Hatch
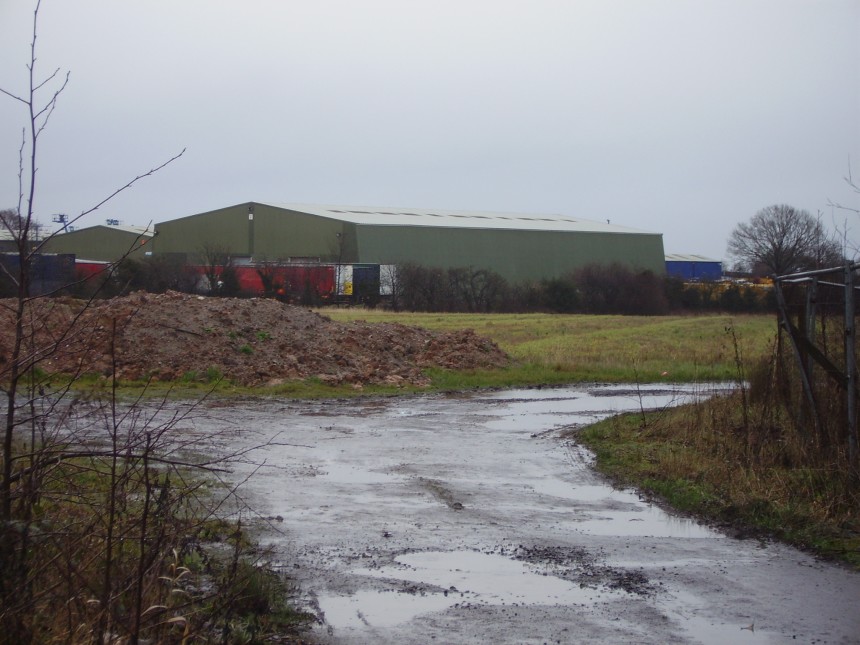
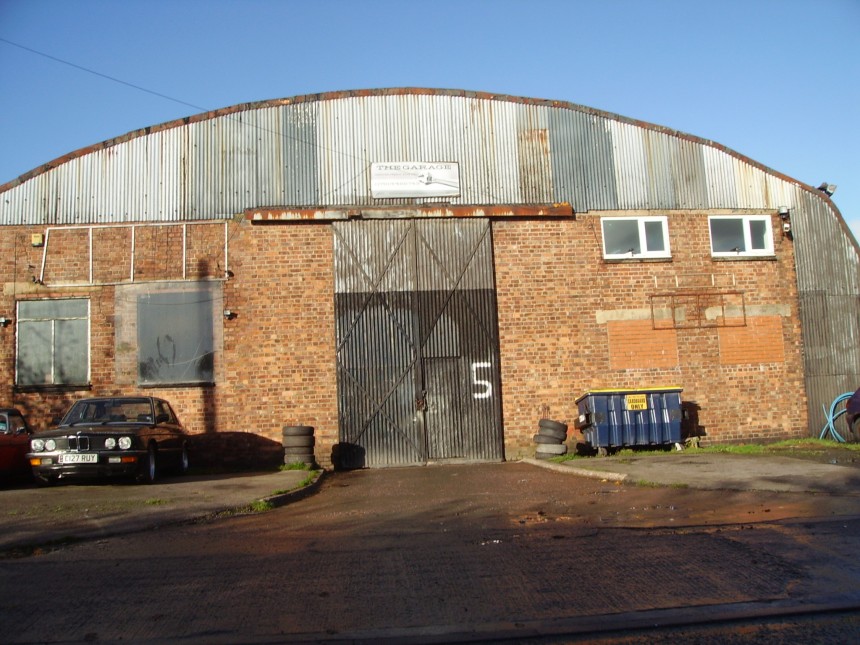
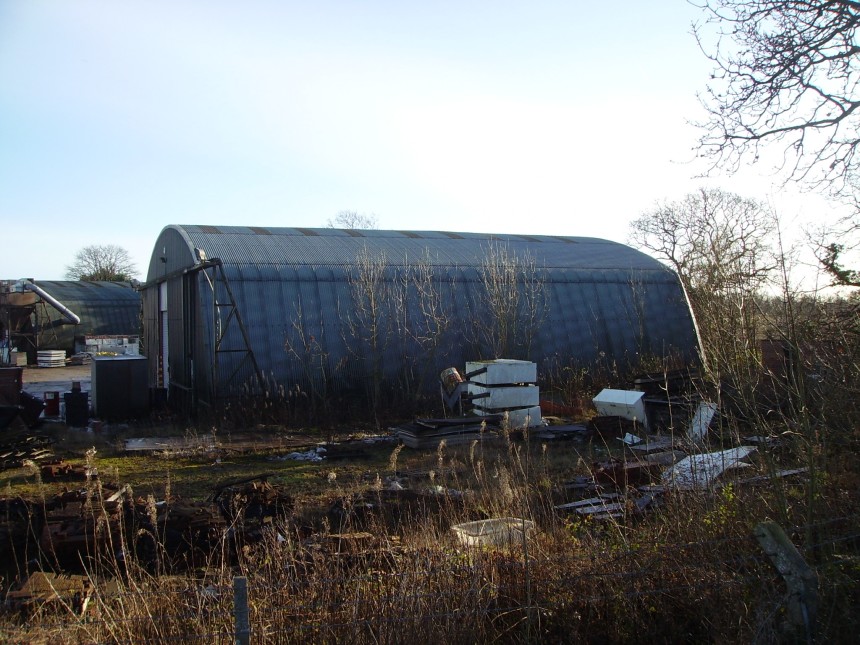
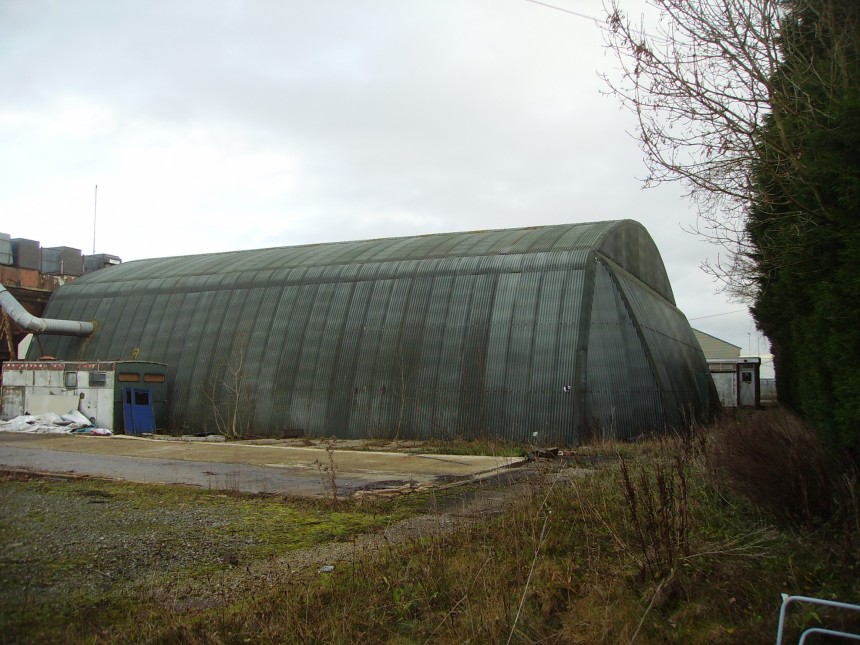
Aircraft manufacturers Fairey Aviation had 2 A1 aircraft maintenance hangars on the North East edge of the airfield for modification, repair and flight testing of Barracuda's, Firefly's & Fulmar's. 1 of the 2 re-clad A1 hangars (photo 2013) built to drawing number 454/43
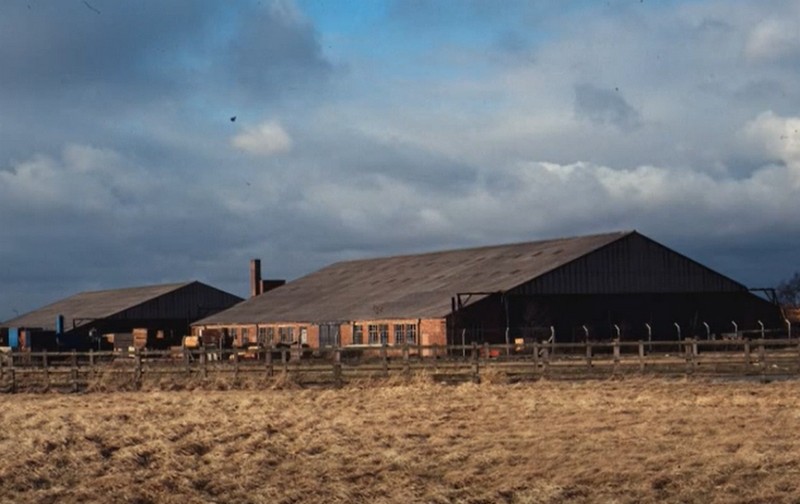
the Fairey Aviation Hangars in 1956
The photo was taken from the extended runway 28
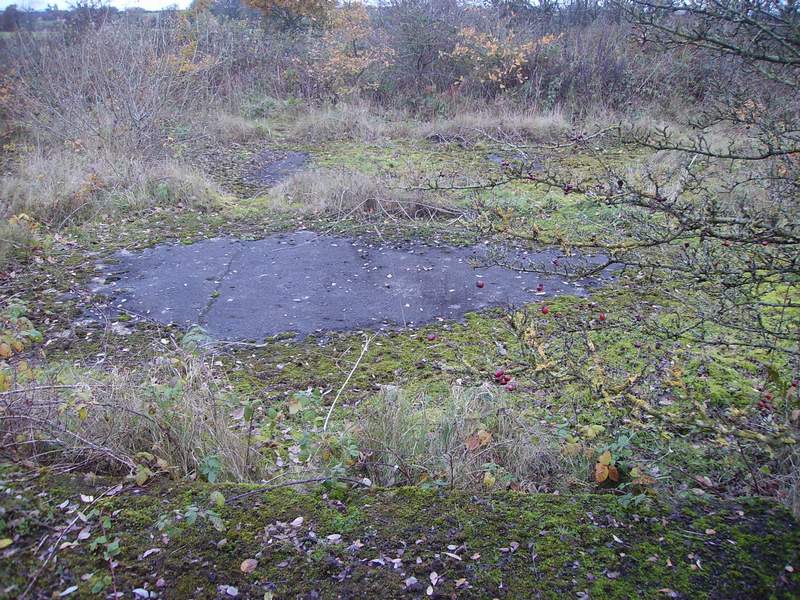
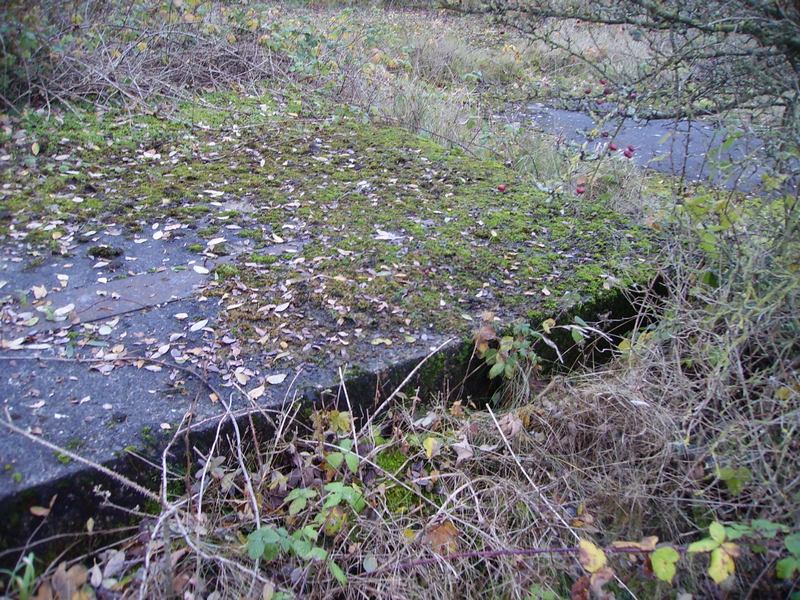
(Concrete Base) Drawing number 10936/41 The compass swinging platform was used to accurately adjust each aircraft magnetic compass
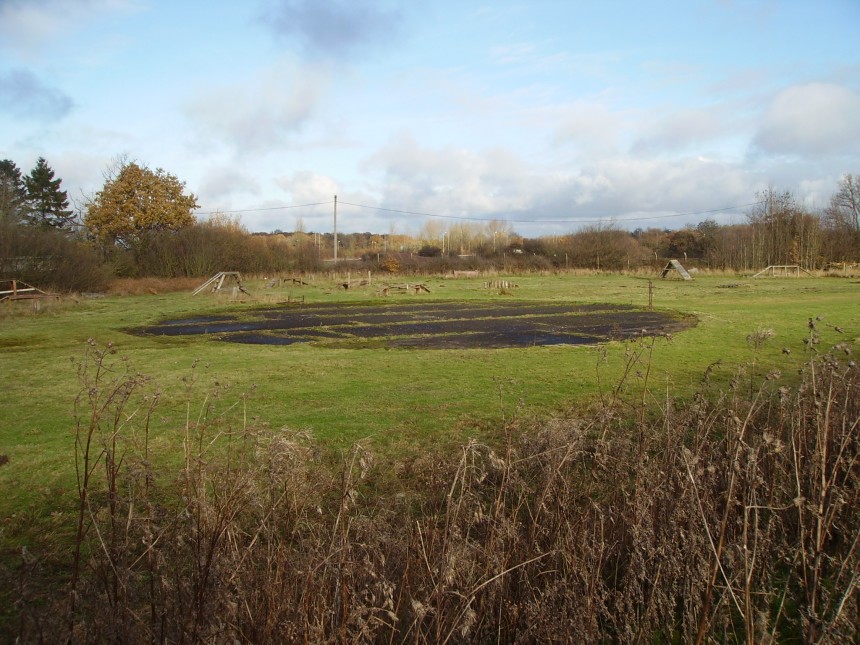
The compass swinging platform was to adjust the aircraft compass by swinging the aircraft on a rotating platform. An aircraft fitter sitting in the cockpit would adjust the compass to North heading ( 0 degrees) East (90 degrees) South (180 degrees) & West (270 degrees headings). The aircraft fitter would check the magnetic compass by adjusting the compass compensator screws with a non magnetic screwdriver. It had a well in the centre and a circular wooden platform covering it. A set of wheels ran in the well and this enabled the platform to act as a turntable. The aircraft sat on top of the turntable and was turned to the compass points. Compass Turning Platform from a Distance

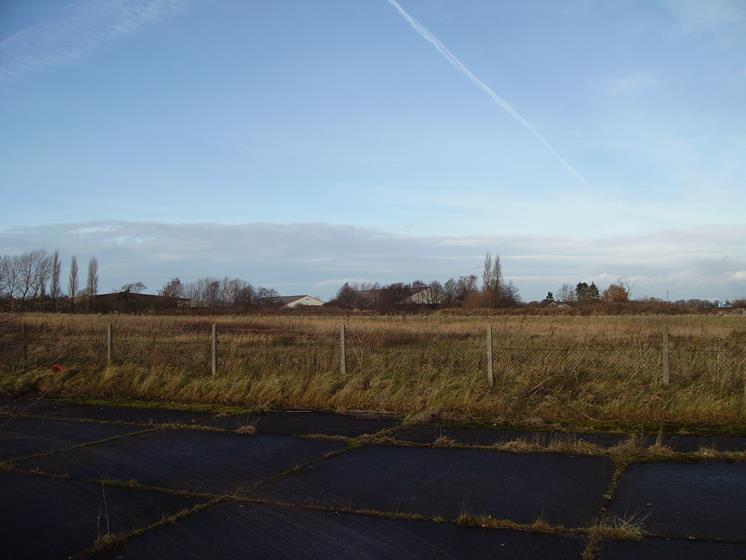
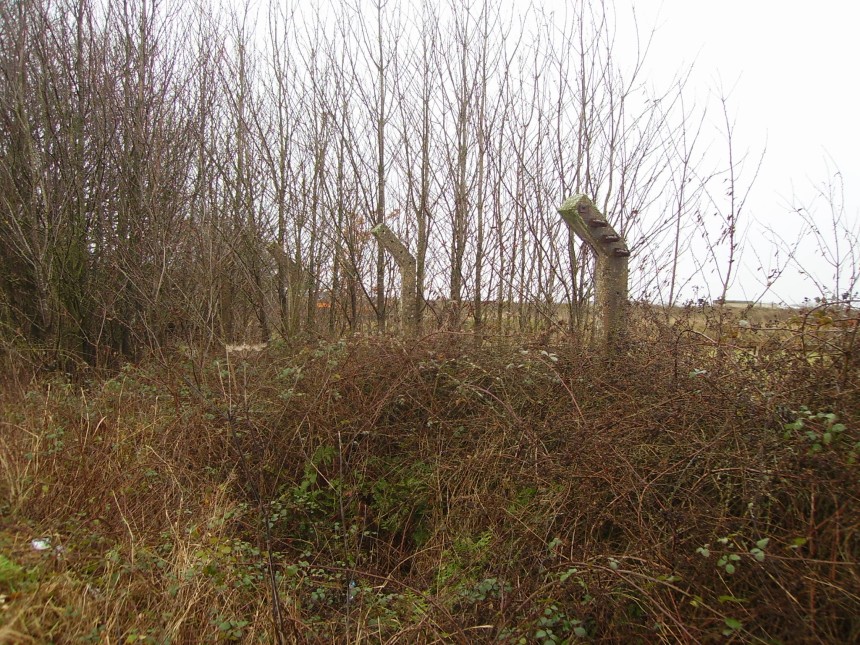
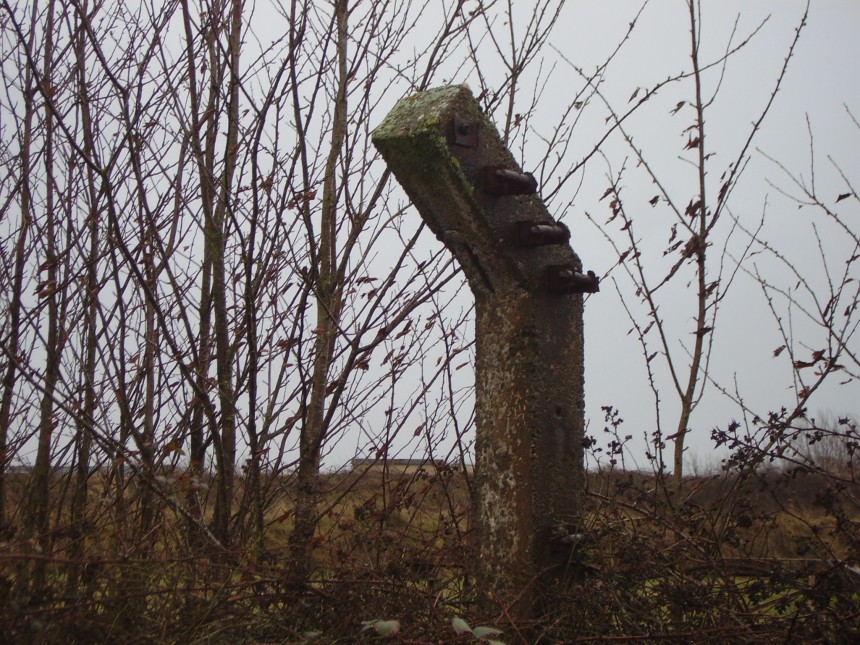
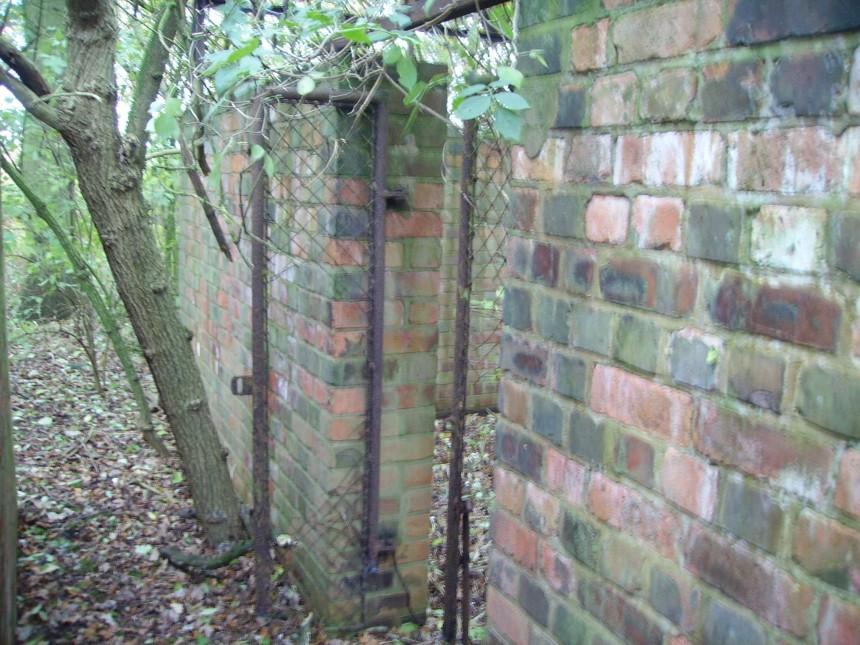
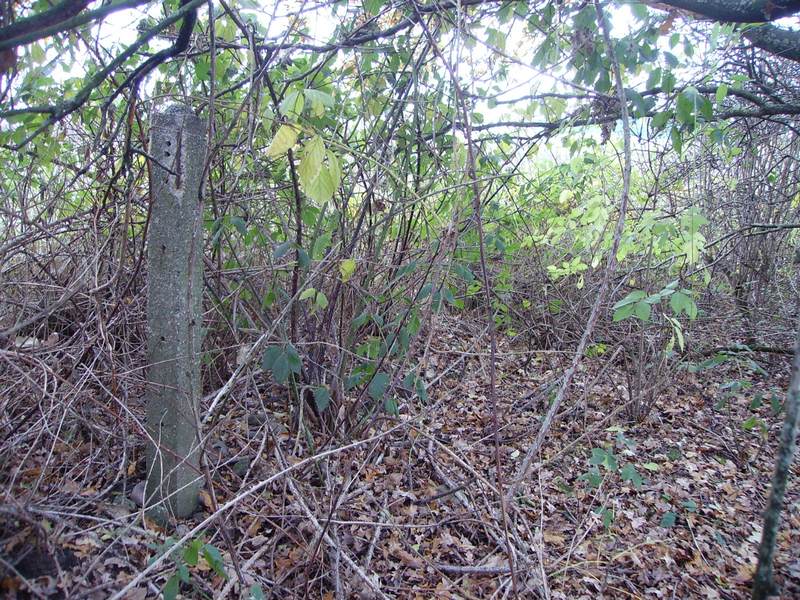
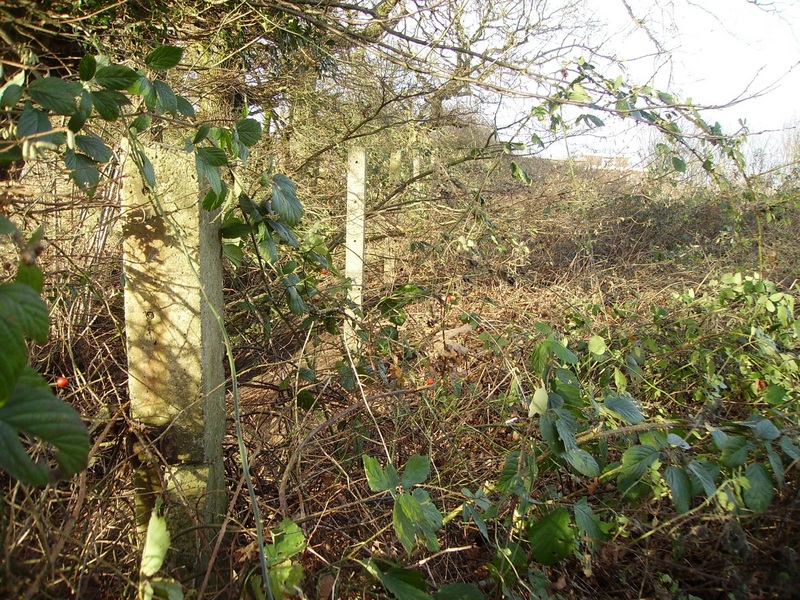
The thickest post (in the foreground) has 4 ratchet strainers to tension the barbed wire through the other posts. These thickest posts are at each corner and are also spaced out at regular intervals along the length of the actual fence itself and wire mesh would have been fixed on the front (the face that is showing).
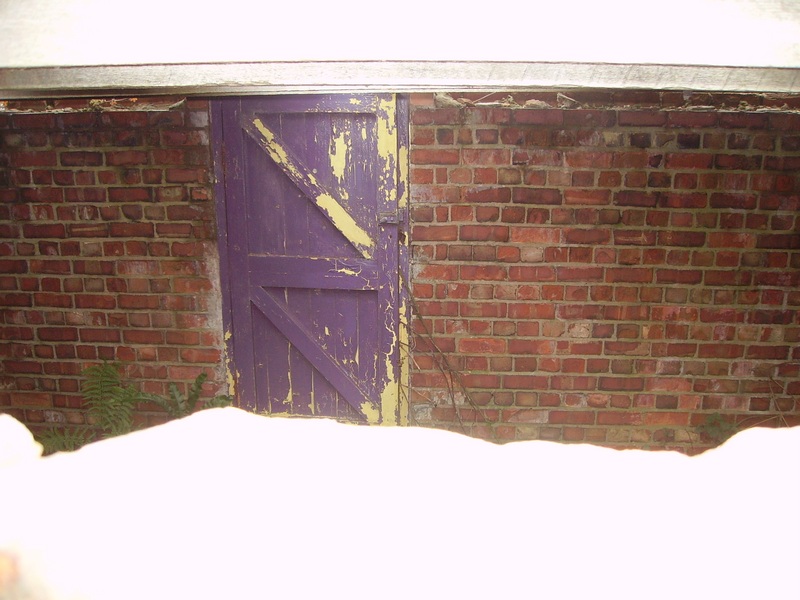
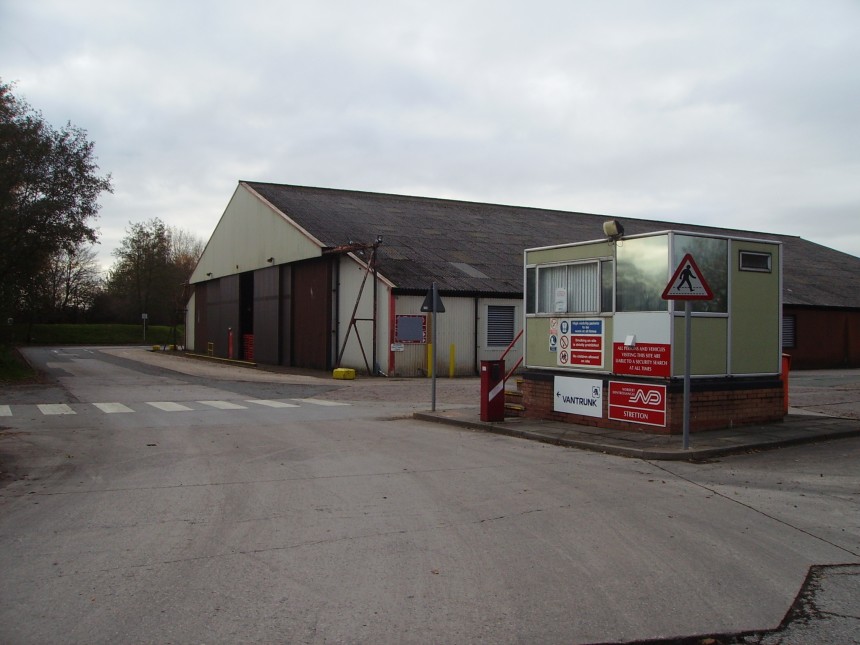
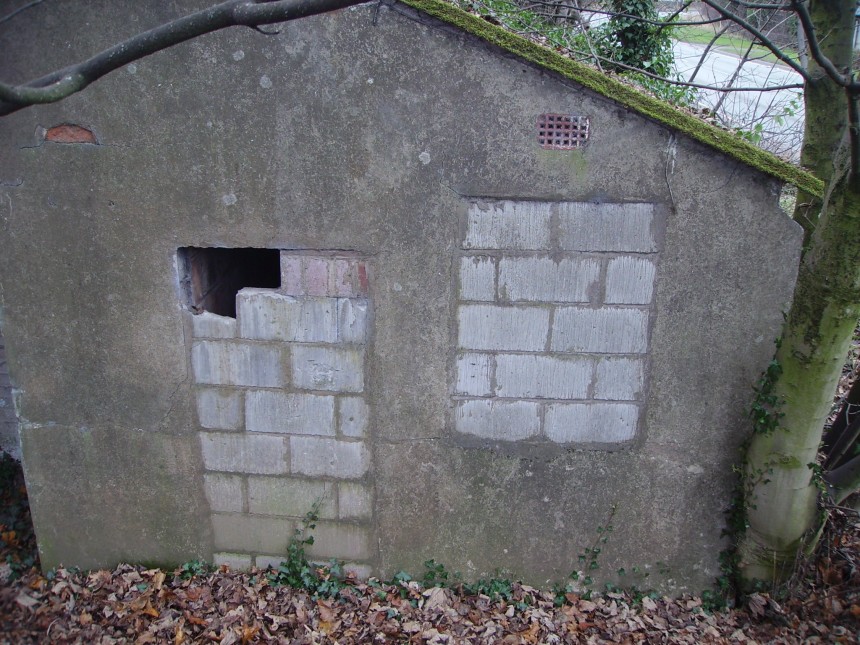
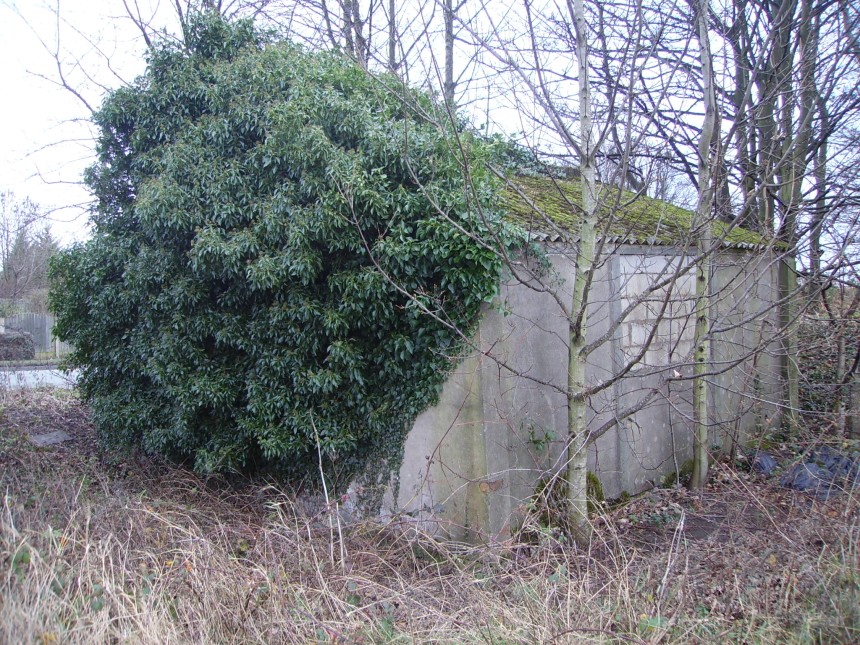
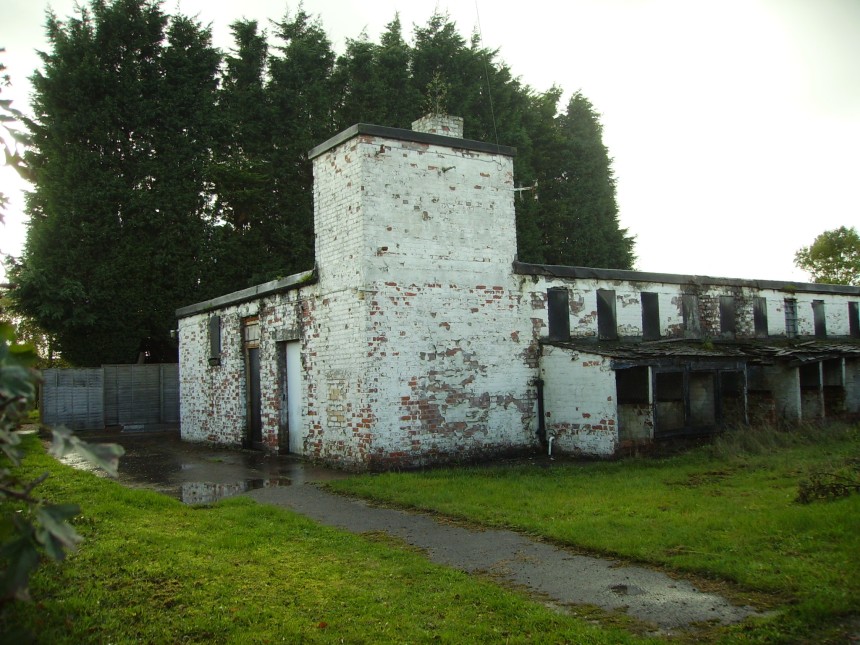
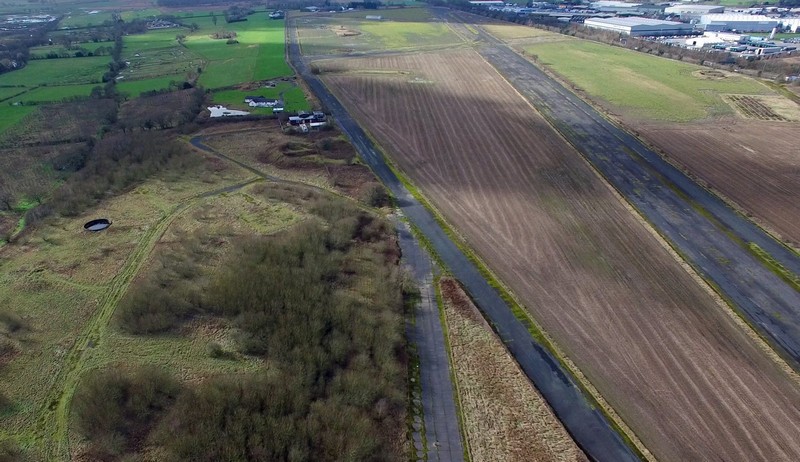
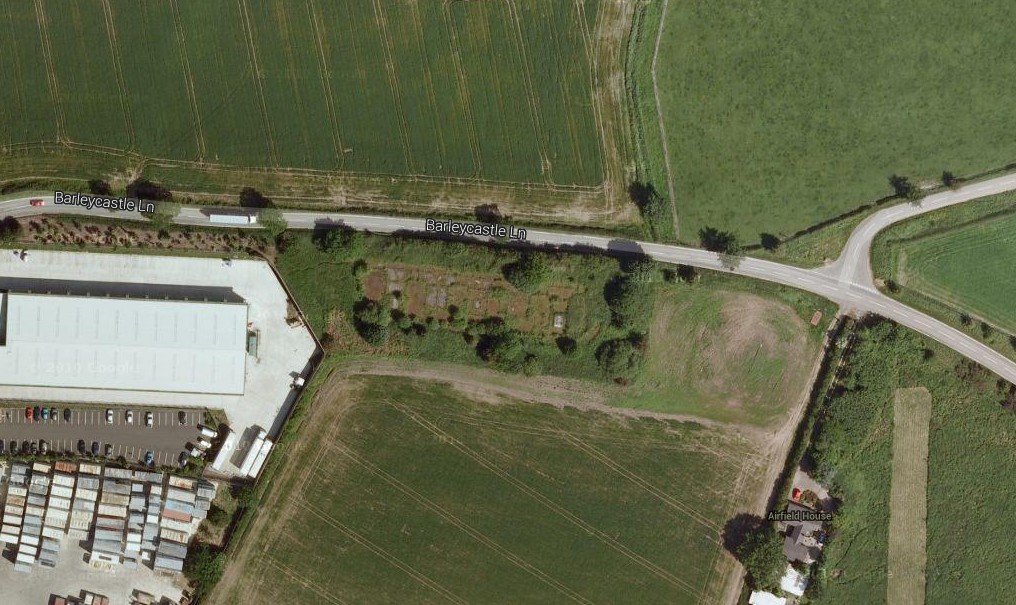
In 1944 an aircraft maintenance yard was built on the North side of Barleycastle Lane and 4 large workshops and several smaller hangers were built. To gain access from the airfield to the air maintenance yard (AMY) a taxi way was constructed crossing Barleycastle Lane. At the crossing a police post building was built which was manned by Royal Naval Police to stop the public traffic and allow the movement of aircraft and transport to cross Barleycastle Lane. The police post was constructed of brick with an outside rendered finish. The roof pitch is constructed of asbestos corrugated roofing sheets fixed to steel rafters.
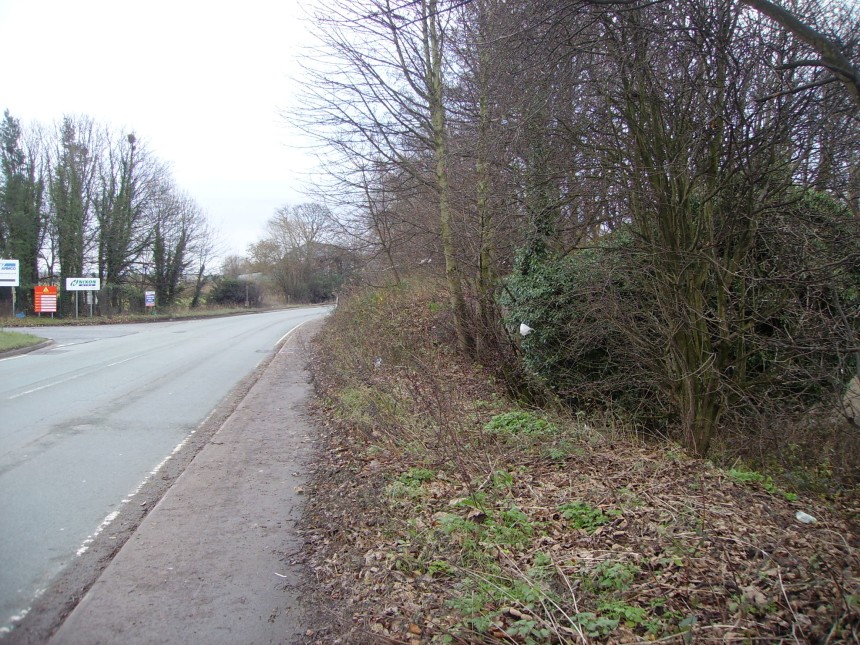
The airfield taxi track came across the front of the lodge from left to right of the picture.

Photo at the Top Left of the Photo

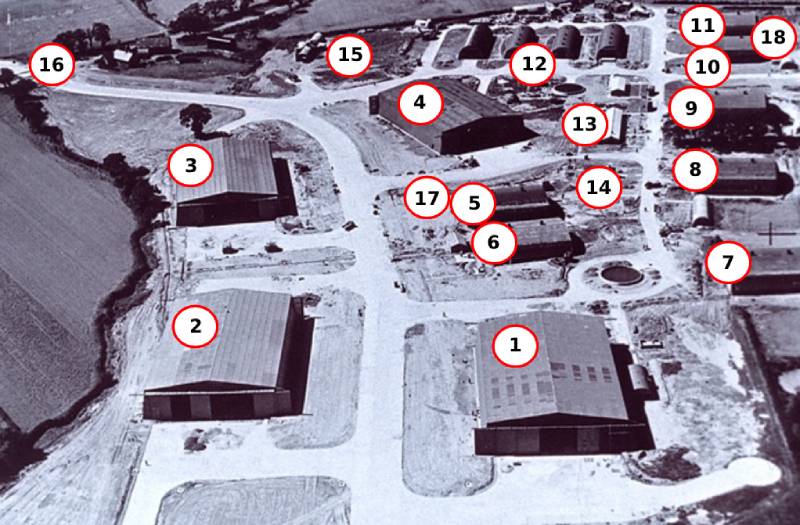
1/Aircraft Repair Section C/ Venom 2 Repair and Dispatch unit. 2/Aircraft Repair Section B/ Wyvern Repair and Dispatch unit 3/Aircraft Repair Section D/ Venom 1 Repair and Dispatch unit 4/Aircraft Repair Section A 5/ Air Ordnance Section 6/ Component Repair- Shop 7/ Dope Component-Shop 8/ Electrical and Instruments Shop 9 Woodwork Shop 10/ Engine Fitters Shop 11/ Metal Shop 12/ 4 Rows of stores Buildings 13/ Air Maintenance Control Office 14/ Battery Charging Building 15/ Fuel Bowser Section 16/ Royal Naval Police Lodge and Road Crossing 17/ Sewage Pump House 18/ Not shown on the photo above, behind this hangar area an Oxygen Charging Bay, Auxiliary Boiler House, and Engine Holding unit Hangar were Constructed.
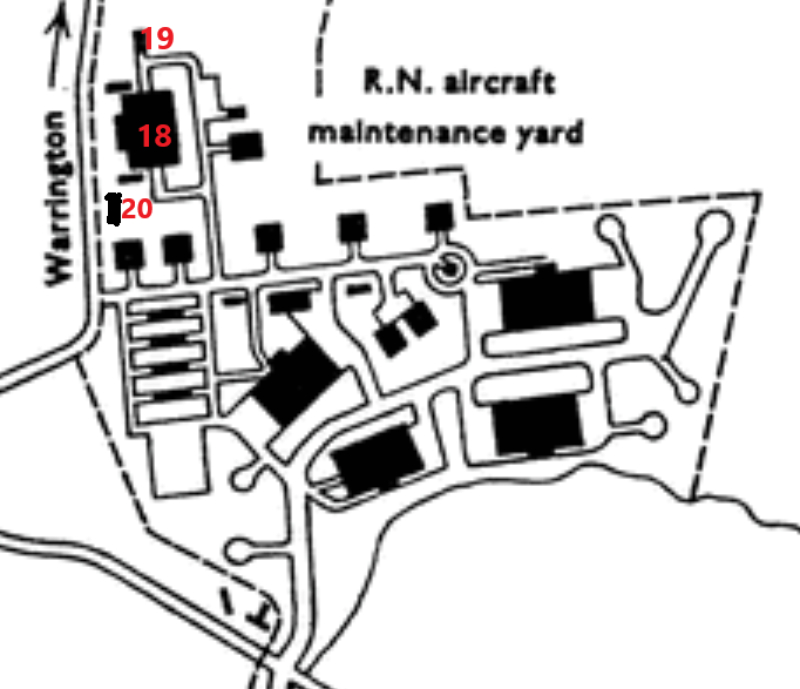
19 Oxygen Charging Bay 20 Auxiliary Boiler House The Ceiling of The Police Post Reception Area
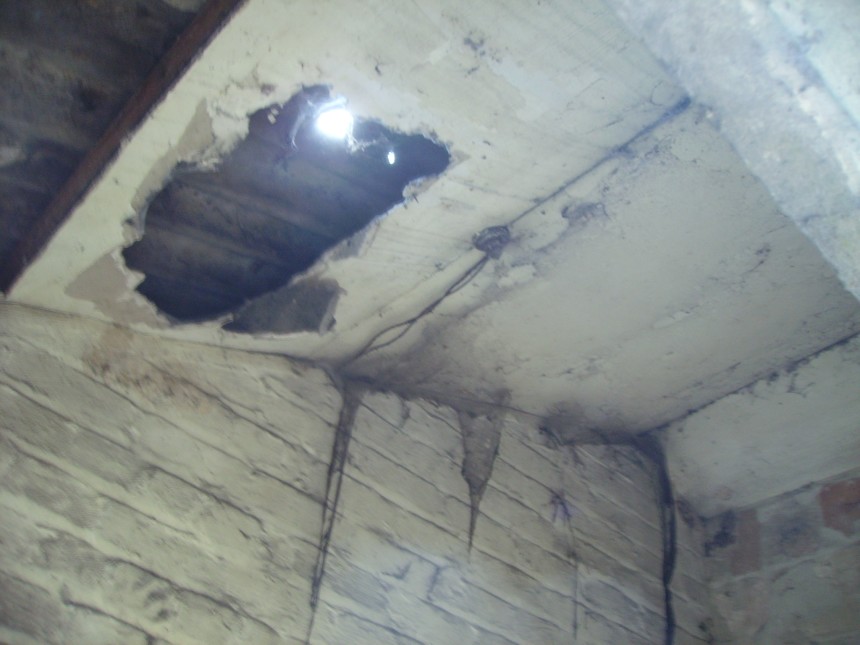
(When looking from the reception entrance)
Through the Hole that You Can See in the Modern Blockwork to The Right of the Photo

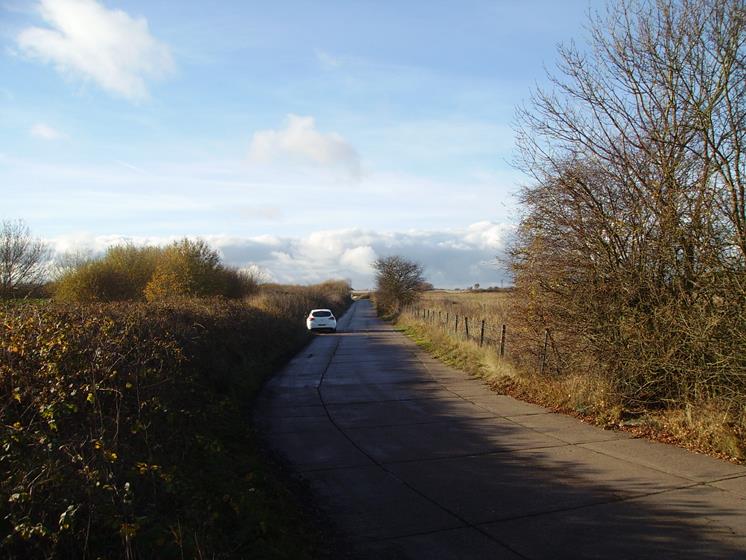
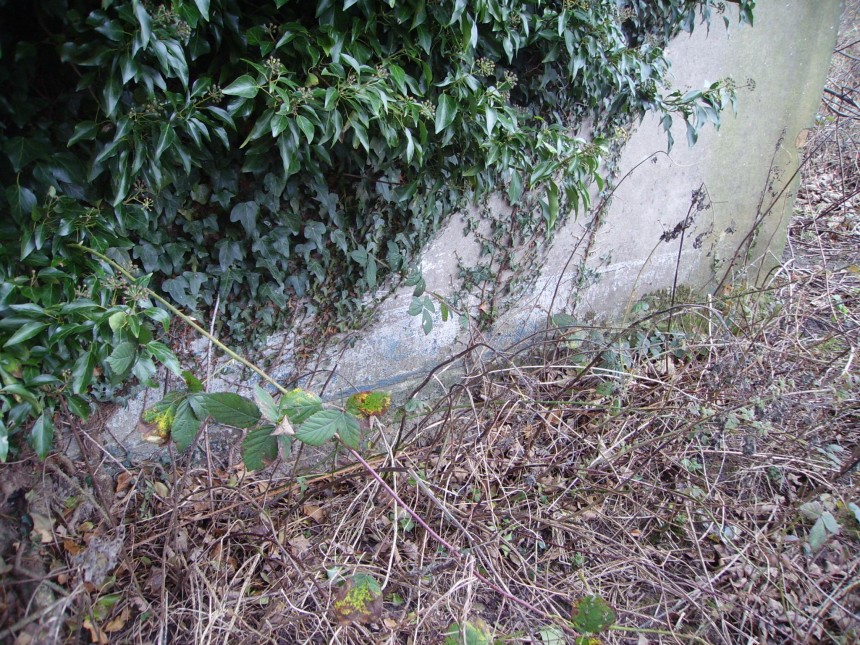
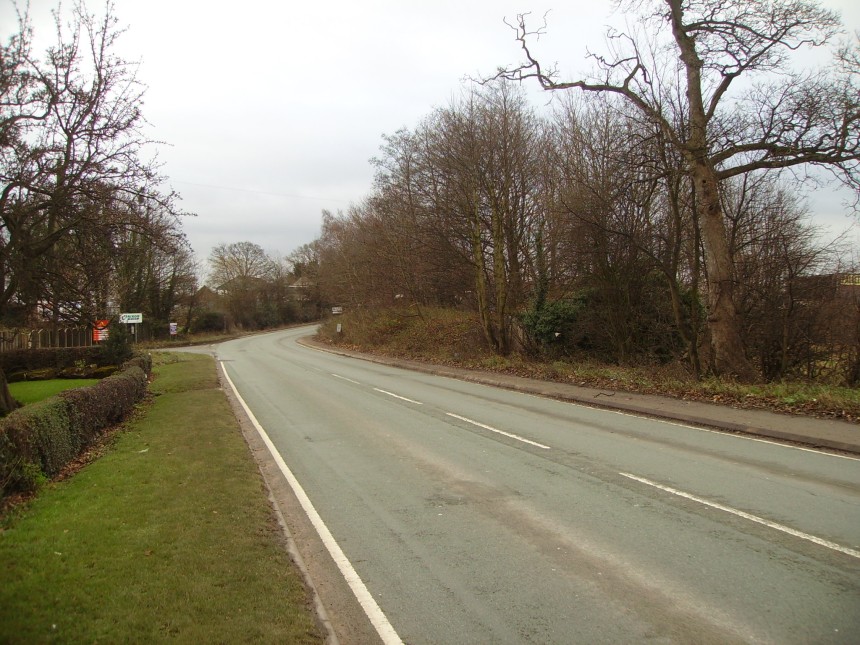
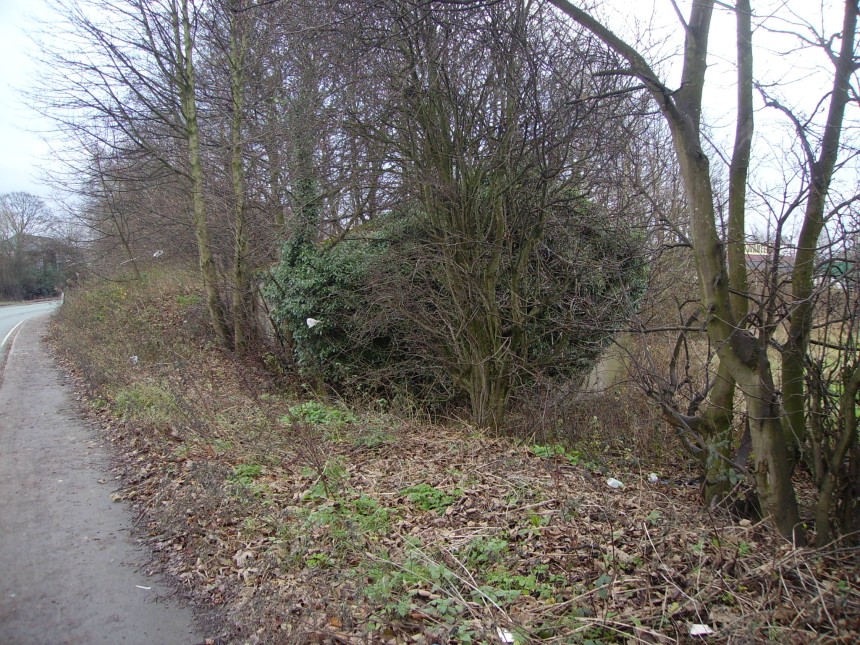
Barleycastle Lane. The Police Post is Just on the Right Behind the Large Tree. You Can See the Dark Green Bush that Grows on the Back of the Post as you have Just Seen in a Previous Photo (above). The road junction to the left is the entrance into the aircraft maintenance yard and the taxi track went from right to left across the front of the lodge from the airfield right across Barleycastle Lane and into the aircraft maintenance yard.
This was the PABX Telephone Exchange for the Airfield & is on the South side of Arley Rd almost Next to Appleton Thorn Primary School. The building contained the PABX switchboard office with telegraphists, a yeoman of signals & a W.R.N.S cipher officer. It was Last Being used as a Cattery, but now it appears to be Disused.
(Pentag hangar with sloping sides and the other is a callender hamilton hanger)

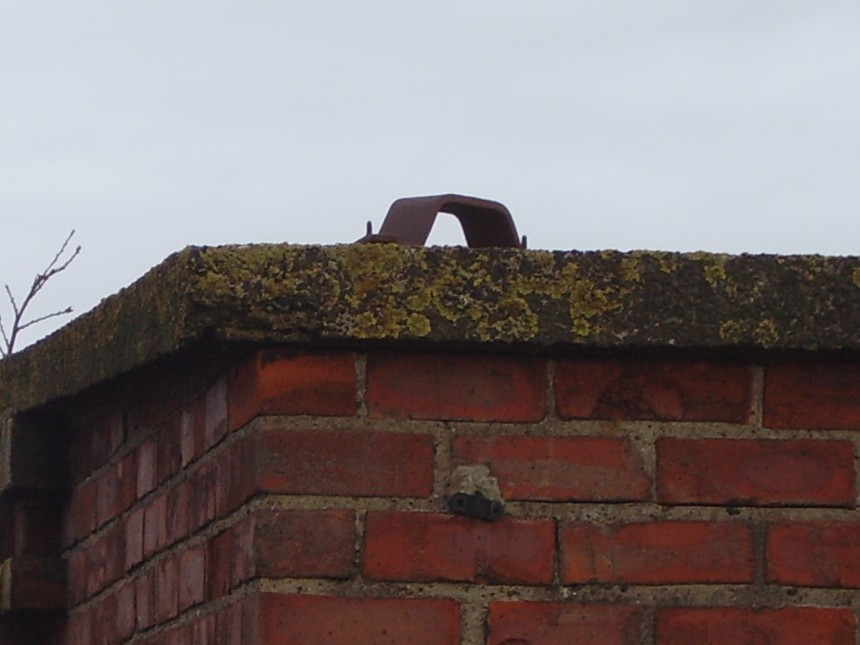

Roof (above) are Fixings For The 2 Lightning Conductors. Note The 2 Lines going Down The Walls Had Lightning Conductor Ground Cables Which Extended From The 2 Lightning Conductor Brackets To The Ground.
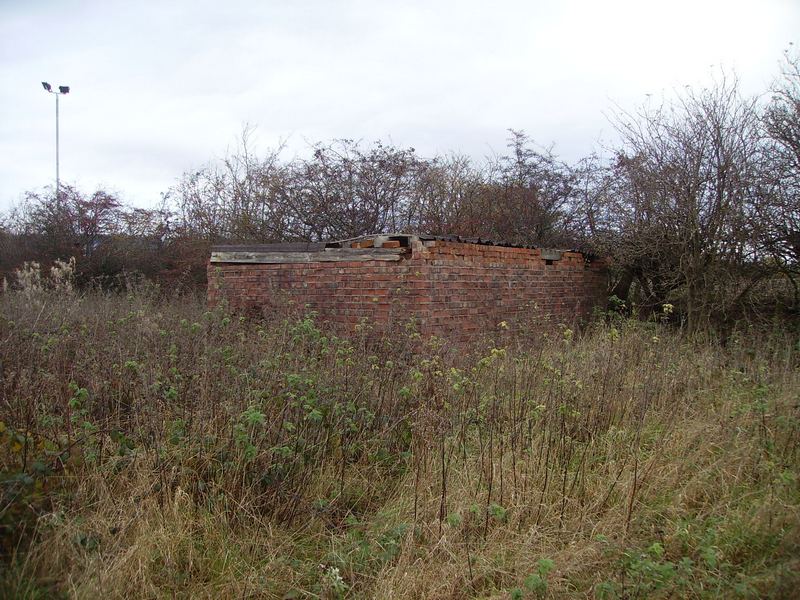
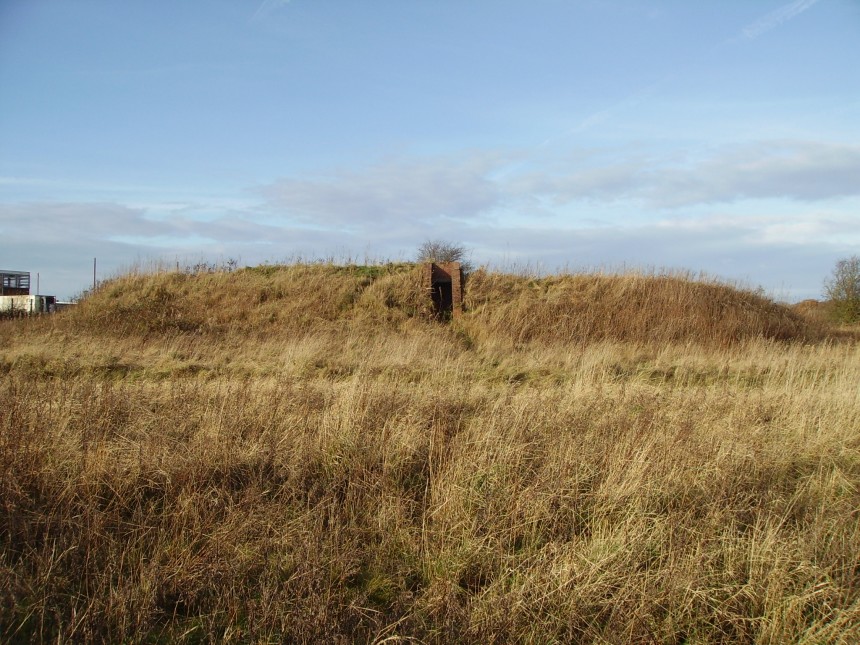
There were numerous fighter pens around the airfield at Stretton. These fighter pens were there to protect the flight & ground crews in case of enemy air raids during WW2. There are 2 that still exist today (as of November 2013 when photos were taken) and these are still accessible today. The layout consisted of 3 arms outlined with brick dwarf walls with retaining earthwork traverses to surround both aircraft. At the rear of the pen is a stanton type air raid shelter for flight & ground crews with access from either bay. Also an emergency exit sited at the rear of the shelter
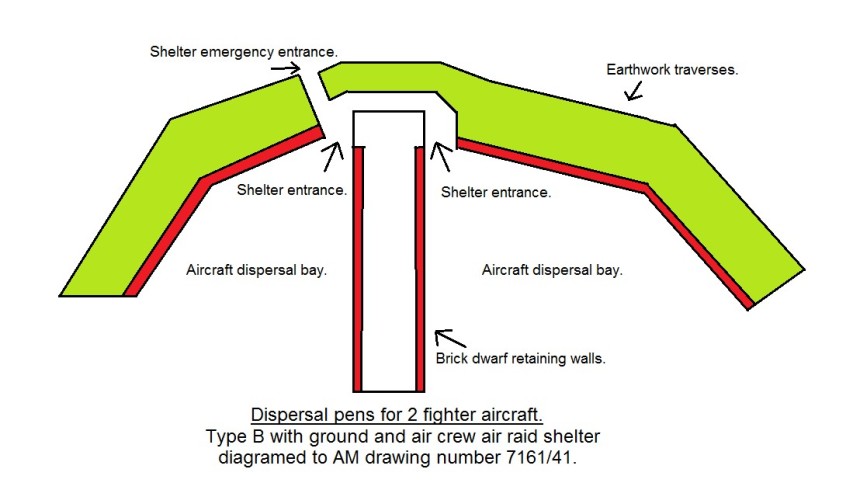
2 Aircraft Type 'B' Building Drawing No. 7161/41
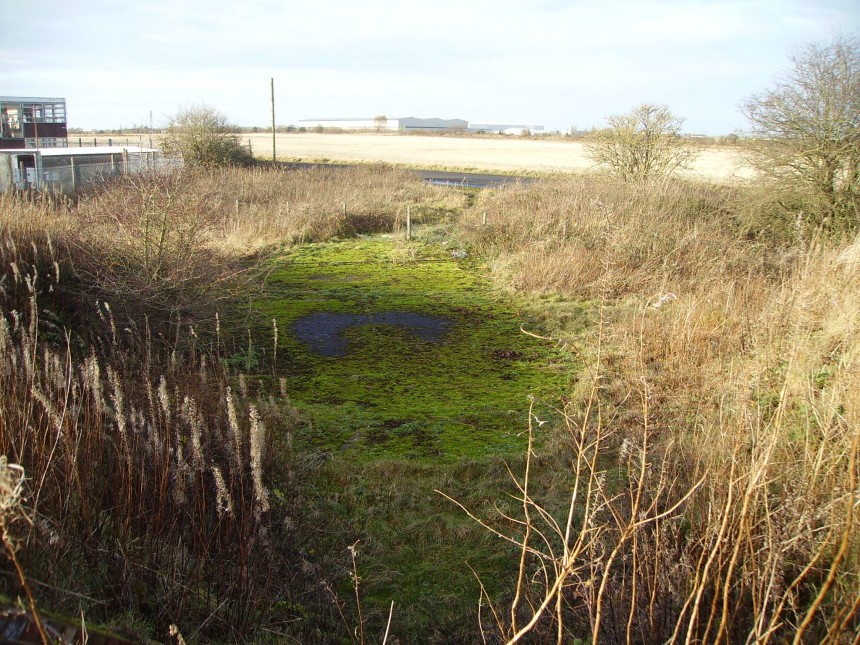
Looking Down onto the Aircraft Dispersal Bay (Note: The South taxi way can be seen just beyond the aircraft dispersal bay)
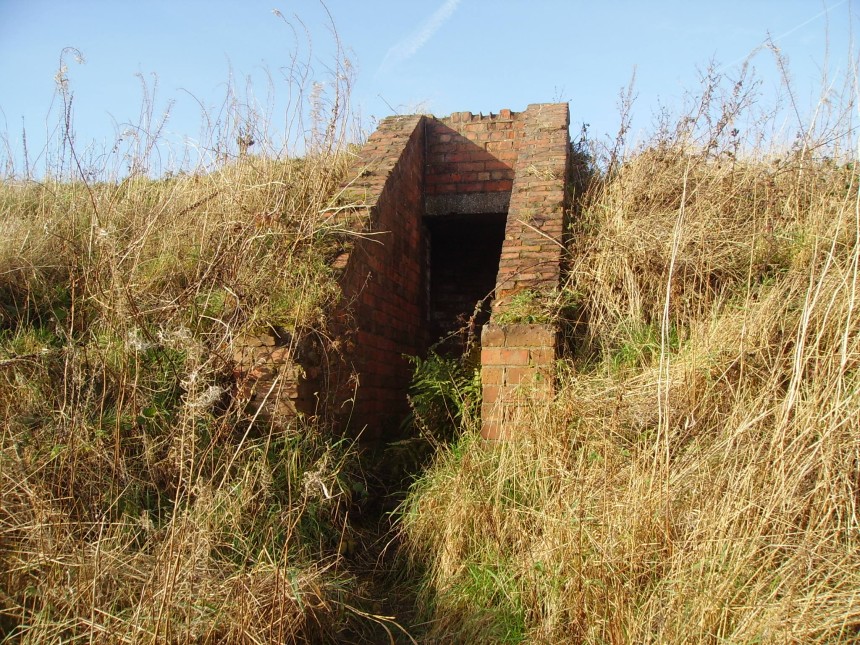
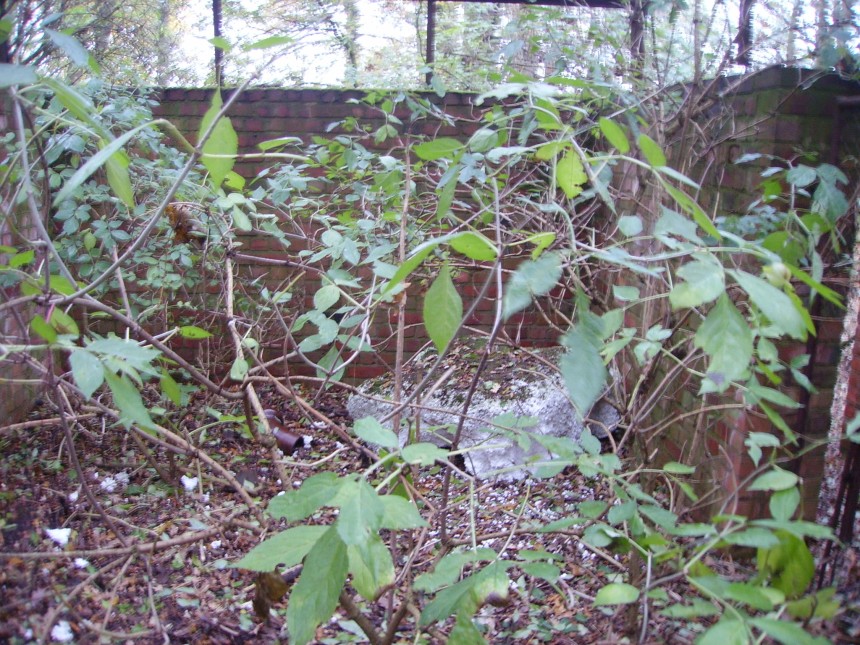
The Ground & Aircrew Would Use During an Air Attack. Photo Taken From the Aircraft Dispersal Bay Showing the Brick Dwarf Wall (on left) With Retaining Earthwork Traverses Above.
Shell Offices and Observation Buildings can be Seen on the Left)
Dispersal Bay Exit (Note: The electrical switched fuse)
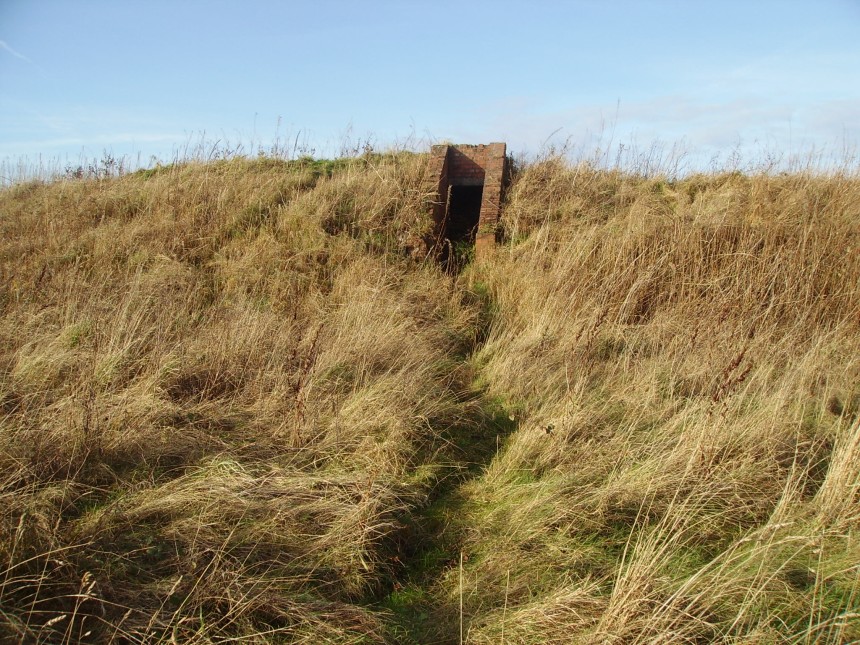
Bay Entrance of the South Fighter Pens Air Raid Shelter

Aircraft Dispersal Bay (turn right at the doorway) (Note: The brick supports of the seating can clearly be still be seen)
you Can See Leads to the Emergency Exit (turn right at the doorway) & The Aircraft Dispersal Bay (turn left at the doorway)
These North Fighter Pens are situated quite near to the M56 and are also next to the North East Taxiway.
the right hand side dispersal entrance.
Note the original seating still exists as of November 2013
with Aircraft Dispersal Bay in Foreground
with the Aircraft Dispersal Bay in the Foreground
Note: In the Foreground is the Earth Traverse Banking that Separates the Left & Right Aircraft Dispersal Bays.

Note: The Brick Dwarf Wall & The Earth Traverse Banking. Also in the Foreground to the left is the Aircraft Dispersal Bay.

The ADI Block is opposite the aviation fuel inspection apron next to the North East taxi way in the wooded area.
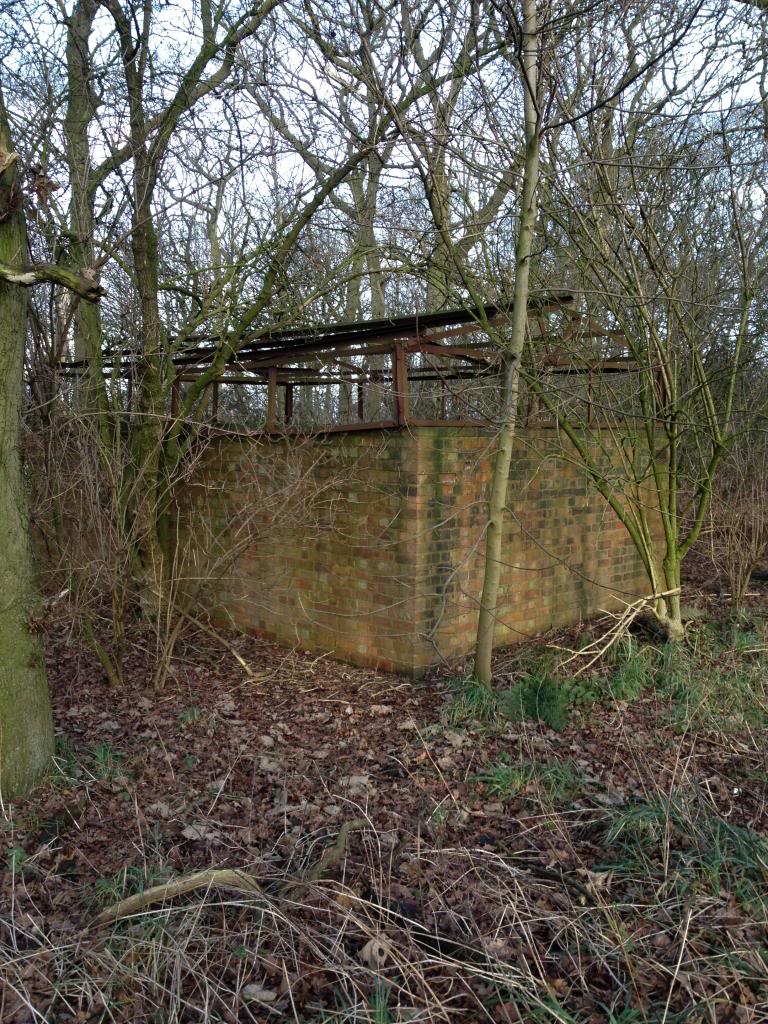
The steel roof structure can still be seen in great condition (2013)
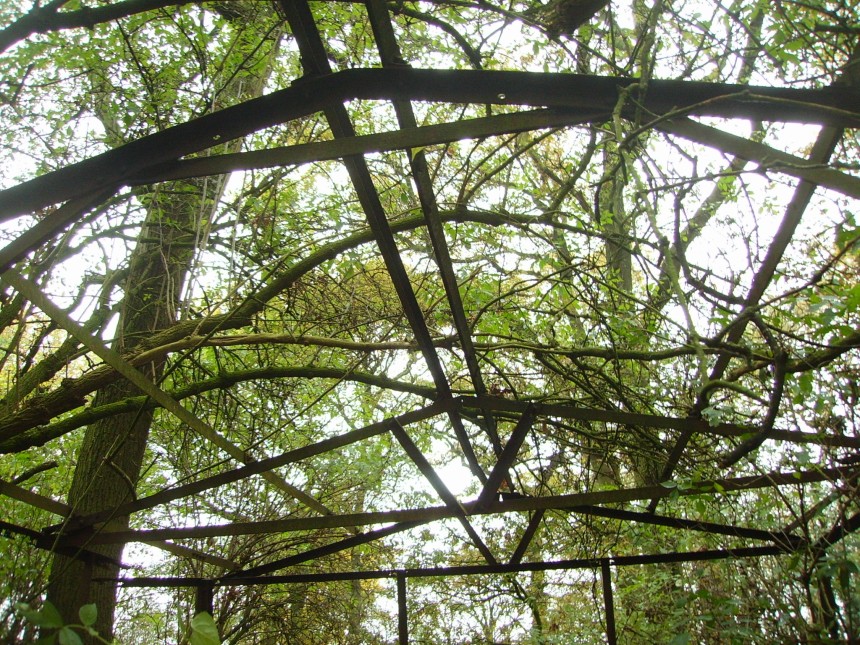
The entrance is on the right hand side of the photo.
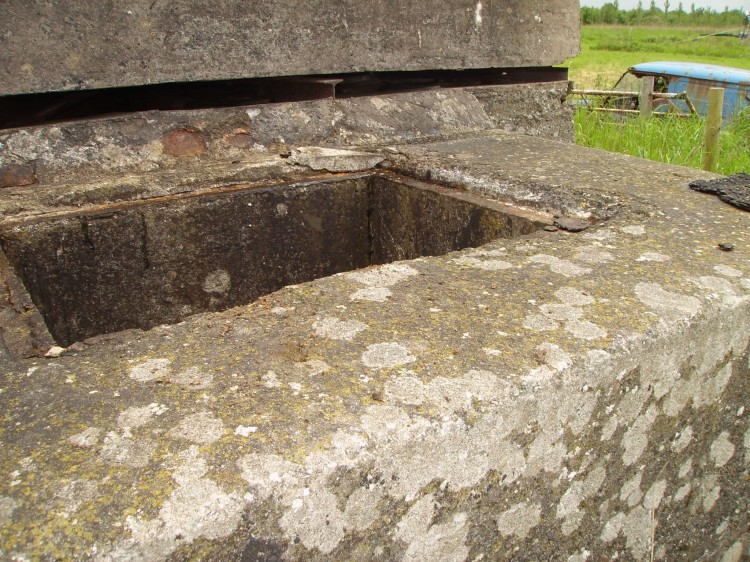
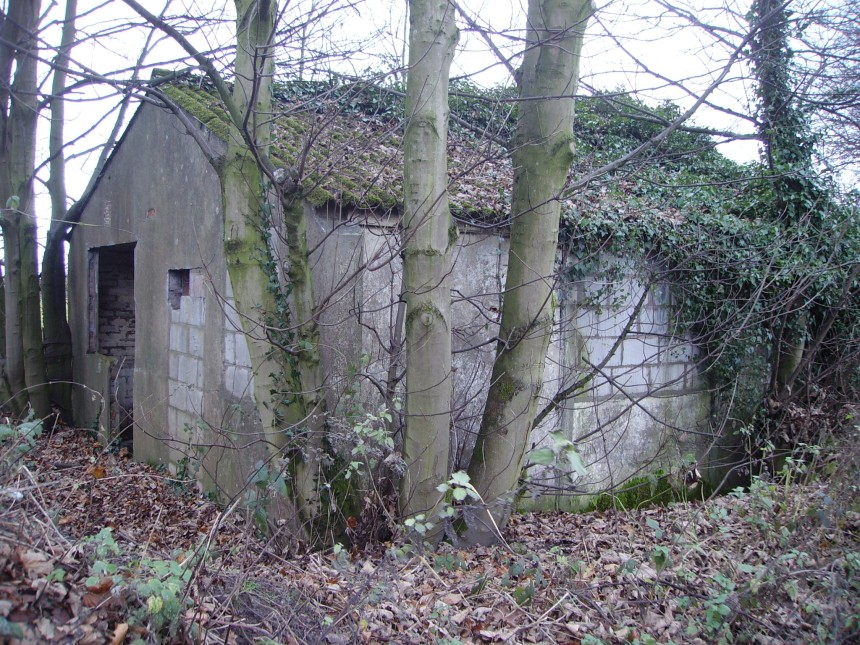
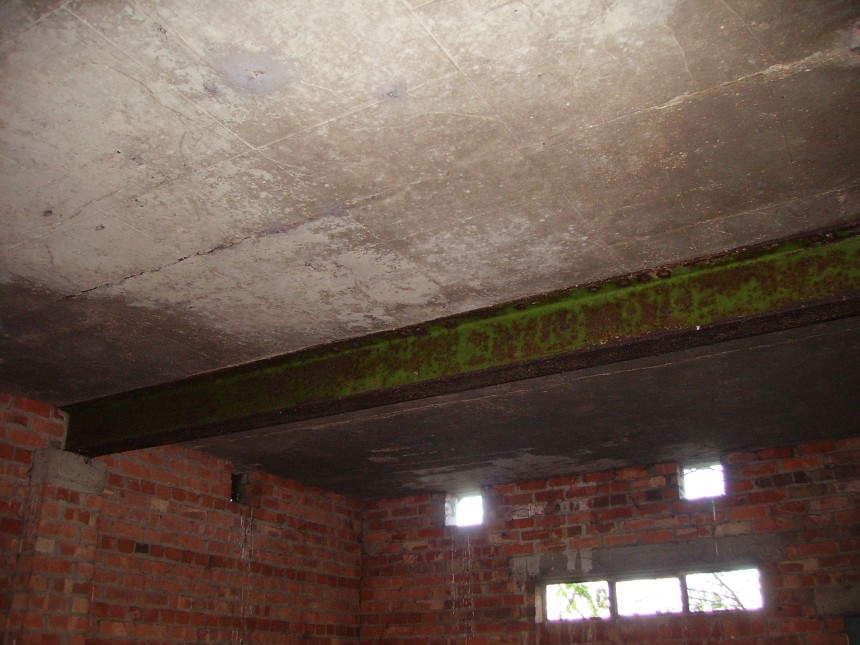
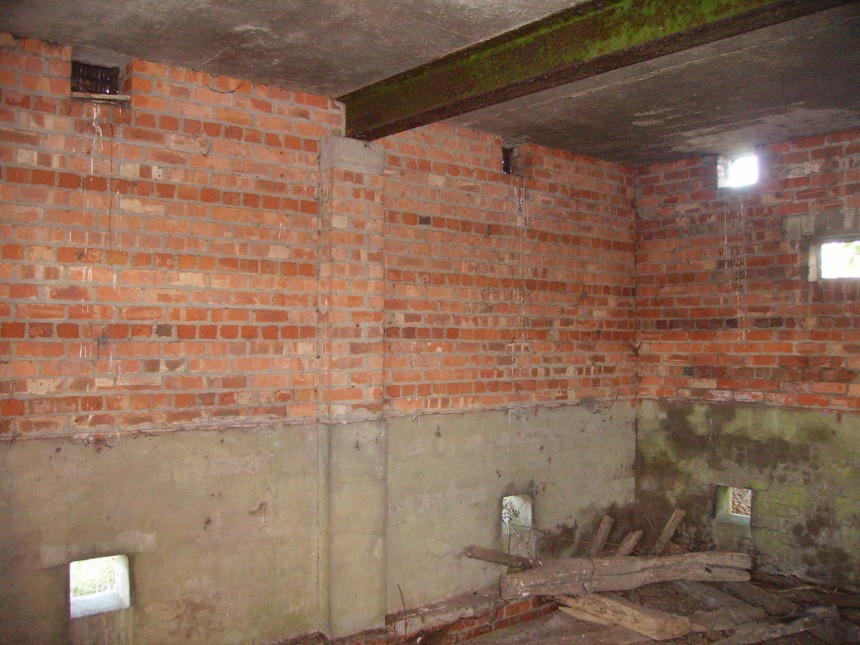
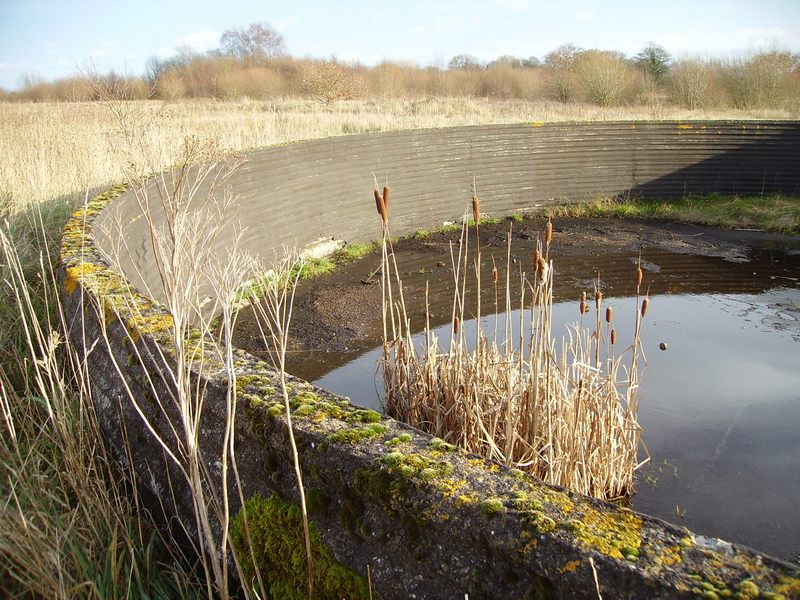
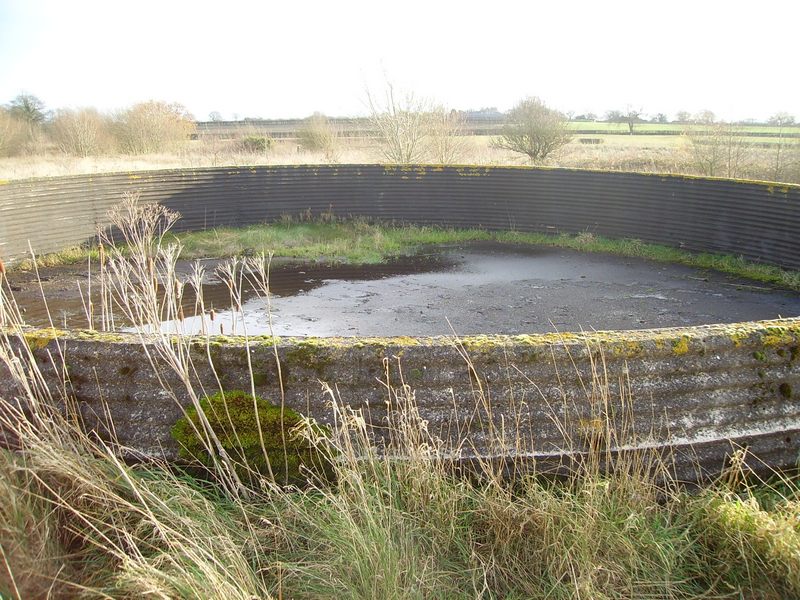
Standby Sethouse (Standby Electricity Generator Building) (All the following photos were taken around 2013 and show the outside and inside the building) The standby sethouse is constructed of brick with a reinforced flat concrete roof, with a central supporting RSJ and consisted of 3 rooms. The building itself is situated quite near the South Extension Taxi-Way at the end of the main runway 28.


Concrete Slabs Resting on the Lip if the Concrete.

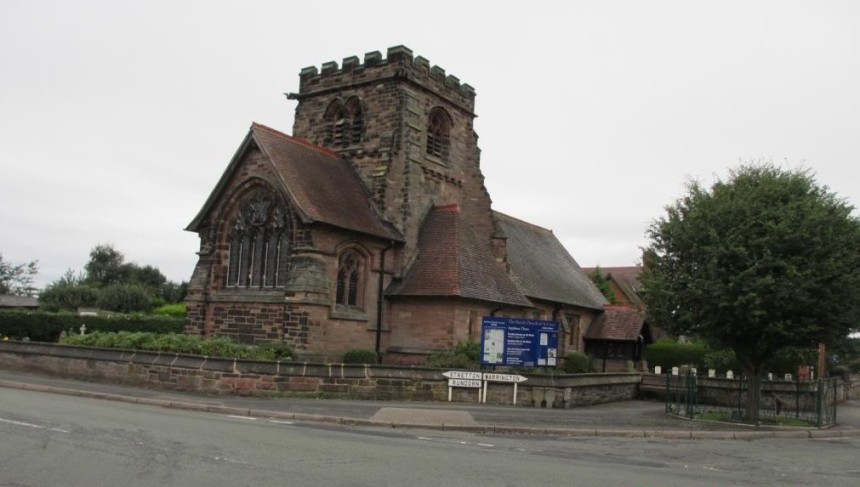
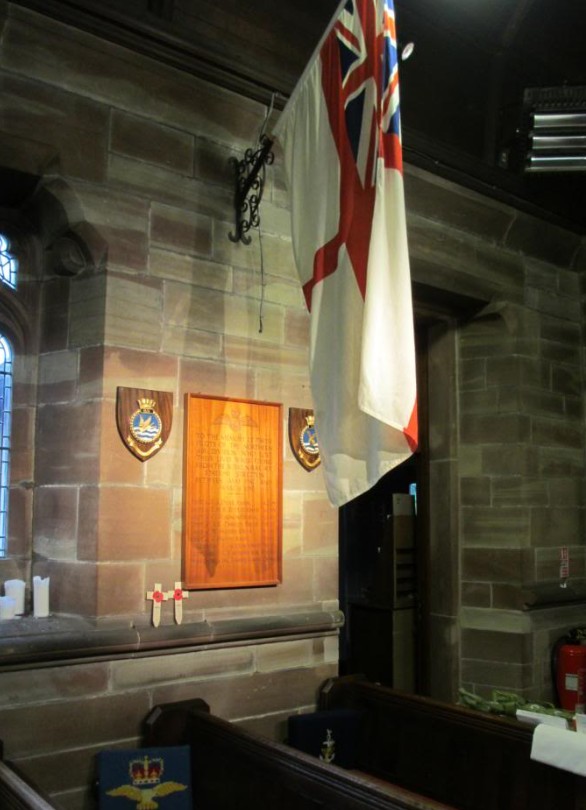
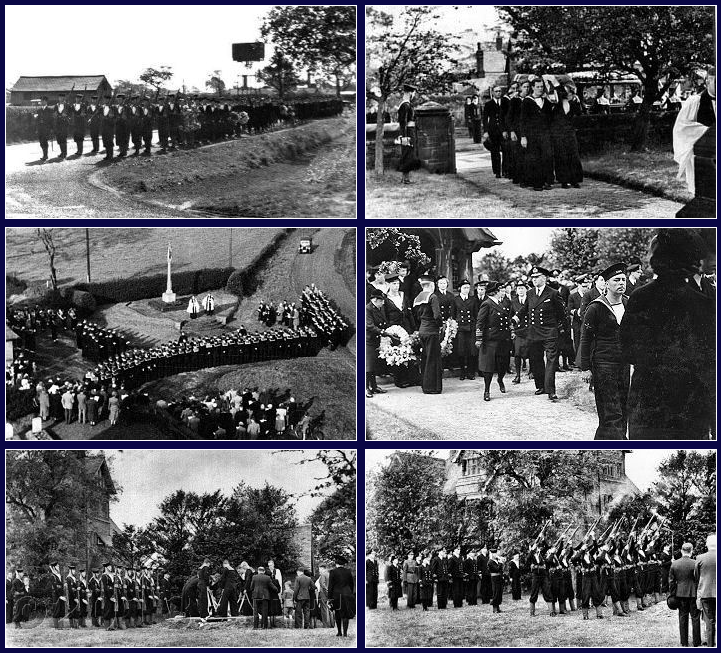
of The Northern Air Division inside The Church.

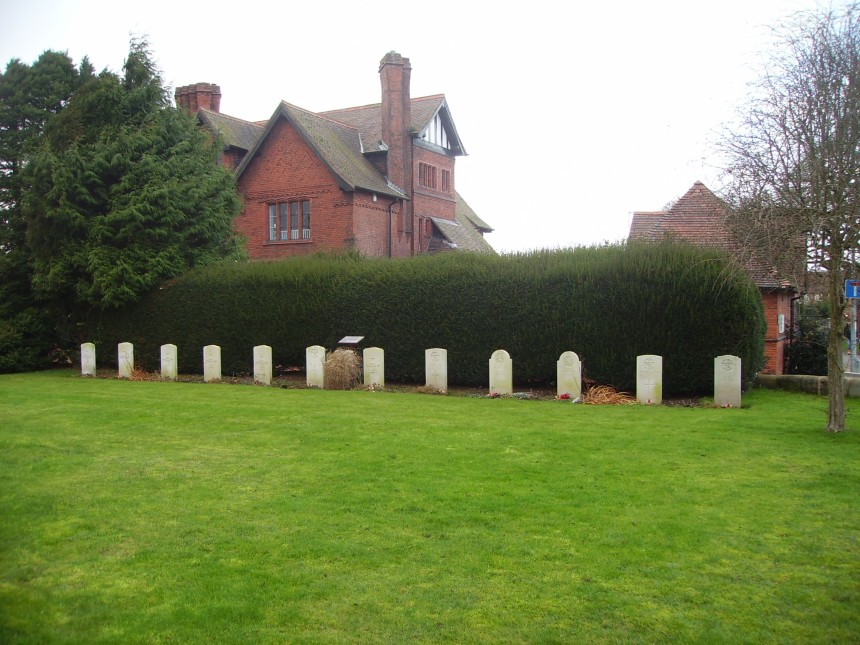

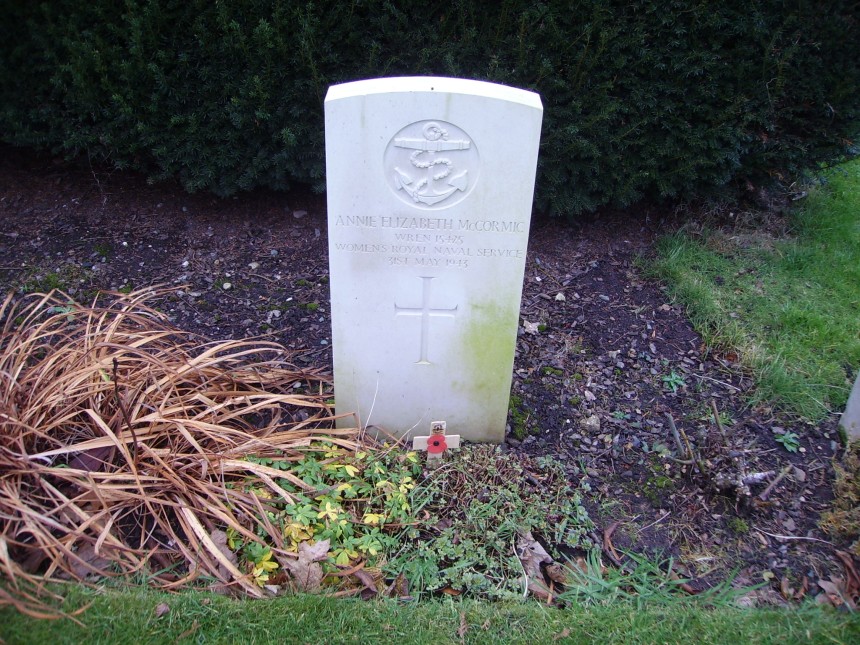

On the night of the 31st of May 1943 a party of WRNS were returning from a local dance to the Royal Naval Air Station Stretton/HMS Blackcap as passengers in the back of a truck. The truck driver lost control at Wright's Green/Lumbrook Lane and crashed into a ditch and overturned. 12 were injured and 6 passengers were killed ... 3 WRNS and 3 Naval Air Mechanics. 5 Were buried in their home town's and 28 year old Annie Elizabeth Mccormick was buried in the graveyard of St Cross Church, Appleton Thorn - the church was 300 yards from the main airfield gate. HMS Blackcap 1943 - Annie Elizabeth Mccormick Middle Front Row
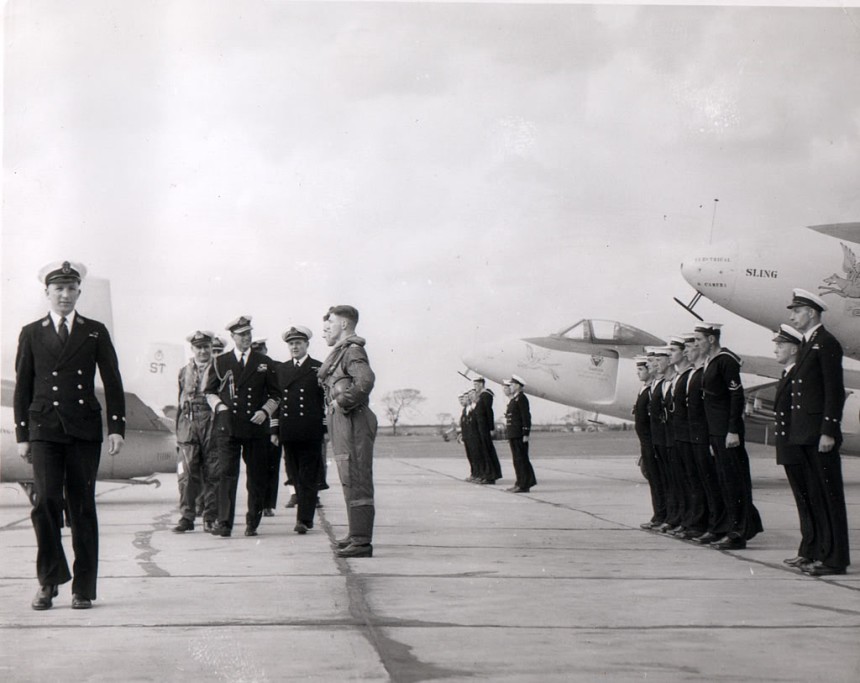
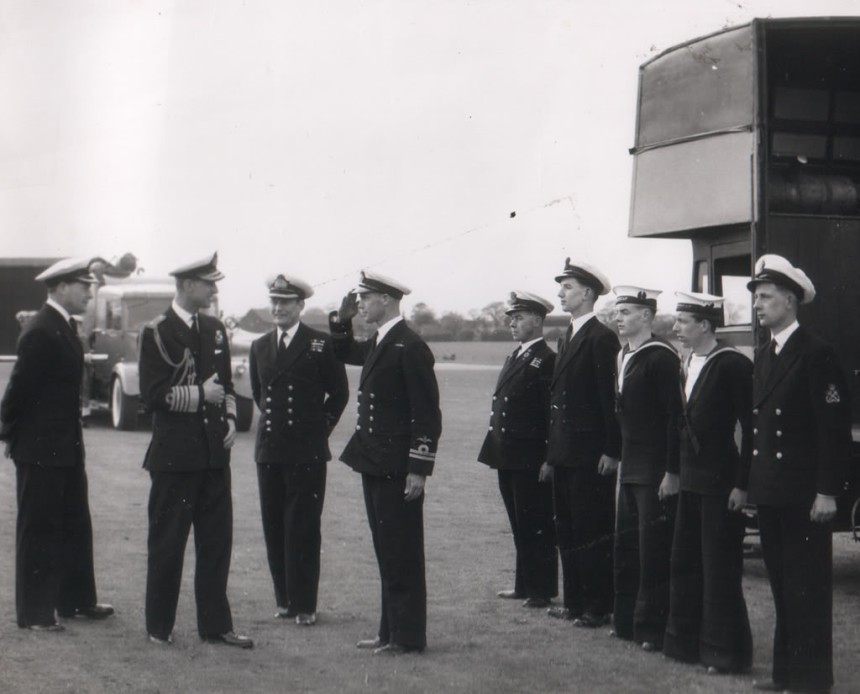
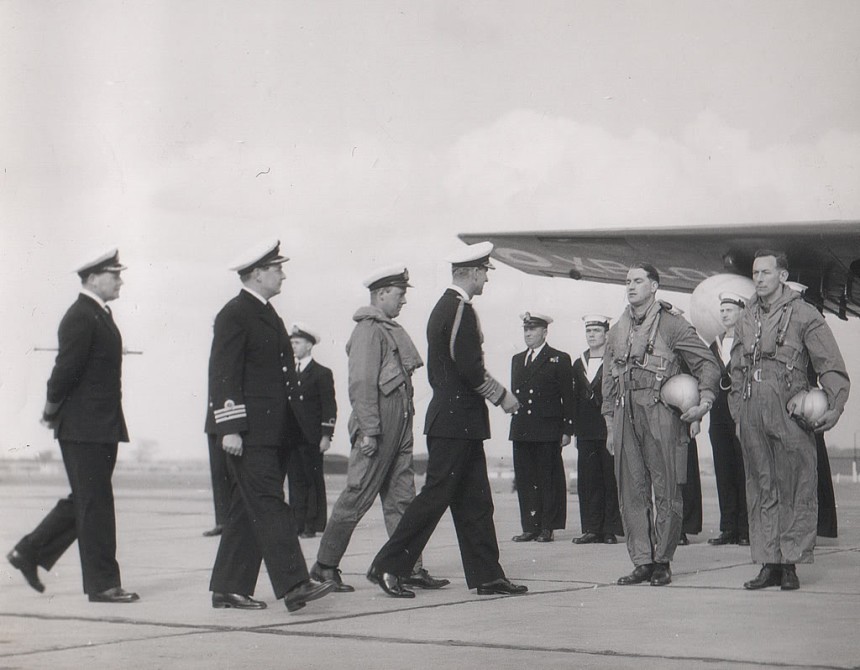
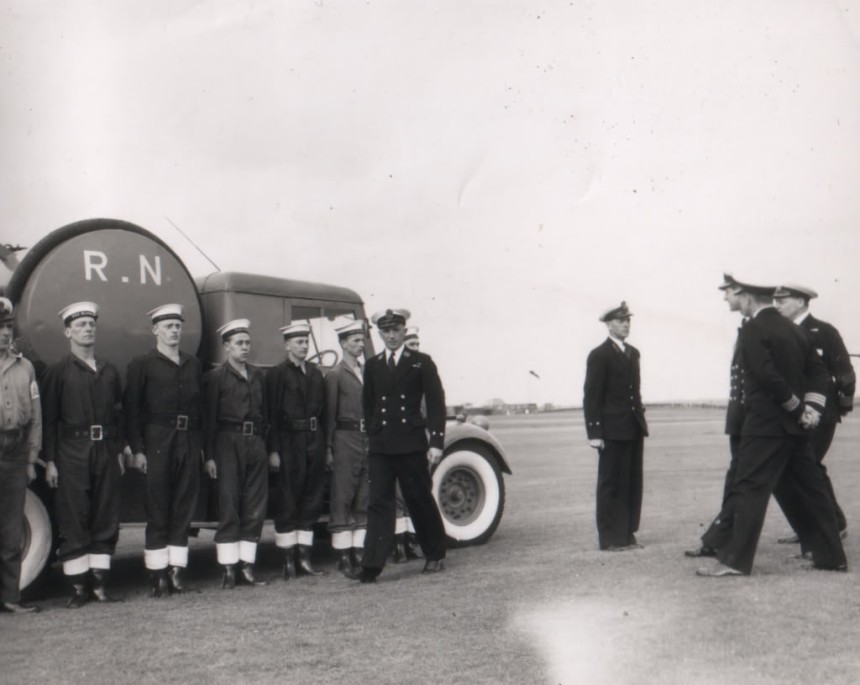
On the 17th/18th of May 1956 HRH Prince Philip paid a visit to the airfield shortly before the airfield was closed. The Prince was inspecting the Northern Air Division and here he can be seen walking past Supermarine Attackers and Their Pilots of 1831 NAS (Naval Air Squadron) of the RNVR (Royal Naval Volunteer Reserve).
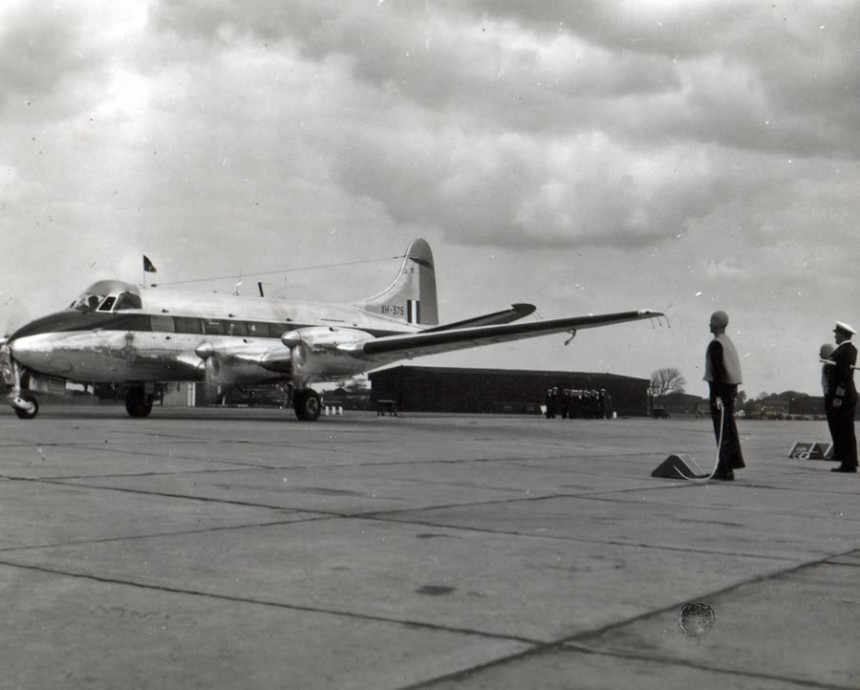
and is a Heron - serial number XH375
In the background is the glider winch, which was a sawn off furniture wagon with a modified barrage balloon winch on top.
Submarine Aircraft of the Naval Air Service 1841.
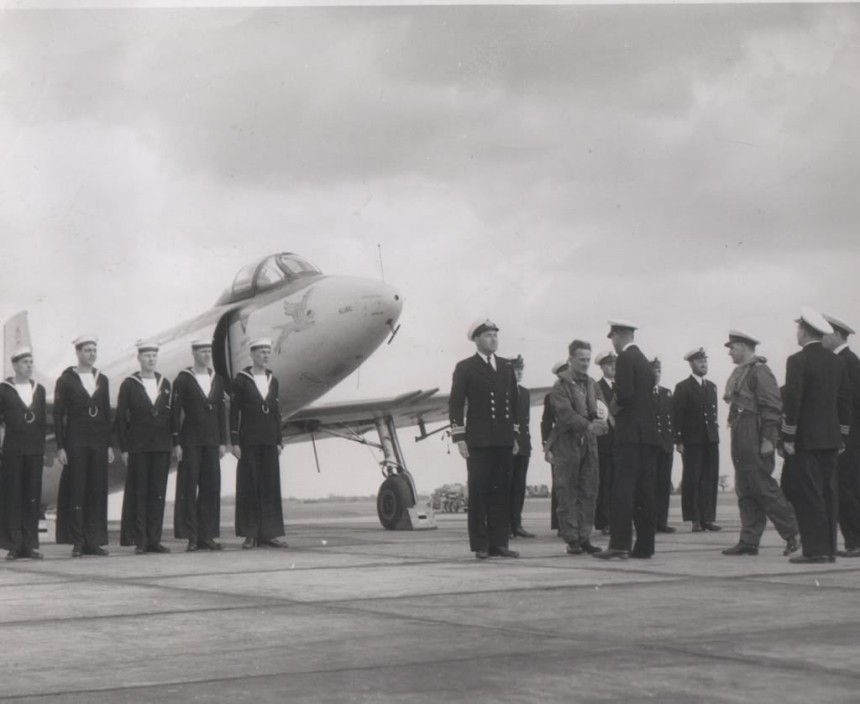
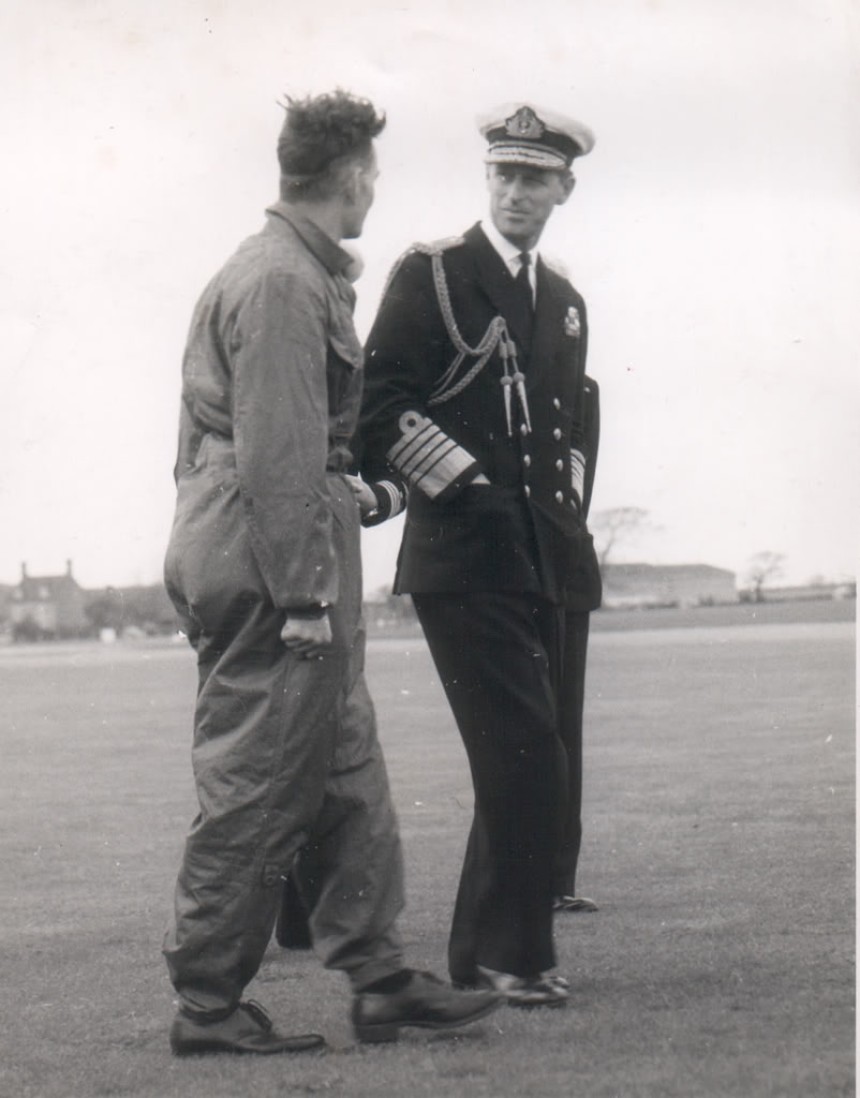
air naval yard to the right of the photo (the hangar still exists today and has been re-clad). The farmhouse in the background still survives today (2013) but it is in a poor state. His Royal Highness Prince Philip is talking to 1 of the pilots of 1831 NAS of the RNVR (Royal Naval Volunteer Reserve)
shown in the photo above at the back of the Prince.
during 1943 at HMS Blackcap.
Corsair fighter at HMS Blackcap during 1944
The main runway can be seen to the right and the southern perimeter track to the left.
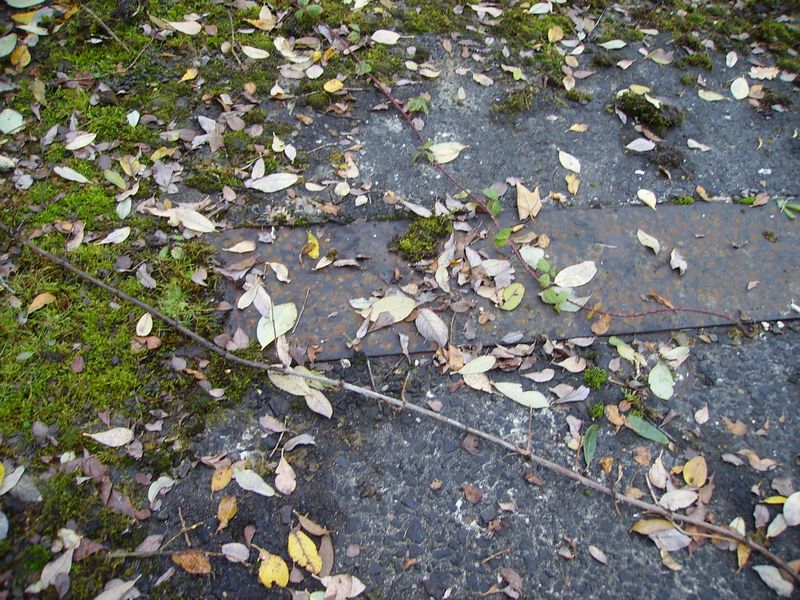
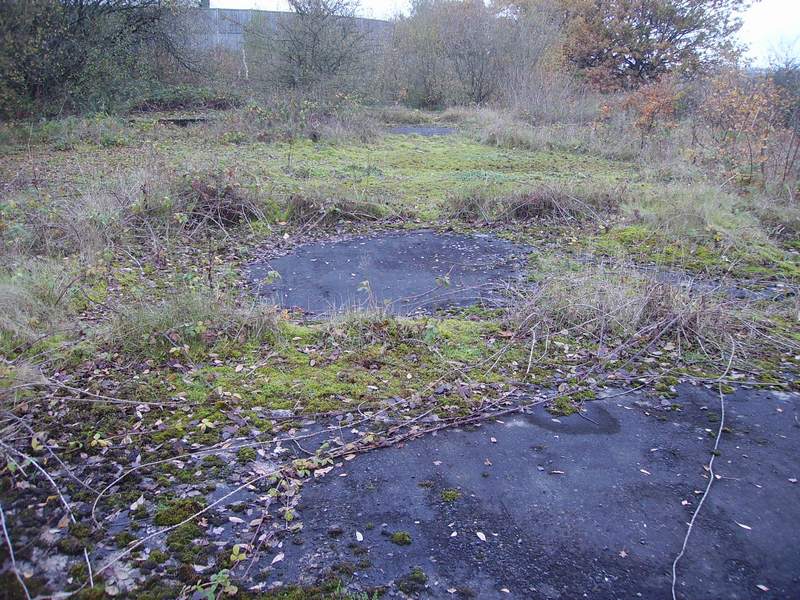
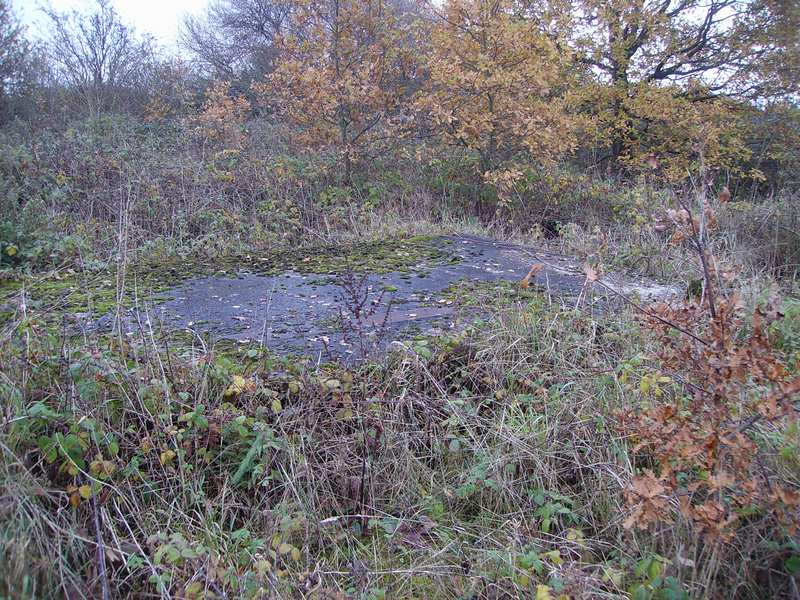
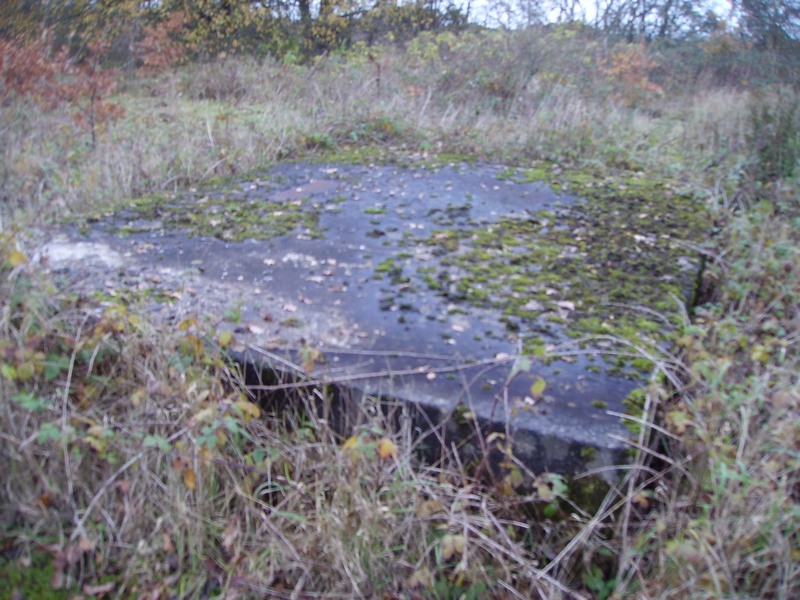
Engine Test Bed(s) Site 2014
(Which is the site of the engine test beds)
Steel Sections in The Reinforced Concrete)
Base of The Engine Test Bed(s)

South Dispersal Perimeter Track in the Foreground and to the Left


from the Opposite Angle Showing the Fighter Pens
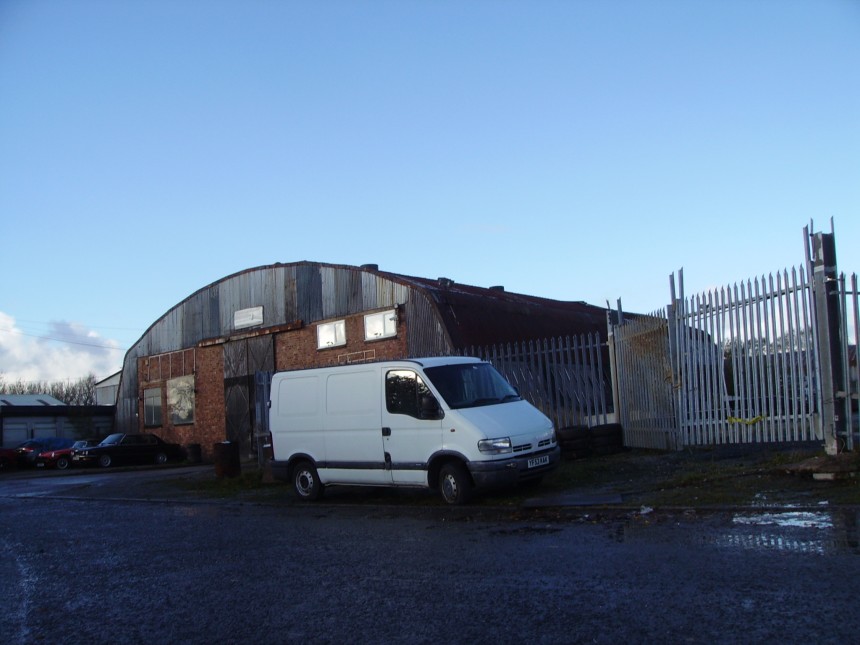
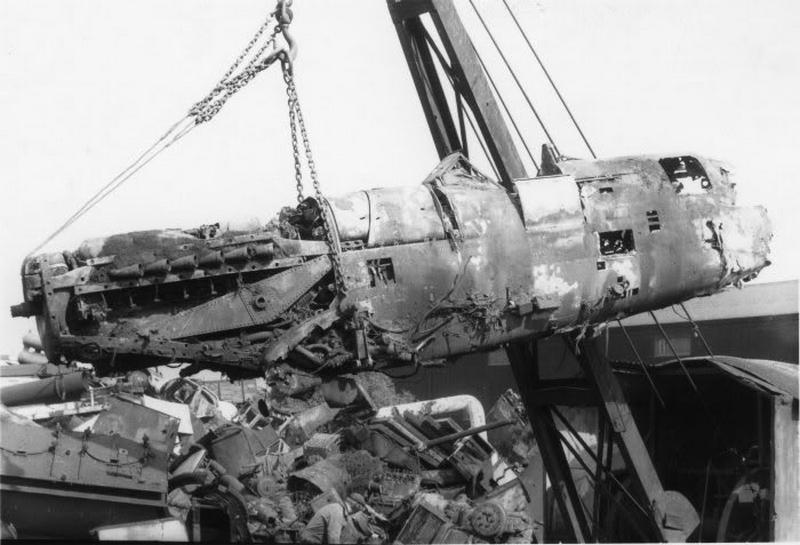
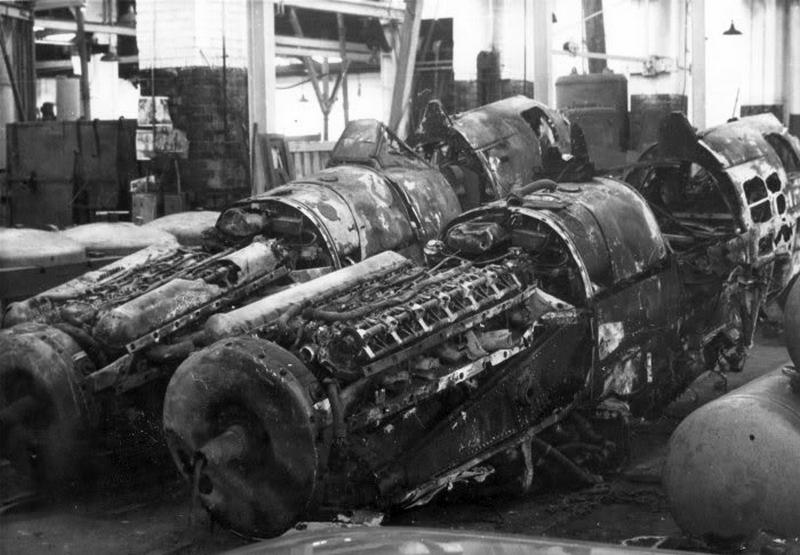
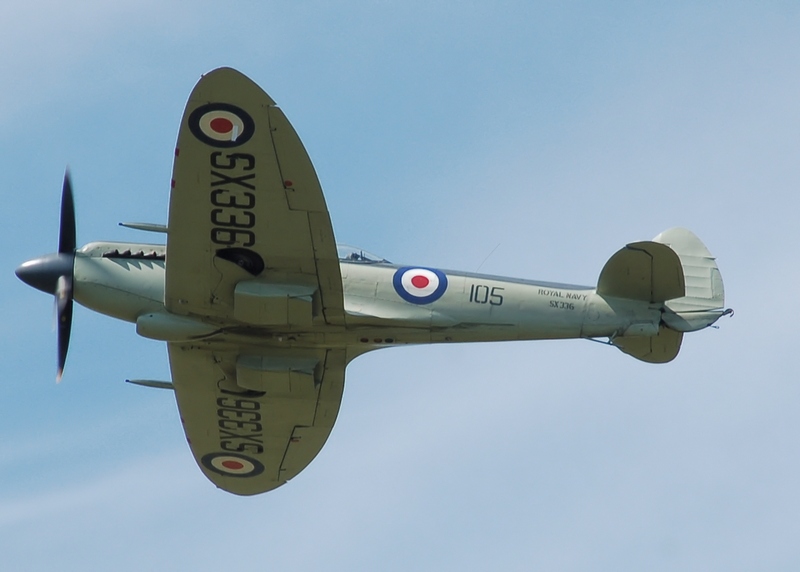
Scrapyard Warrington Wilderspool Causeway That Were From HMS Blackcap Stretton. The scrapyard was behind Warrington corporation bus garage which was the former site of 2 Fairey aviation workshop hangars. At Least One of These Was Rebuilt to Become the SX336 Shown Below in The Colour Photograph in Flying Condition.
RNVR at RNAS Stretton , Cheshire, in 1951
187th squadron ATC gliding school during 1945
Antrobus radar station was sited a short distance away from Stretton airfield HMS blackcap The radar station was built at Antrobus in 1941 with the electrics and instruments being installed by G.E. Taylor & Co. Ltd. of London. Its wartime use and immediately after is unknown, it was regarded as top secret by those aware of its existence. In late 1952 it was modified for use by Blackcap’s Air Traffic Control to ensure the safety of flights into and out of Stretton. The equipment in use was ‘Type AMES (Air Ministry Experimental Set) 15 and Type 277T’ Other active airfields in the vicinity of Stretton included Speke (Liverpool Airport), Ringway and Burtonwood (U.S. Military Air Transport HQ). At that time a Manchester Control Zone was in operation with Ministry of Civil Aviation Zone controllers located at Ringway. Northern Air Traffic Control Centre at Broughton near Preston maintained an Area Control. On 13th February 1953 trials commenced at Antrobus under Lieutenant J.R. Gee with a view to controlling all naval traffic. A few weeks later after some 1500 sorties, it was also providing a service to military aircraft through the zone. The use of the facility was then offered to the Ministry of Civil Aviation. It duly commenced its own trials early in 1954 with a team from Manchester led by Mr I.M. Lucas. At 0745 on Tuesday 1st June 1954 the unit became operational, controlling civil and military aircraft at peak periods. It was the first Joint Air Traffic Control Radar Unit and became known as Northern radar.